

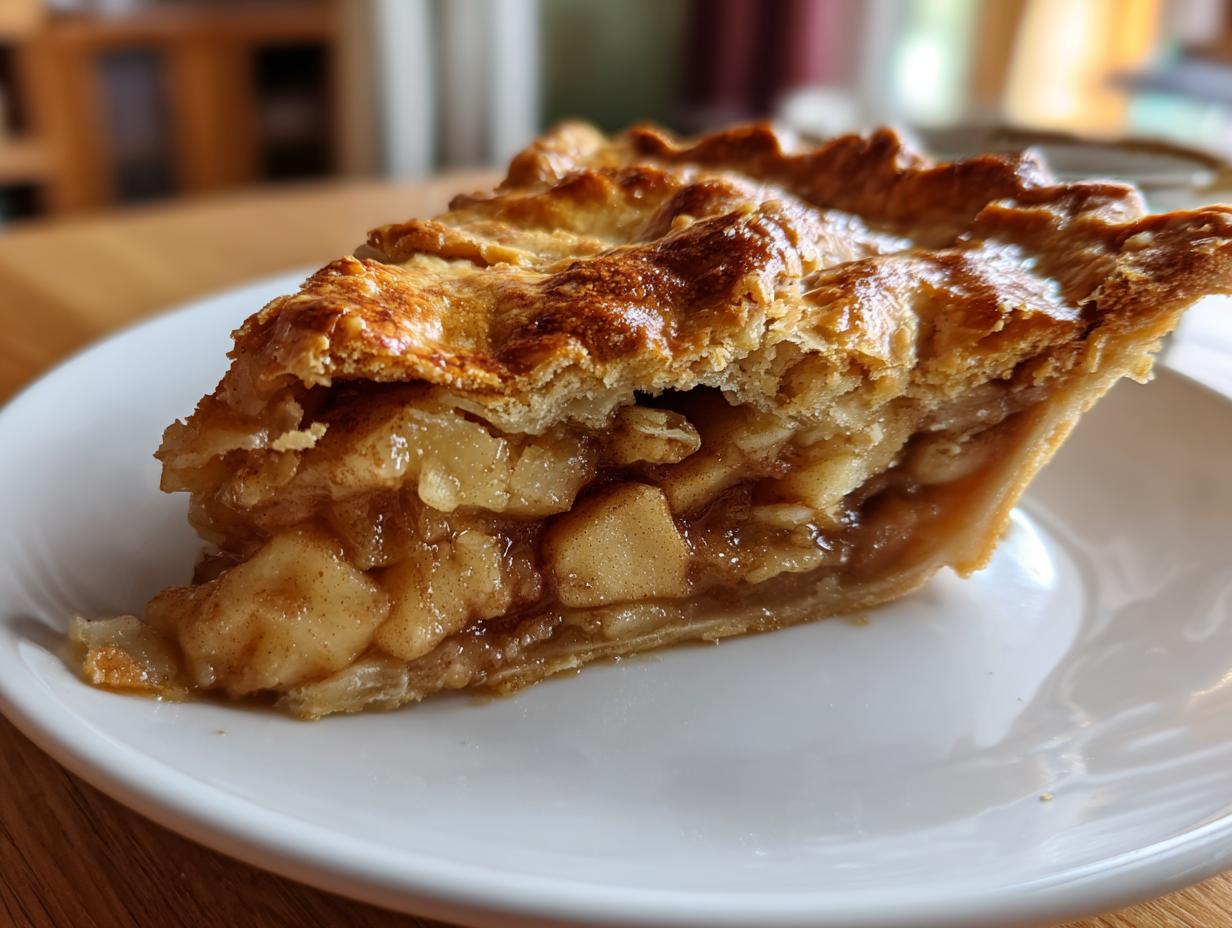
Oh, that comforting smell! There’s just nothing like an Amazing Apple Pie Just Like Grandma Made! It takes me right back to her kitchen, doesn’t it? This recipe isn’t just about apples and crust; it’s about pure nostalgia baked into every slice. I remember watching Grandma’s hands, always so sure, as she’d whip up this pie. It’s the perfect balance of sweet and tart, with that flaky crust that just melts in your mouth. Trust me, this is the apple pie that will become your family’s favorite, too.
Why You’ll Love This Amazing Apple Pie Just Like Grandma Made!
Seriously, this Amazing Apple Pie Just Like Grandma Made! is a total winner, and here’s why you’ll be baking it again and again. It’s more than just a pie; it’s a warm hug in dessert form!
- Unforgettable Flavor and Texture: Get ready for that perfect bite! We’re talking about a delightful dance between sweet and tart Granny Smith apples, all cozy with warm cinnamon spice. And that crust? Oh, it’s pure flaky perfection. The aroma alone will fill your home with that classic, comforting smell.
- Simple Steps to Baking Bliss: Don’t let the “grandma-approved” title fool you! This recipe is surprisingly easy. I’ve broken it down so anyone can achieve that incredible homemade taste. You’ll be amazed at how manageable this easy apple pie is, even if you’re new to baking.
- Perfect for Any Occasion: Whether it’s a holiday feast, a family get-together, or just a Tuesday night craving, this classic dessert fits right in. It’s guaranteed to be a crowd-pleaser and bring smiles all around.
Essential Ingredients for Your Amazing Apple Pie Just Like Grandma Made!
Alright, let’s talk ingredients! Getting that perfect Amazing Apple Pie Just Like Grandma Made! totally hinges on using the right stuff. You don’t need anything fancy, just good quality basics. Trust me, a little attention to detail here makes all the difference.
For the Perfect Pie Shell
You can absolutely use a store-bought crust if you’re in a pinch, but oh my goodness, a homemade pie shell is where the magic really starts! For this recipe, we need:
1 (9-inch) unbaked pie crust
For the Delicious Cinnamon Apple Filling
This is where the stars of the show come in! We want that perfect sweet-tart filling that’s bursting with apple flavor.
6 cups sliced Granny Smith apples (about 6 medium apples)
Make sure you slice these about 1/4-inch thick. Granny Smith apples are my absolute go-to because they’re nice and tart, which balances the sweetness perfectly. They also hold their shape beautifully when baked!
3/4 cup granulated sugar
Just regular granulated sugar works great here. Make sure it’s level, not packed.
2 tablespoons all-purpose flour
This helps thicken up all those lovely apple juices so you don’t end up with a soupy pie. No need to sift it!
1 teaspoon ground cinnamon
This is non-negotiable for that classic apple pie smell and taste. Use good quality ground cinnamon!
1/4 teaspoon ground nutmeg
Just a little pinch of nutmeg adds such a warm depth. Again, ground is perfect.
1 tablespoon lemon juice
Freshly squeezed is best! It brightens up all the flavors and keeps the apples from browning too much while you’re getting everything else ready.
2 tablespoons unsalted butter, cut into small pieces
Think about pea-sized little bits. These melt down into the apples as it bakes, adding just a touch of richness.
For the Golden Egg Wash and Topping
These are the final touches that give our pie that gorgeous, bakery-worthy look!
1 large egg, beaten (for egg wash)
Just a whole large egg, whisked up well. This gives the crust that beautiful golden sheen.
1 tablespoon granulated sugar (for sprinkling)
A little sprinkle of coarse sugar on top is my favorite. It gives a lovely little crunch!
Step-by-Step Guide to Baking Your Amazing Apple Pie Just Like Grandma Made!
Alright, let’s get baking! This is where the magic really happens. Follow these steps, and you’ll have an Amazing Apple Pie Just Like Grandma Made! in no time.
Preparing the Apple Filling
First things first, grab that big bowl you’ve got your sliced apples in. Gently toss them with the 3/4 cup sugar, the flour (that’s our thickener!), the cinnamon, nutmeg, and that little splash of lemon juice. You want to make sure every single apple slice is coated nicely. Be gentle though – we don’t want mushy apples!
Assembling Your Amazing Apple Pie Just Like Grandma Made!
Now, carefully pour that beautiful apple mixture into your unbaked pie crust. Try to spread it out evenly. Next, dot the top of the apples with those little pieces of butter. These will melt down and add such a lovely richness. If you’re using a top crust, lay it gently over the filling now. If you’re going for a lattice or crumble, now’s the time to get that ready!
Securing the Crust Edges
Once your top crust (or lattice) is in place, it’s time to seal the deal! Crimp the edges of the pie crust together. You can use your fingers or even a fork to make a pretty pattern. This is super important to keep all that yummy filling inside.
Creating Steam Vents
This is a crucial step, especially if you have a full top crust! You need to cut a few slits or vents in the top of the crust. This lets the steam escape as the pie bakes. Without vents, the steam can build up and make your crust soggy or even blow it open. Grandma always said it helps the pie “breathe!”

The Finishing Touches
Take that beaten egg wash and brush it all over the top crust. This is what gives it that gorgeous golden-brown color. Then, sprinkle that extra tablespoon of granulated sugar all over the top. It adds a little sparkle and a lovely crunchy texture.
Baking Instructions for Perfect Pie Crust and Filling
Time to get this beauty into the oven! It’s a two-temperature bake, which sounds fancy but is really simple and works like a charm.
Initial High-Heat Bake
First, pop your pie into a preheated oven at 425 degrees F (220 degrees C) for about 15 minutes. This initial blast of heat helps to set the crust and get it started on its way to golden perfection.
Lowered Temperature Baking
After those 15 minutes, reduce the oven temperature to 375 degrees F (190 degrees C). Now, let it bake for another 35 to 45 minutes. You’re looking for that crust to be beautifully golden brown and for the apple filling to be bubbling up through the vents. If you notice the crust edges getting too dark before the rest of the pie is done, just loosely tent those edges with a little piece of aluminum foil. It’s a lifesaver!
Cooling for the Perfect Set
This is probably the hardest part – waiting! Once your pie is out of the oven, you HAVE to let it cool completely on a wire rack. I know, I know, you want to dive right in! But this cooling time is essential. It allows the filling to thicken up and set properly. If you cut into it too soon, you’ll have a runny mess. Patience, my friend, patience!
Tips for an Amazing Apple Pie Just Like Grandma Made!
You know, even with a great recipe, a few little tricks can make your Amazing Apple Pie Just Like Grandma Made! absolutely spectacular. These are the things Grandma taught me, or things I’ve figured out along the way that really make a difference.
Achieving a Flaky Pie Crust
The secret to that perfect, melt-in-your-mouth flaky crust? Keep. Everything. Cold. Seriously, use cold butter, cold water, and even chill your flour. When you’re mixing the dough, work quickly so the butter doesn’t warm up. Overworking the dough is also a no-no; just mix until it *just* comes together. A cold dough bakes up into the flakiest layers!
Selecting the Best Apples
I can’t stress this enough: use firm, tart apples! Granny Smith apples are the gold standard for this Amazing Apple Pie Just Like Grandma Made! because they’re tart enough to balance the sugar and firm enough to hold their shape. If you can’t find them, a mix of tart apples like Honeycrisp or Fuji can work, but avoid softer, mealy apples. They’ll turn to mush!
Preventing a Soggy Bottom
Oh, the dreaded soggy bottom! Nobody wants that. A couple of things help. First, make sure you’re using enough flour in your filling to absorb excess liquid. Second, don’t skip the cooling step – that’s when the filling really thickens. If you’re really worried, you can bake the bottom crust for about 10 minutes at 400°F (200°C) before adding the filling, or use a pie shield to protect the edges while the center finishes baking.
Frequently Asked Questions About Amazing Apple Pie Just Like Grandma Made!
Got questions about whipping up your own slice of heaven? I’ve got answers!
Can I use other types of apples for this Amazing Apple Pie Just Like Grandma Made!?
While I absolutely adore using Granny Smith apples for that perfect tart-sweet balance and great texture, you can certainly mix it up! Try using a blend of apples – maybe some Honeycrisp for sweetness or Braeburn for a bit of spice. Just make sure they’re firm apples that hold their shape well when baked so you don’t end up with apple sauce in your pie!
How do I know when my apple pie is fully baked?
It’s all about what you see! Look for a crust that’s a beautiful golden brown all over. The filling should be bubbly, especially in the center. You might even see some juices bubbling up through the vents. If you’re unsure, you can gently insert a knife into one of the vents – the apples should feel tender.
How long does this apple pie need to cool before serving?
This is the hardest part, but it’s SO important! You really need to let your Amazing Apple Pie Just Like Grandma Made! cool for at least 2-3 hours, sometimes even longer. This allows the filling to set up properly. If you cut into it too soon, it’ll be runny and might fall apart. Trust me, the wait is worth it!
Can I make this Amazing Apple Pie Just Like Grandma Made! recipe ahead of time?
You sure can! You can bake the pie completely and let it cool, then store it at room temperature for up to two days. For longer storage, cover it loosely and pop it in the fridge. Reheat gently in a low oven (around 300°F or 150°C) until warmed through. It might not be *exactly* like Grandma’s fresh-from-the-oven magic, but it’s still mighty delicious!
Serving and Storing Your Classic Apple Pie
Now for the best part – enjoying your masterpiece! This Amazing Apple Pie Just Like Grandma Made! is absolutely divine served warm.
Serving Suggestions
My favorite way to enjoy a slice is with a generous scoop of creamy vanilla ice cream. A dollop of freshly whipped cream is also divine! Honestly, it’s so good, it doesn’t need much else.
Storage and Reheating
If, by some miracle, you have leftovers, let the pie cool completely first. You can store it loosely covered at room temperature for about two days. For longer storage, pop it in the fridge. To reheat, just pop a slice in a moderate oven (around 300°F or 150°C) for about 10-15 minutes until warmed through. Enjoy!

Estimated Nutritional Information
Just a heads-up, these numbers are estimates! The exact nutritional values for your Amazing Apple Pie Just Like Grandma Made! can vary a bit depending on the specific ingredients and brands you use. It’s all part of the fun of homemade baking!
Estimated Nutritional Values Per Slice
Serving Size: 1 slice
Calories: 350
Fat: 18g
Saturated Fat: 8g
Trans Fat: 0g
Cholesterol: 30mg
Sodium: 200mg
Carbohydrates: 45g
Fiber: 3g
Sugar: 25g
Protein: 3g
Amazing Apple Pie: 1 Taste of True Comfort
- Total Time: 75-85 minutes
- Yield: 8 servings
- Diet: Vegetarian
Description
A classic apple pie recipe that tastes just like grandma used to make, featuring a flaky crust and a sweet, cinnamon-spiced apple filling.
Ingredients
- 1 (9-inch) unbaked pie crust
- 6 cups sliced Granny Smith apples (about 6 medium apples)
- 3/4 cup granulated sugar
- 2 tablespoons all-purpose flour
- 1 teaspoon ground cinnamon
- 1/4 teaspoon ground nutmeg
- 1 tablespoon lemon juice
- 2 tablespoons unsalted butter, cut into small pieces
- 1 large egg, beaten (for egg wash)
- 1 tablespoon granulated sugar (for sprinkling)
Instructions
- Preheat your oven to 425 degrees F (220 degrees C).
- In a large bowl, combine the sliced apples, 3/4 cup sugar, flour, cinnamon, nutmeg, and lemon juice. Toss gently to coat the apples evenly.
- Pour the apple mixture into the unbaked pie crust. Dot the top with the small pieces of butter.
- If you have a top crust, place it over the filling and crimp the edges to seal. Cut vents in the top crust to allow steam to escape. If you are making a lattice top or a crumble topping, prepare that now.
- Brush the top crust (or edges if no top crust) with the beaten egg wash. Sprinkle the remaining 1 tablespoon of sugar over the top.
- Bake for 15 minutes at 425 degrees F (220 degrees C).
- Reduce the oven temperature to 375 degrees F (190 degrees C) and continue baking for another 35-45 minutes, or until the crust is golden brown and the filling is bubbly.
- If the crust starts to brown too quickly, you can loosely tent it with aluminum foil.
- Let the pie cool completely on a wire rack before slicing and serving. This allows the filling to set properly.
Notes
- Use firm, tart apples like Granny Smith for the best flavor and texture.
- For an extra flaky crust, keep your ingredients cold.
- Serve warm with vanilla ice cream or whipped cream.
- Prep Time: 25 minutes
- Cook Time: 50-60 minutes
- Category: Dessert
- Method: Baking
- Cuisine: American
Nutrition
- Serving Size: 1 slice
- Calories: 350
- Sugar: 25g
- Sodium: 200mg
- Fat: 18g
- Saturated Fat: 8g
- Unsaturated Fat: 10g
- Trans Fat: 0g
- Carbohydrates: 45g
- Fiber: 3g
- Protein: 3g
- Cholesterol: 30mg


