
Oh, apple pie! There’s just something about that warm, comforting smell filling the kitchen that screams “home.” This Classic American Apple Pie Recipe isn’t just any pie; it’s a tradition in my house, especially when the leaves start turning or when we’re gathering for the holidays. Trust me, making the crust from scratch makes *all* the difference – it’s a labor of love, but so, so worth it. This recipe has been a family favorite for years, bringing warmth and smiles to every single holiday gathering.

Why You’ll Love This Classic American Apple Pie Recipe – Perfect Holiday Dessert
Seriously, why is this Classic American Apple Pie Recipe so special? Well, for starters, it’s got that perfect balance of sweet and tart apples that just sings. And that crust? Oh, that homemade pie crust is flaky, buttery, and just melts in your mouth. It’s not just a dessert; it’s the star of any holiday table, you know? Plus, the smell that fills your house while it’s baking? Pure magic! It’s truly a comforting hug in pie form, perfect for making any occasion feel extra special.
- Deliciously balanced sweet and tart apple filling
- Flaky, buttery homemade pie crust
- Perfect centerpiece for holiday tables
- Comforting aroma fills your home while baking
Gathering Your Ingredients for a Classic American Apple Pie Recipe
Okay, let’s get everything ready for our amazing Classic American Apple Pie Recipe! Having all your ingredients prepped makes the whole process so much smoother, trust me. For the crust, you’ll want really cold butter and ice water – that’s the secret to flakiness! We’re making a double crust, so grab your flour, salt, a whole cup of that cold butter cut into cubes, and about half a cup of ice water. For the star of the show, the filling, we need about six cups of thinly sliced peeled apples. I love using a mix of tart Granny Smiths and sweet Honeycrisps, but use what you love! Toss those apples with granulated sugar, a couple of tablespoons of flour to thicken things up, cinnamon, nutmeg, and a little lemon juice to brighten the flavors. Oh, and don’t forget those little pats of butter to dot on top of the apples – pure magic!
- For the Homemade Pie Crust (Double Crust):
- 2 1/2 cups all-purpose flour (plus more for dusting)
- 1 teaspoon salt
- 1 cup (2 sticks) cold unsalted butter, cut into cubes
- 1/2 cup ice water (approximate)
- For the Apple Filling:
- 6 cups thinly sliced peeled apples (about 6 medium apples, a mix of Granny Smith and Honeycrisp recommended)
- 3/4 cup granulated sugar
- 2 tablespoons all-purpose flour
- 1 teaspoon ground cinnamon
- 1/4 teaspoon ground nutmeg
- 1 tablespoon fresh lemon juice
- 1 tablespoon unsalted butter, cut into small pieces
- For the Egg Wash:
- 1 large egg, beaten
- 1 tablespoon granulated sugar (for sprinkling)

How to Make an Apple Pie From Scratch: Step-by-Step Instructions
Alright, let’s get this pie baked! Making an apple pie from scratch is so rewarding, and this step-by-step guide will make it a breeze. You’ve got this!
Preparing the Homemade Pie Crust
First things first, let’s get our pie crust dough ready. In a big bowl, whisk together your flour and salt. Then, toss in those cold, cubed butter pieces. Use your fingers or a pastry blender to cut the butter into the flour until it looks like coarse crumbs – little pea-sized bits are what you’re aiming for! Now, drizzle in the ice water, a little bit at a time, mixing until the dough just starts to come together. Don’t overmix! Divide the dough in half, flatten each half into a disk, wrap them up, and pop them in the fridge to chill for at least 30 minutes. This is super important for a flaky crust!
Assembling Your Classic American Apple Pie Recipe
Okay, oven preheating time! Crank it up to 425°F (220°C). Grab one of your chilled dough disks and roll it out on a lightly floured surface into about a 12-inch circle. Gently ease it into your 9-inch pie plate, letting the edges hang over a bit. Now for that glorious filling! Pour your apple mixture right into the crust-lined pie plate. Try to spread it out evenly. Dot the top with those little butter pieces – they add a little extra richness! Take your second dough disk and roll it out, maybe about 11 inches this time. Lay this over the apples. Trim the edges so they’re even with the bottom crust’s overhang, then crimp them together really well to seal everything up. Don’t forget to cut a few slits in the top crust – this lets the steam escape so your pie doesn’t get too soggy.
Baking Your Perfect Holiday Dessert Apple Pie
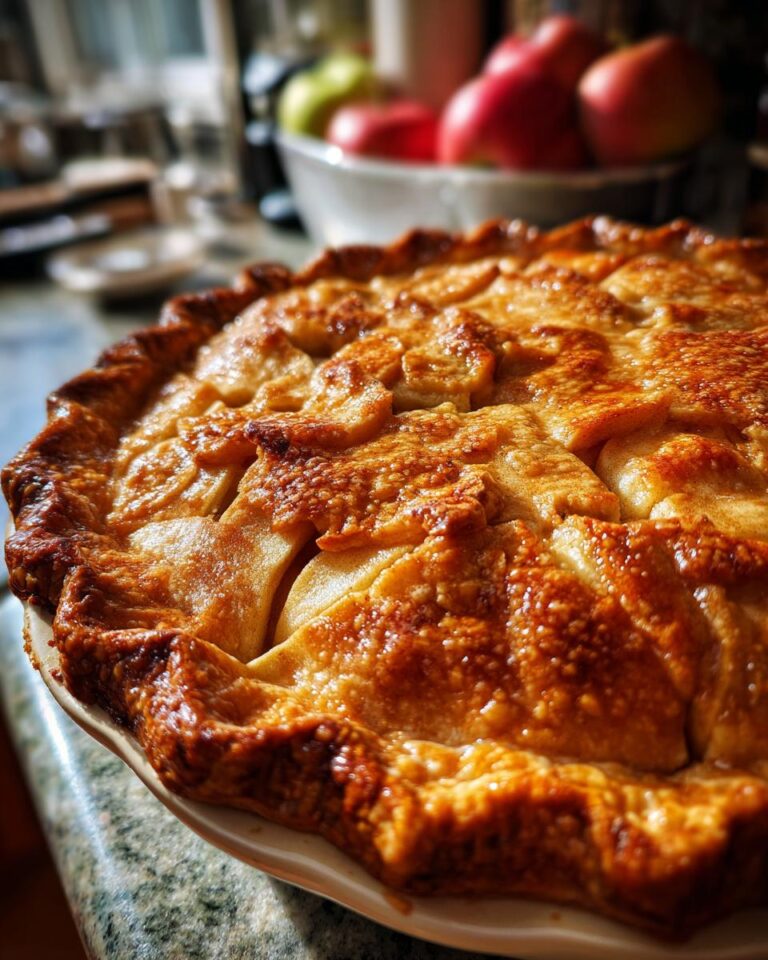
Time for the magic to happen in the oven! Brush the top crust all over with your beaten egg wash. This gives it that gorgeous golden sheen. Then, sprinkle that remaining tablespoon of sugar over the top – it makes it nice and sparkly! Pop it into the hot oven (425°F/220°C) for about 15 minutes. After that, reduce the oven temperature to 375°F (190°C) and let it bake for another 35 to 45 minutes. You’ll know it’s ready when the crust is a beautiful golden brown and you can see the filling bubbling through those vents. If the crust starts looking a little *too* brown, just loosely tent it with some foil. The key is getting that crust perfectly golden and the apples tender!
Tips for the Best Apple Pie Crust Recipe Homemade
Alright, let’s talk crust! Because let’s be honest, a fantastic apple pie crust recipe homemade is half the battle, right? The absolute biggest secret is keeping everything super cold. I mean, *bone-chillingly* cold butter, ice water, even a cold bowl. This is how you get those flaky layers! Also, be gentle with the dough. Overworking it just makes it tough, and nobody wants a tough crust. So, mix just until it comes together, and always, always give it that good chill time in the fridge. That makes it way easier to roll out, too! And for that gorgeous golden finish on your pie crust recipe for apple pie, don’t skip the egg wash – it’s a game-changer!
Serving and Storing Your Classic American Apple Pie Recipe
Okay, the hardest part is waiting! You absolutely *have* to let your Classic American Apple Pie Recipe cool completely for at least 2-3 hours before you even *think* about slicing it. Trust me on this one! It seems like forever, but it’s so important for the filling to set up properly. Otherwise, you’ll have a delicious, but very runny, mess. Once it’s cooled, though? Oh, it’s pure heaven! You can serve it warm or at room temperature – both are amazing. If you happen to have any leftovers (which is rare in my house!), just cover it up well. It’ll keep on the counter for a couple of days, or you can pop it in the fridge if you want it to last a bit longer. Reheating is easy too – just pop a slice in a low oven for a few minutes.
Frequently Asked Questions About Apple Pie Recipes
Got questions about making the best apple pie? I totally get it! There are a few little things that can make all the difference. Let’s dive into some common ones:
- What are the best apples to use for apple pie? Oh, this is a fun one! I really love using a mix of apples for the best flavor and texture in my apple pie. Tart ones like Granny Smith give it a nice zing, while sweeter ones like Honeycrisp, Fuji, or Gala add lovely sweetness and a bit of softness. A combination is usually perfection!
- How do I prevent a soggy bottom crust? Ugh, the dreaded soggy bottom! A few tricks help. Make sure your oven is fully preheated – don’t rush that! Baking the pie on a lower rack helps too, as it gets more direct heat. Some folks swear by blind baking the bottom crust first, which means baking it partially before adding the filling. It’s a little extra step, but can really save you!
- Can I make the pie crust ahead of time? Absolutely! This is a lifesaver, especially when you’re busy. You can totally make your homemade pie crust dough a day or two in advance. Just wrap it up nice and tight and keep it in the fridge. It actually makes it easier to handle when it’s nice and chilled!
- Why is my apple pie filling watery? This usually happens if the filling isn’t thick enough or if you slice the pie too soon. Make sure you’re using enough flour or cornstarch to help thicken things up. And seriously, let that pie cool completely! It needs that time for the juices to set. Patience is key for a perfect slice!

Enjoy Your Perfect Holiday Dessert Apple Pie
And there you have it! Your beautiful Perfect Holiday Dessert Apple Pie is ready to be devoured. I hope you love making and eating it as much as my family does. Seriously, take a moment to savor that golden crust and delicious filling. I’d absolutely love to hear how yours turned out! Share your feedback and any fun variations you tried in the comments below – happy baking!
Print
Classic Apple Pie Recipe: 1 Heavenly Holiday Treat
- Total Time: 3 hours 30 minutes (includes cooling time)
- Yield: 8 servings
- Diet: Vegetarian
Description
A classic American apple pie with a homemade crust, perfect for any holiday gathering or as a comforting fall dessert.
Ingredients
- 1 recipe for homemade pie crust (for double crust)
- 6 cups thinly sliced peeled apples (about 6 medium apples, a mix of varieties like Granny Smith and Honeycrisp is good)
- 3/4 cup granulated sugar
- 2 tablespoons all-purpose flour
- 1 teaspoon ground cinnamon
- 1/4 teaspoon ground nutmeg
- 1 tablespoon lemon juice
- 1 tablespoon unsalted butter, cut into small pieces
- 1 large egg, beaten (for egg wash)
- 1 tablespoon granulated sugar (for sprinkling on top)
Instructions
- Preheat your oven to 425°F (220°C).
- On a lightly floured surface, roll out one disk of pie dough into a 12-inch circle. Carefully transfer it to a 9-inch pie plate. Trim any excess dough, leaving about a 1/2-inch overhang.
- In a large bowl, toss the sliced apples with 3/4 cup sugar, flour, cinnamon, nutmeg, and lemon juice until evenly coated.
- Pour the apple mixture into the pie crust. Dot the top with the small pieces of butter.
- Roll out the second disk of pie dough into an 11-inch circle. Place it over the apple filling. Trim the edges, leaving about a 1/2-inch overhang. Crimp the top and bottom crusts together to seal. Cut several vents in the top crust to allow steam to escape.
- Brush the top crust with the beaten egg wash and sprinkle with the remaining 1 tablespoon of sugar.
- Bake for 15 minutes at 425°F (220°C).
- Reduce the oven temperature to 375°F (190°C) and continue to bake for another 35-45 minutes, or until the crust is golden brown and the filling is bubbly. If the crust starts to brown too quickly, you can loosely tent it with foil.
- Let the pie cool on a wire rack for at least 2-3 hours before slicing and serving. This allows the filling to set.
Notes
- Using a mix of apple varieties will give your pie a more complex flavor and texture.
- Ensure your apples are sliced thinly and uniformly for even cooking.
- Allowing the pie to cool completely is crucial for the filling to set properly.
- Prep Time: 30 minutes
- Cook Time: 50-60 minutes
- Category: Dessert
- Method: Baking
- Cuisine: American
Nutrition
- Serving Size: 1 slice
- Calories: 350
- Sugar: 30g
- Sodium: 250mg
- Fat: 18g
- Saturated Fat: 9g
- Unsaturated Fat: 9g
- Trans Fat: 0g
- Carbohydrates: 45g
- Fiber: 3g
- Protein: 3g
- Cholesterol: 30mg


