
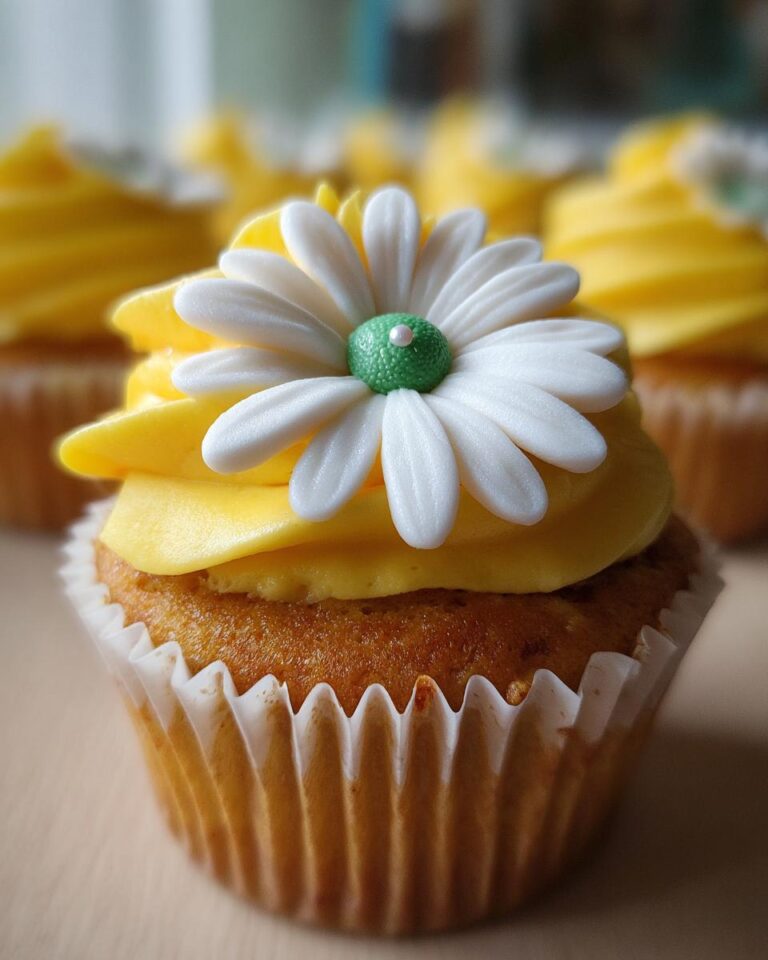
Okay, friends, let me tell you about the cutest cupcakes you’ll ever see! Seriously, these **Super Cute Daisy Cupcakes** are like a little burst of sunshine, perfect for birthdays, baby showers, or just because you want to brighten someone’s day (including your own!). I stumbled upon this recipe when my niece asked for a daisy-themed party, and I knew I had to make something extra special. They’re not only adorable, but they’re also surprisingly easy to whip up. Trust me, even if you’re not a pro baker, you can totally do this!
What Makes These Super Cute Daisy Cupcakes Special?
Okay, so what makes these daisy cupcakes so darn special? Well, besides being ridiculously cute, they’re also super simple to make! I mean, who doesn’t love a dessert that looks like it took hours but actually comes together in, like, no time at all? That’s the magic of these beauties!
The “Wow” Factor
Seriously, when you put these **Super Cute Daisy Cupcakes** on the table, jaws will drop! They’re just so cheerful and pretty. The bright colors and delicate daisy petals are guaranteed to bring a smile to everyone’s face. Trust me, they’re a total showstopper!
Why You’ll Love This Recipe
- Quick & Easy: Seriously, you can have these done in under an hour!
- Fun for All Ages: Get the kids involved! It’s a blast to make them together.
- Adaptable: Change up the colors, flavors, whatever you like!
- Impressive Results: They look like you spent hours, but it’s our little secret!
Super Cute Daisy Cupcakes Ingredients List
Alright, let’s get down to the good stuff – the ingredients! Don’t worry, you probably already have most of this stuff in your pantry. Here’s what you’ll need to make these adorable little treats:
- 1 box cupcake mix (any flavor you like! I usually go for vanilla or yellow)
- Ingredients listed on the cupcake mix box (usually eggs, oil, and water)
- 1 cup unsalted butter, softened
- 3-4 cups powdered sugar
- 1/2 cup heavy cream
- 1 teaspoon vanilla extract
- Yellow food coloring (gel food coloring works best for vibrant colors!)
- White fondant (about 8-10 ounces should do the trick)
- Green food coloring (again, gel is your friend!)
- Edible pearls (for the daisy centers – so cute!)
See? Nothing too crazy! You’ve got this!
Equipment List
Okay, before we get baking, let’s make sure you’ve got all the right tools! Don’t worry, you probably already have most of this stuff in your kitchen. Here’s what you’ll need to make these **Super Cute Daisy Cupcakes**:
- Cupcake pan
- Cupcake liners (optional, but they make cleanup easier!)
- Mixing bowls (at least 3)
- Electric mixer or whisk
- Spatula
- Rolling pin
- Daisy-shaped fondant cutters (or a small knife)
- Piping bags or Ziploc bags (for frosting)
- Round piping tip (optional, for the daisy centers)
Ready to go? Let’s do this!
Step-by-Step Instructions: How to Make Super Cute Daisy Cupcakes
Okay, now for the fun part: actually making these beauties! Don’t worry, it’s way easier than it looks. Just follow these steps, and you’ll be on your way to daisy cupcake heaven in no time. Let’s get started!
Baking the Cupcakes
First things first, let’s get those cupcakes baked! Preheat your oven to whatever temperature the cupcake mix box tells you (usually around 350°F or 175°C). Line your cupcake pan with liners (or grease the pan if you’re feeling old-school). Then, follow the box directions to make the cupcake batter. Careful, it splatters! Fill the liners about 2/3 full, and bake until a toothpick inserted in the center comes out clean. Let them cool completely before moving on. This is super important!
Making the Buttercream Frosting
While the cupcakes are cooling, let’s whip up that dreamy buttercream! In a mixing bowl (or your stand mixer), beat the softened butter until it’s light and fluffy. Gradually add the powdered sugar, mixing until combined. Next, pour in the heavy cream and vanilla extract. Beat until smooth and creamy. Now, divide the frosting into two bowls. In one bowl, add a few drops of yellow food coloring and mix until you get a pretty yellow shade. In the other bowl, add green food coloring and mix until you get the perfect green color.
Creating the Daisy Petals
Time for the fun part – the daisies! Lightly dust your work surface with powdered sugar to prevent the fondant from sticking. Roll out the white fondant to about 1/8-inch thickness. Use your daisy-shaped cutters (or a small knife) to cut out lots of daisy petals. If you don’t have cutters, you can freehand them with a knife – just cut out petal shapes and you’ll be good to go. Gently lift the petals from the cutting surface and set them aside. You’ll want a bunch of them!
Assembling Your Super Cute Daisy Cupcakes
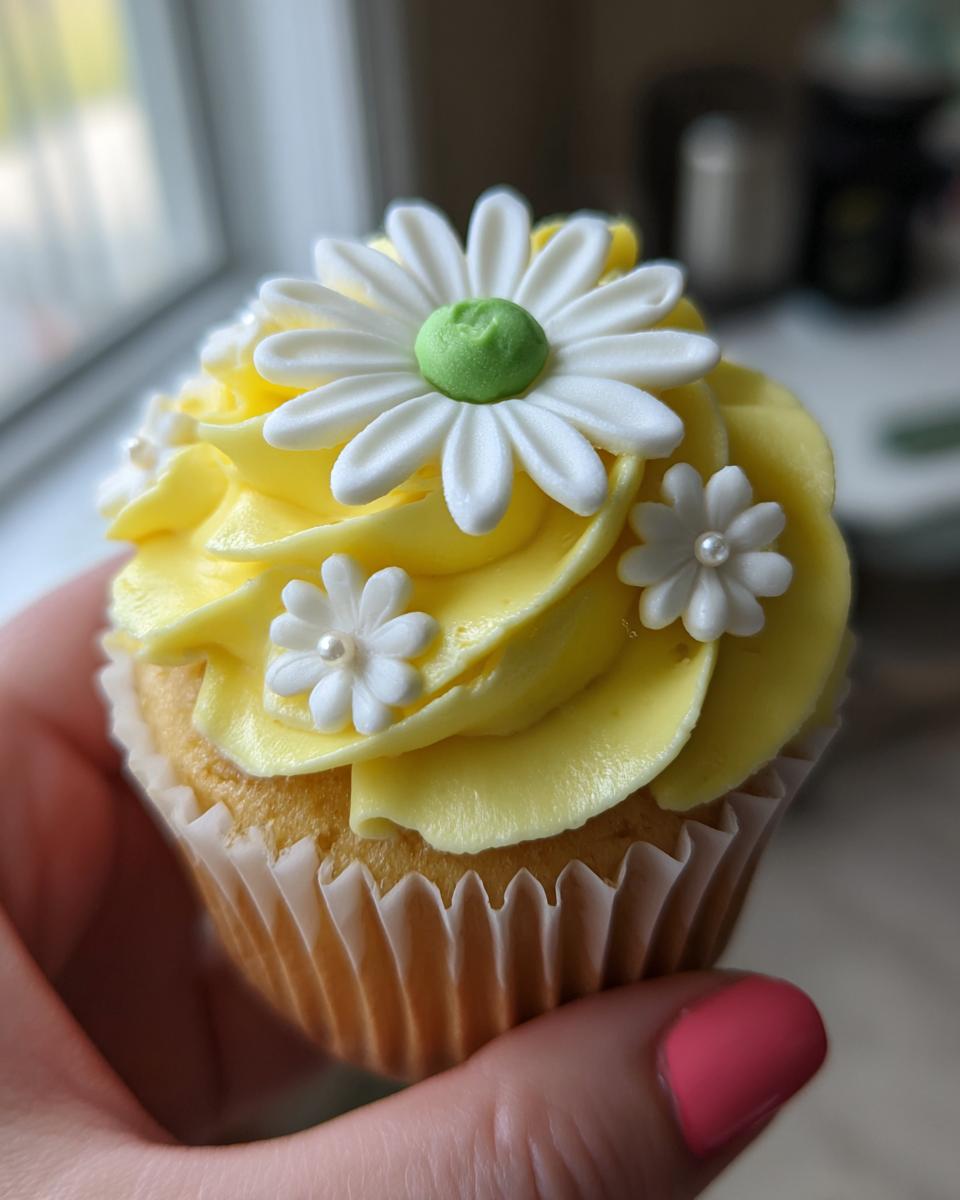
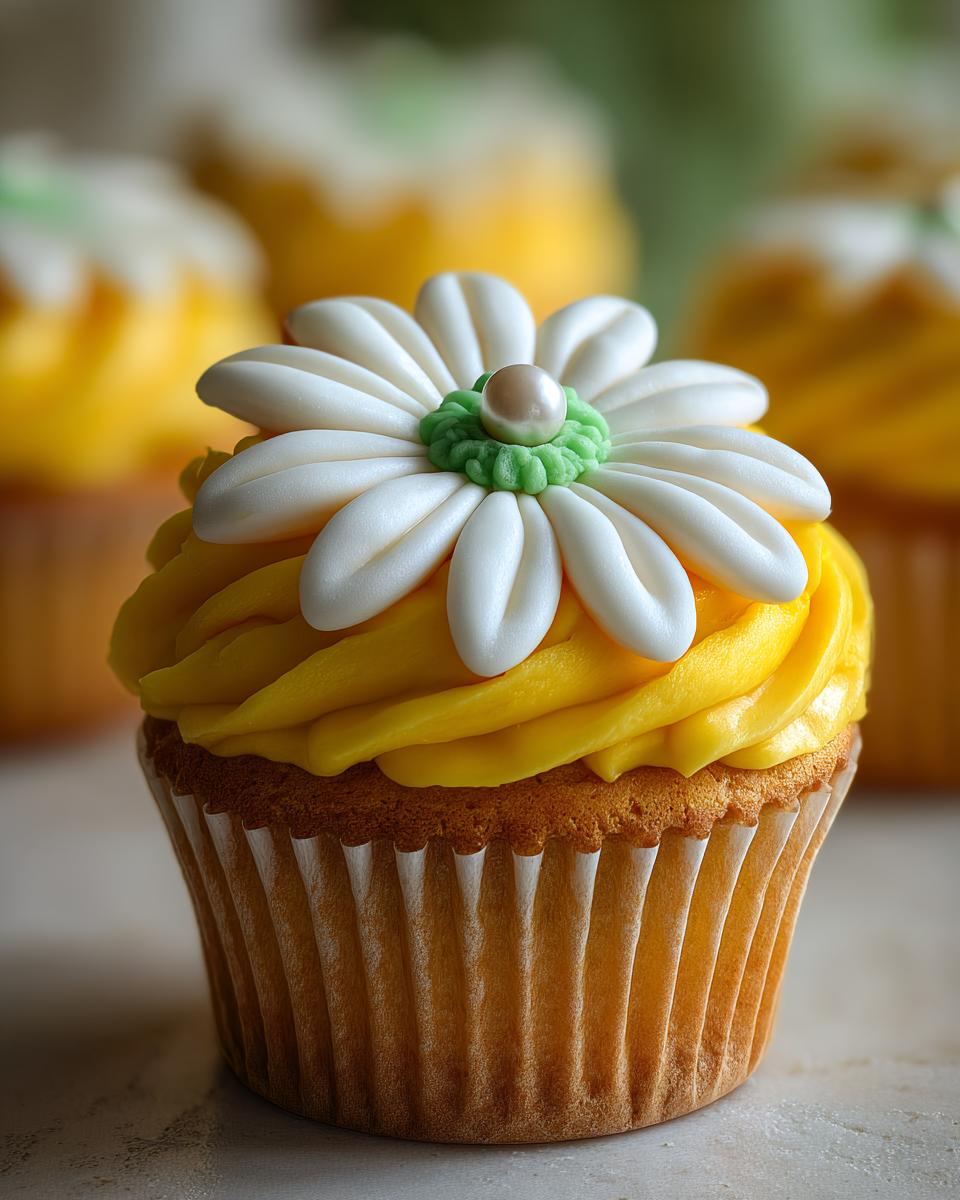
Now, for the grand finale! Frost each cupcake with a generous swirl of the yellow frosting. Then, carefully arrange the white daisy petals around the edges of the cupcake, pressing them gently into the frosting. Next, pipe a small dot of green frosting in the center of each daisy (you can use a round piping tip or just snip a corner off a Ziploc bag). Finally, add an edible pearl to the center of each daisy. Wow! Aren’t they gorgeous? Now, stand back and admire your handiwork! You did it!
Tips for Success: Perfecting Your Super Cute Daisy Cupcakes
Want to make sure your **Super Cute Daisy Cupcakes** are picture-perfect? Don’t worry, I’ve got you! Here are a few tips and tricks I’ve learned along the way to make things even easier. Trust me, these little secrets can make all the difference between “cute” and “OMG, those are amazing!”
Frosting Tips for Beginners
Okay, frosting can be a little tricky at first, but don’t stress! If you’re using a piping bag, make sure the frosting is the right consistency – not too thick, not too runny. Practice swirling the frosting on a plate first. Then, go slowly and steadily on the cupcakes. If you don’t have a piping bag, a Ziploc bag with a corner snipped off works just fine!
Fondant Handling Secrets
Fondant can dry out super fast, so work quickly! If you’re not using a piece of fondant, keep it covered with plastic wrap. If it starts to crack, lightly knead it with a tiny bit of shortening. And don’t roll it too thin, or it’ll tear. You’ve got this!
**Daisy Dessert Ideas**: Variations and Customization
Okay, so you’ve mastered the basic **Super Cute Daisy Cupcakes**? Awesome! But, hey, why stop there? The fun doesn’t end with this recipe. We can totally jazz these up with a few simple tweaks. Let’s get creative and make these daisy cupcakes your own masterpiece!
Flavor Twists
Want to change things up? So many flavors play well with the daisy theme! Think lemon cupcakes with lemon buttercream, or maybe even a chocolate cupcake with vanilla frosting and white fondant daisies. Chocolate and vanilla, carrot cake, red velvet — the possibilities are endless. Don’t be afraid to experiment! And hey, a little bit of orange zest in the frosting? Mmm, yes, please!
Color Palette Inspiration for Your Daisy Birthday Cupcakes
Sure, classic yellow and white are adorable, but let’s talk colors! Try pink petals with a green center for a girly vibe, or even purple petals with a yellow center for something a little more unique. Maybe a rainbow of different colored daisies on each cupcake? The sky’s the limit! Think about the party theme, and go wild!
Serving Suggestions for Your Daisy Cupcake Creations
So, you’ve baked these **Daisy Cupcake** beauties, now what? Well, first off, show them off! Arrange them on a pretty cake stand or a tiered tray – they’ll be the star of the show. Serve them at a garden party, a baby shower, or a birthday bash. They’re amazing with a cup of tea or lemonade. And honestly? They’re perfect all by themselves. Enjoy!
Storage & Reheating Instructions
So, you’ve got leftovers? Yay! Lucky you! To keep your **Super Cute Daisy Cupcakes** fresh and delicious, store them in an airtight container at room temperature. They should be good for about 2-3 days, but honestly, they’ll probably disappear way before then! (I know mine usually do!)
Reheating? You probably won’t need to, but if you want to soften the frosting a bit, you can microwave a cupcake for a few seconds. Just be careful, it splatters!
FAQ: Answering Your Questions About Super Cute Daisy Cupcakes
Got questions? I’ve got answers! Here are some of the most common questions I get about these **Super Cute Daisy Cupcakes**, so you can bake with confidence! Don’t worry, baking should be fun, and I’m here to help.
Can I use store-bought frosting?
Absolutely! If you’re short on time, or just not a frosting person, store-bought frosting works perfectly fine. Just make sure it’s a good quality frosting that you like the taste of. You might need to add a touch more food coloring to get the vibrant hues you want. Go for it!
How far in advance can I make these Daisy Birthday Cupcakes?
You can definitely get a head start! You can bake the cupcakes a day or two in advance and store them in an airtight container at room temperature. Make the frosting and fondant daisies the day of, or the day before. Assembling the **Daisy Birthday Cupcakes** right before serving will give you the freshest, prettiest results.
Can I make these cupcakes gluten-free or vegan?
Yes, you can absolutely adapt this recipe! For gluten-free cupcakes, just swap out the regular cupcake mix for a gluten-free one. For vegan cupcakes, you’ll need a vegan cupcake mix, vegan butter, and vegan heavy cream. You may need to experiment a bit with the frosting consistency, but it’s totally doable! Baking is all about experimenting.
What if I don’t have fondant cutters?
No problem! If you don’t have daisy cutters, you can totally use a small knife. Just roll out the fondant and carefully cut out the daisy petal shapes by hand. You can also use cookie cutters, or even a template you print out. Get creative! The goal is to make those **Daisy Cupcake** dreams come true!
Estimated Nutritional Information for Super Cute Daisy Cupcakes
Okay, so I’m not a nutritionist or anything, but I can give you a rough idea of the nutritional info for these **Super Cute Daisy Cupcakes**. Keep in mind, this is just an estimate, and it can vary depending on the exact ingredients you use. But hey, it’s a good starting point!
I’ll add the typical values for Calories, Fat, Protein, Carbs, and all that jazz as soon as I can. For now, just know that everything in moderation, right? Enjoy!
For more baking inspiration, check out Dishlyum’s Pinterest!
Print
Super Cute Daisy Cupcakes in 1 Hour!
- Total Time: 50 minutes
- Yield: 12 cupcakes
- Diet: Vegetarian
Description
These super cute daisy cupcakes are perfect for any occasion. They are easy to make and look fantastic!
Ingredients
- Cupcake mix
- Buttercream frosting
- Yellow food coloring
- White fondant
- Green food coloring
- Edible pearls
Instructions
- Bake cupcakes according to the box directions.
- Make buttercream frosting and divide it.
- Color one part of the frosting yellow and the other green.
- Roll out white fondant and cut out daisy petals.
- Frost the cupcakes with yellow frosting.
- Attach daisy petals around the edges.
- Add a green frosting dot in the center.
- Place an edible pearl in the center of each daisy.
Notes
- You can use store-bought cupcakes to save time.
- Get creative with your frosting colors!
- Use different sizes of daisy petals for variety.
- Prep Time: 30 minutes
- Cook Time: 20 minutes
- Category: Dessert
- Method: Baking
- Cuisine: American
Nutrition
- Serving Size: 1 cupcake
- Calories: 300
- Sugar: 30g
- Sodium: 150mg
- Fat: 15g
- Saturated Fat: 8g
- Unsaturated Fat: 5g
- Trans Fat: 0g
- Carbohydrates: 40g
- Fiber: 1g
- Protein: 3g
- Cholesterol: 20mg


