
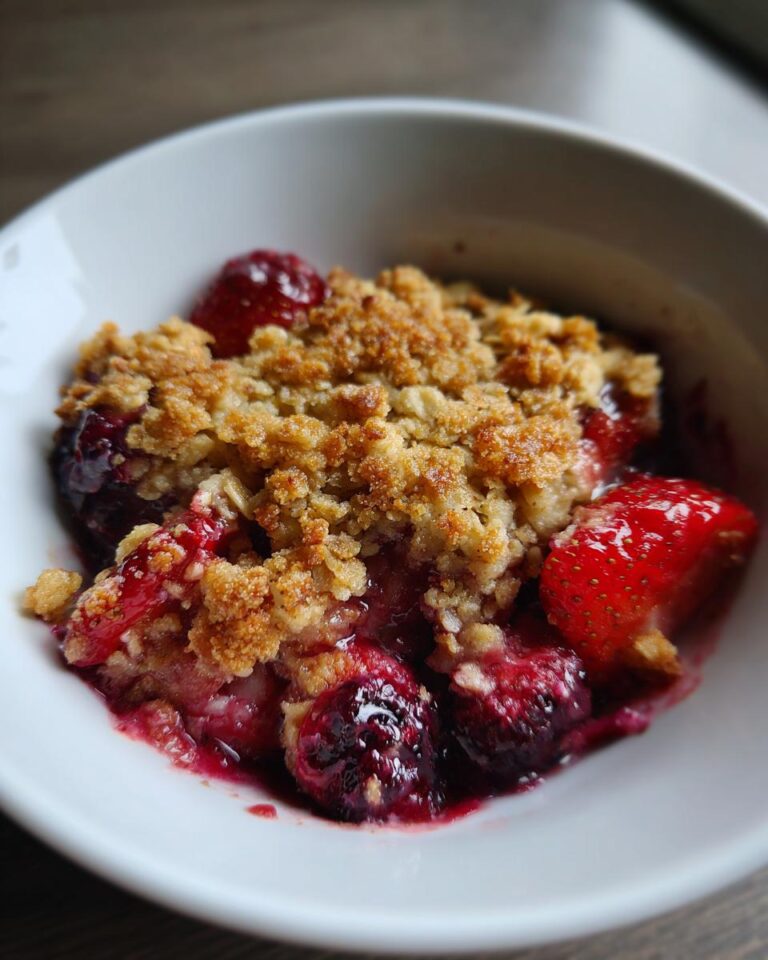
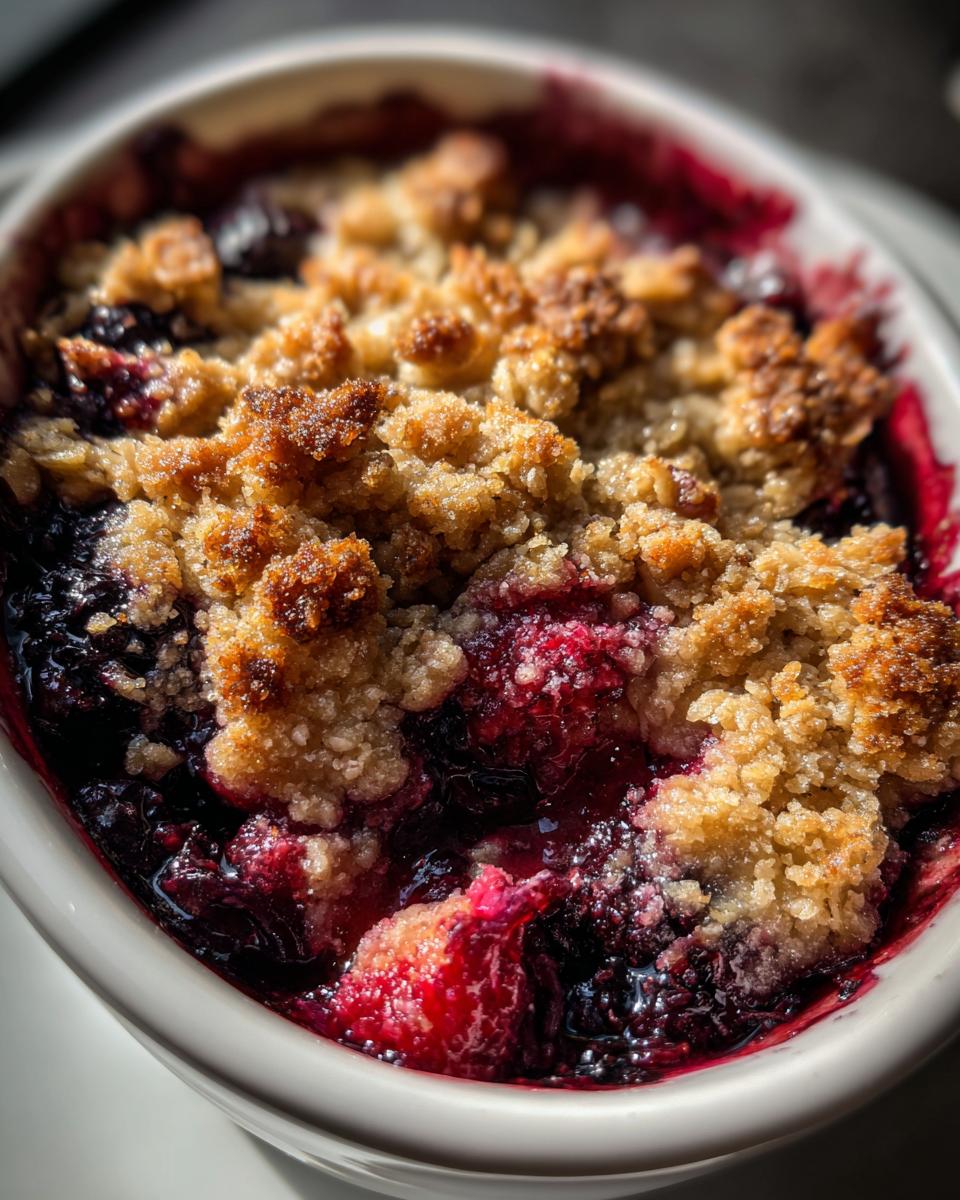
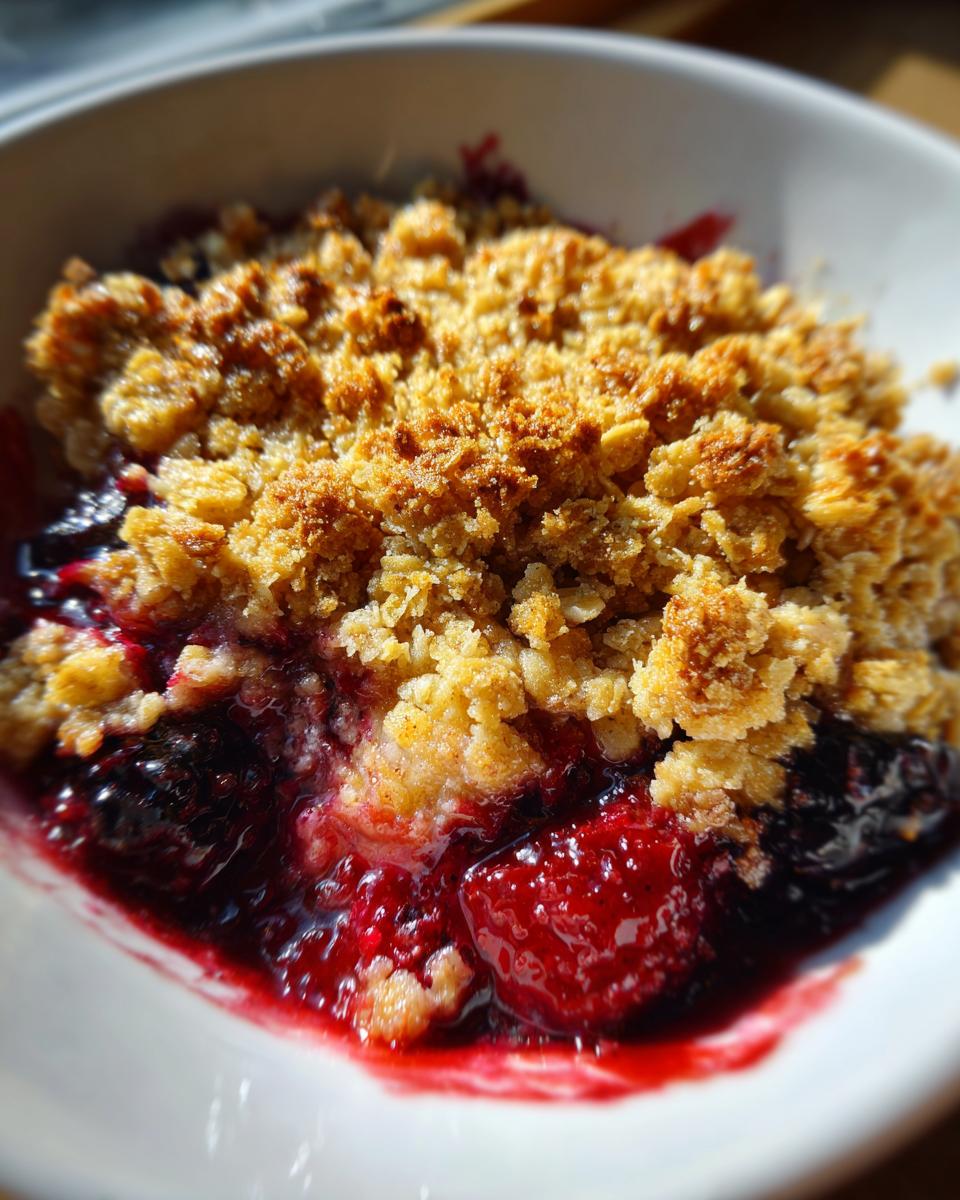
Okay, friends, let me tell you about the easiest, most delicious dessert you’ll ever make – my *Mixed Berry Crisp (No Pie Crust Needed)*! Seriously, it’s a total game-changer. I’m not kidding when I say this is the perfect recipe for those times you need something sweet, fast, and totally impressive. Plus, it’s so simple, even if you’re a beginner baker, you’ll be a star. Trust me, once you try it, you’ll be making this *Berry Dessert* all the time. It’s the ultimate *Easy Baking Recipe* and a truly *Rustic Dessert*!
Ingredients for Your Delicious Mixed Berry Crisp (No Pie Crust Needed)
Alright, let’s talk ingredients! You’ll need about four cups of mixed berries – fresh or frozen, it’s up to you! I usually go for a mix of blueberries, raspberries, and blackberries, but honestly, any combo you love will work. Then, for the berry filling, you’ll need 1/2 cup of granulated sugar, and 2 tablespoons of cornstarch, plus a little squeeze of lemon juice. Don’t skip the lemon juice; it brightens everything up!
Fresh Berries: The Heart of Your Mixed Berry Crisp (No Pie Crust Needed)
Okay, so, about those berries! Fresh is amazing, especially in the summer when they’re bursting with flavor. But, listen, frozen berries are a total lifesaver, especially if you’re making this in the off-season. Just make sure to thaw them a little bit before you use them, and if they release a lot of extra liquid, you might want to drain some of it off so your crisp doesn’t get too soggy. You can use a mix of any berries you love, like strawberries, blueberries, raspberries, or blackberries.
Sweeteners and Thickeners
Next up, the sweet stuff! We’re using granulated sugar in the berry filling. Granulated sugar is perfect for sweetening the berries. And then, cornstarch is your best friend here. It thickens the berry juices as they bake, so you don’t end up with a watery mess. It’s a key ingredient! Don’t worry, it’s easy to find at any grocery store.
The Crispy Crumble Topping Ingredients
Now, for the best part – the crumble topping! You’ll need one cup of rolled oats, they add a great texture. Then, 1/2 cup of all-purpose flour, 1/2 cup of packed brown sugar, and a dash of ground cinnamon for that warm, cozy flavor. And the secret weapon? 1/4 cup (that’s 1/2 a stick!) of cold, unsalted butter, cut into little cubes. Make sure that butter is cold, it’s what makes the crumble, well, crumble!
Step-by-Step Instructions: Making the Perfect Mixed Berry Crisp (No Pie Crust Needed)
Okay, ready to get baking? This part is super easy, I promise! First things first:
Preparing the Berry Filling
Grab a big bowl and toss in your mixed berries. Then, add in that 1/2 cup of granulated sugar – it’s going to make everything so yummy! Next, sprinkle in the 2 tablespoons of cornstarch. This helps thicken everything up as it bakes. And for a little zing, squeeze in that teaspoon of lemon juice. Give it all a gentle stir until the berries are coated. Careful, don’t mash them up too much!
Assembling the Mixed Berry Crisp (No Pie Crust Needed)
Now, pour that beautiful berry mixture into a baking dish. I usually use an 8×8 inch square dish, but anything similar will work! Next, let’s get that crumble topping ready. In a separate bowl, combine the rolled oats, flour, brown sugar, and cinnamon. Now, here’s the fun part: cut in the cold butter. Use a pastry cutter or your fingers (clean ones, of course!) to work the butter into the dry ingredients until it looks like coarse crumbs. That means little bits of butter are evenly distributed, so the topping gets nice and crispy. Sprinkle this mixture evenly over the berries. Yum!
Baking and Cooling Your Mixed Berry Crisp (No Pie Crust Needed)
Pop that baking dish into a preheated oven at 375°F (190°C). Bake for about 35-40 minutes, or until the topping is golden brown and the berries are bubbling. You’ll know it’s ready when the edges are starting to get bubbly and the topping looks nice and crispy. A toothpick inserted into the center should come out clean (or with just a little berry juice). Now, this is the hardest part: let it cool for a bit before serving. I know, I know, it smells amazing, but letting it cool allows the filling to set up a little more. Trust me, it’s worth the wait!
Why You’ll Love This Mixed Berry Crisp (No Pie Crust Needed)
Okay, so, why is this *Mixed Berry Crisp (No Pie Crust Needed)* the best thing ever? Let me tell you:
- It’s ridiculously easy! Seriously, anyone can make this. No fancy skills required.
- The flavor is AMAZING! The sweet berries, the crispy topping… it’s a total party in your mouth!
- It’s perfect for using up berries! Got a bunch of berries that need to be used? This is your answer.
- It’s super versatile! You can swap out fruits, add different spices… get creative!
- It’s great warm or cold! You can serve it right out of the oven, or enjoy leftovers later.
- It’s a crowd-pleaser! Everyone loves a good *Berry Dessert*, and this one is always a hit!
Tips for Mixed Berry Crisp (No Pie Crust Needed) Success
Want to make sure your *Mixed Berry Crisp (No Pie Crust Needed)* is absolutely perfect? I got you! Here are a few pro tips to make it the best it can be. Trust me, these little tricks make a big difference, and you’ll be so glad you know them!
Achieving the Perfect Crumble
The key to a killer crumble is the texture. You want it to be nice and crumbly, not a big, solid clump. Make sure your butter is COLD! And when you’re cutting it into the flour mixture, use a pastry cutter or your fingers to really work it in. You’re aiming for a mix of small and large crumbs, so it’s not all the same size. Don’t overmix!
Preventing a Soggy Bottom
Nobody wants a soggy bottom, right? To avoid that, make sure you don’t overfill your baking dish with berries. Also, letting the crisp cool down a bit before serving helps the filling set up properly. If you’re really worried, you can sprinkle a little extra flour or cornstarch over the berries before the topping.
Serving Suggestions for Your Mixed Berry Crisp (No Pie Crust Needed)
Okay, so you’ve got this amazing *Mixed Berry Crisp (No Pie Crust Needed)*, what now? Well, the possibilities are endless, but let me tell you my favorites! Honestly, a big scoop of vanilla ice cream is a total classic. The cold, creamy ice cream with the warm, fruity crisp? Heaven! Or, if you’re feeling fancy, a dollop of fresh whipped cream is divine. You could even drizzle a little honey over it for extra sweetness. Don’t be afraid to experiment – a sprinkle of chopped nuts would be delicious too!
Mixed Berry Crisp (No Pie Crust Needed) Variations
Ready to get creative with your *Berry Dessert*? This *Rustic Dessert* is super adaptable! You can totally switch up the fruits. Try it with apples and a sprinkle of cinnamon for a cozy fall treat, or peaches in the summer. Don’t be afraid to experiment with the spices, either! A pinch of cardamom or allspice can add a whole new level of flavor.
Fruit Swaps
Seriously, almost any fruit works! Besides the mixed berries, try peaches, apples, pears, or even a mix of them! You can also use frozen fruit, just make sure to thaw it a little bit before using. I love to use a mix of fruits, like a combination of apples and berries, it’s so yummy!
Flavor Enhancements
Want to amp up the flavor? Try adding a teaspoon of vanilla extract or a pinch of ground nutmeg to the berry filling. For the crumble topping, you could add some chopped nuts, like pecans or walnuts, for extra crunch and flavor. A little bit of lemon zest would be amazing too!
Gluten-Free and Vegan Options
Want to make this *Mixed Berry Crisp (No Pie Crust Needed)* gluten-free? Easy peasy! Just swap the all-purpose flour for a gluten-free all-purpose flour blend. For a vegan version, use vegan butter instead of regular butter. It’s that simple! I’ve made it both ways, and it always turns out great!
Okay, so you made this amazing *Mixed Berry Crisp (No Pie Crust Needed)*, but you can’t eat it all at once? No problem! Leftovers are just as good, maybe even better! Let me give you the lowdown on storing and reheating so you can enjoy every last bite.
First off, let that crisp cool completely before you even think about storing it. Then, just cover the baking dish tightly with plastic wrap or transfer the leftovers to an airtight container. Pop it in the fridge, and it’ll be good for about 3-4 days. Seriously, it’s still delicious even days later!
When you’re ready to eat it again, you can reheat it a few different ways. The easiest is in the microwave! Just heat a portion in the microwave in 30-second intervals until it’s warmed through. Or, for a crispier topping, you can reheat it in the oven at 350°F (175°C) for about 10-15 minutes, or until heated through. You can also reheat it in a toaster oven. Trust me, it’s amazing and tastes almost as good as fresh out of the oven!
Alright, I know you’re probably wondering about the nitty-gritty of what’s in this delicious *Mixed Berry Crisp (No Pie Crust Needed)*, right? Well, I’ve got some estimated nutritional information for you. Keep in mind, this is just an estimate, as things can vary a bit depending on the exact ingredients you use, and how generous you are with the serving sizes! But, it’ll give you a pretty good idea!
For one serving, you’re looking at about 250 calories. It has around 10 grams of fat, with about 6 grams of that being saturated fat. There’s about 25 grams of sugar, but hey, it’s dessert, right? You’ll also get around 10 milligrams of sodium, 40 grams of carbohydrates, 4 grams of fiber, and 3 grams of protein. And, just a heads-up, there’s about 20 milligrams of cholesterol per serving. So there you have it!
Frequently Asked Questions About Mixed Berry Crisp (No Pie Crust Needed)
Got questions? I’ve got answers! Here are a few things I get asked all the time about my *Mixed Berry Crisp (No Pie Crust Needed)*. Hopefully, these will help you out!
Can I use frozen berries in this recipe?
Absolutely! Frozen berries work like a charm. Just make sure to thaw them a bit first, and if they release a lot of extra liquid, you might want to drain some of it off. But honestly, I often use frozen berries, especially when fresh ones aren’t in season, and it always turns out great. Don’t worry, it’s super easy!
How can I make this crisp gluten-free?
Easy peasy! To make this *Rustic Dessert* gluten-free, simply swap the all-purpose flour in the crumble topping for a gluten-free all-purpose flour blend. Make sure it’s a blend that works well for baking. Also, double-check that your rolled oats are certified gluten-free, to be totally safe. That’s really all there is to it, and you’ll still have a super yummy *Berry Dessert*!
Can I make this ahead of time?
You sure can! You can totally assemble the berry filling and crumble topping a day or two in advance. Just store them separately in the fridge. Then, when you’re ready to bake, assemble the crisp and bake it as usual. Or, you can bake the whole thing ahead of time and just reheat it later. Just let it cool completely, then store it in the fridge, and reheat before serving. Either way, it’s perfect for a *Easy Baking Recipe*!
Print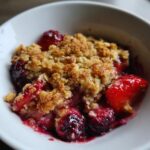
**Mixed Berry Crisp (No Pie Crust): 1 Easy & Delicious**
- Total Time: 55 minutes
- Yield: 6 servings
- Diet: Vegetarian
Description
A simple and delicious Mixed Berry Crisp without a pie crust. Perfect for a quick dessert.
Ingredients
- 4 cups mixed berries (fresh or frozen)
- 1/2 cup granulated sugar
- 2 tablespoons cornstarch
- 1 teaspoon lemon juice
- 1 cup rolled oats
- 1/2 cup all-purpose flour
- 1/2 cup packed brown sugar
- 1/4 teaspoon ground cinnamon
- 1/4 cup (1/2 stick) cold unsalted butter, cut into small pieces
Instructions
- Preheat your oven to 375°F (190°C).
- In a bowl, combine the berries, granulated sugar, cornstarch, and lemon juice.
- Pour the berry mixture into a baking dish.
- In a separate bowl, combine the oats, flour, brown sugar, and cinnamon.
- Cut in the cold butter until the mixture resembles coarse crumbs.
- Sprinkle the oat mixture evenly over the berries.
- Bake for 35-40 minutes, or until the topping is golden brown and the berries are bubbling.
- Let cool slightly before serving.
Notes
- Serve warm with a scoop of vanilla ice cream.
- You can substitute other fruits like apples or peaches.
- For a gluten-free option, use gluten-free oats and flour.
- Prep Time: 15 minutes
- Cook Time: 40 minutes
- Category: Dessert
- Method: Bake
- Cuisine: American
Nutrition
- Serving Size: 1 serving
- Calories: 250
- Sugar: 25g
- Sodium: 10mg
- Fat: 10g
- Saturated Fat: 6g
- Unsaturated Fat: 4g
- Trans Fat: 0g
- Carbohydrates: 40g
- Fiber: 4g
- Protein: 3g
- Cholesterol: 20mg


