
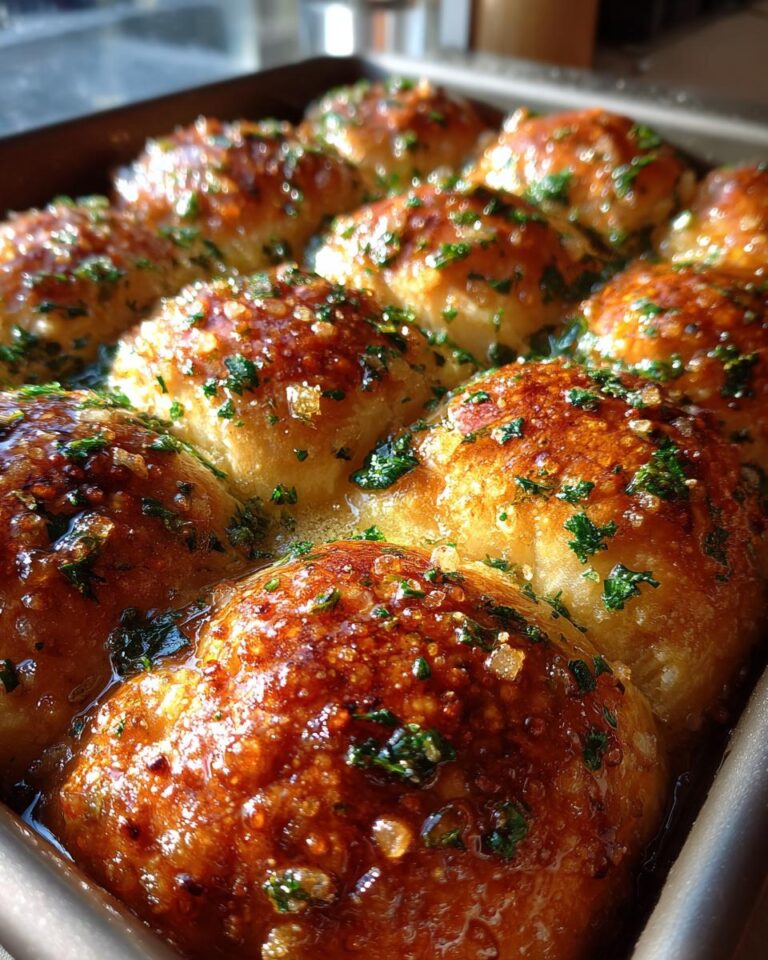
Oh, hello there! If there’s one thing that instantly makes me feel cozy and happy, it’s the smell of fresh bread baking, and these Garlic Butter Pull-Apart Rolls are pure magic. Seriously, they’re so soft, so savory, and just dripping with that glorious garlic butter. They’re the kind of dinner bread that disappears practically the second you put them on the table. I remember making these for the first time for a potluck, and people were practically fighting over the last one! They’re just so darn good, perfect alongside pasta, soup, or honestly, just on their own with a little extra butter.
Why You’ll Love These Garlic Butter Pull-Apart Rolls
Trust me, you’re going to adore these rolls! They’re:
- Super Easy: Even if you’re new to baking bread, these are totally doable.
- Packed with Flavor: That garlic butter coating is just heavenly!
- Crowd-Pleasers: Everyone always asks for seconds (or thirds!).
- So Versatile: They’re the perfect side dish for almost any meal.
Gathering Your Ingredients for Garlic Butter Pull-Apart Rolls
Alright, let’s get our mise en place ready for these amazing garlic rolls! You’ll need to grab a few things from your pantry and fridge. First up, for our yeast mixture, we need 2 1/4 teaspoons of active dry yeast, a little pinch of 1 teaspoon of granulated sugar to wake it up, and 1/4 cup of warm water. Make sure that water is between 105-115°F – too hot and it’ll kill our little yeast friends! For the dough itself, we’ll use 1 cup of warm milk (same temperature range as the water!), 1/4 cup of unsalted butter that’s been melted, and 1 teaspoon of salt. Then, for the flour, you’ll want about 3 1/2 to 4 cups of all-purpose flour. We’ll add it gradually, so don’t dump it all in at once!
Now for that glorious garlic butter coating: grab 1/2 cup of unsalted butter and let it soften up nicely. You’ll also need 4 cloves of garlic, minced super fine, and a good handful of 2 tablespoons of fresh parsley, all chopped up. That’s it! Simple, right?
Ingredient Notes and Substitutions
A quick note on the milk and water temperatures – getting them just right is key for activating the yeast. If you don’t have a thermometer, just make sure it feels pleasantly warm, not hot, to your finger. If you happen to be out of regular milk, you could try a plant-based milk like almond or soy, though it might change the flavor just a tiny bit. And for the flour, I always start with 3 1/2 cups and see how the dough feels. If it’s too sticky, I add a little more, a tablespoon at a time. You want it soft and elastic, not tough!
Step-by-Step Guide to Making Garlic Butter Pull-Apart Rolls
Alright, let’s get these beautiful rolls into the oven! It’s a pretty straightforward process, and the results are SO worth it. You’ll be amazed at how simple it is to get that soft, fluffy texture.
Preparing the Dough for Your Garlic Rolls
First things first, let’s get our yeast going. In a small bowl, whisk together the 2 1/4 teaspoons of active dry yeast, 1 teaspoon of granulated sugar, and the 1/4 cup of warm water. Give it a gentle stir and let it sit for about 5 to 10 minutes. You want to see it get nice and foamy – that means your yeast is alive and ready to party! While that’s happening, grab a big bowl and whisk together the 1 cup of warm milk, the 1/4 cup of melted butter, and the 1 teaspoon of salt. Once the yeast is foamy, pour that into the milk mixture. Now, gradually add about 3 1/2 cups of your all-purpose flour. Mix it all up until you have a nice, soft dough. Turn it out onto a lightly floured surface and knead it for about 5 to 7 minutes. If it feels too sticky, just add a little more flour, a tablespoon at a time, until it’s smooth and elastic. Pop that dough into a greased bowl, cover it up, and let it rise in a warm spot for 1 to 1.5 hours, or until it’s doubled in size. It’s like magic!
Shaping and Baking Your Pull-Apart Bread
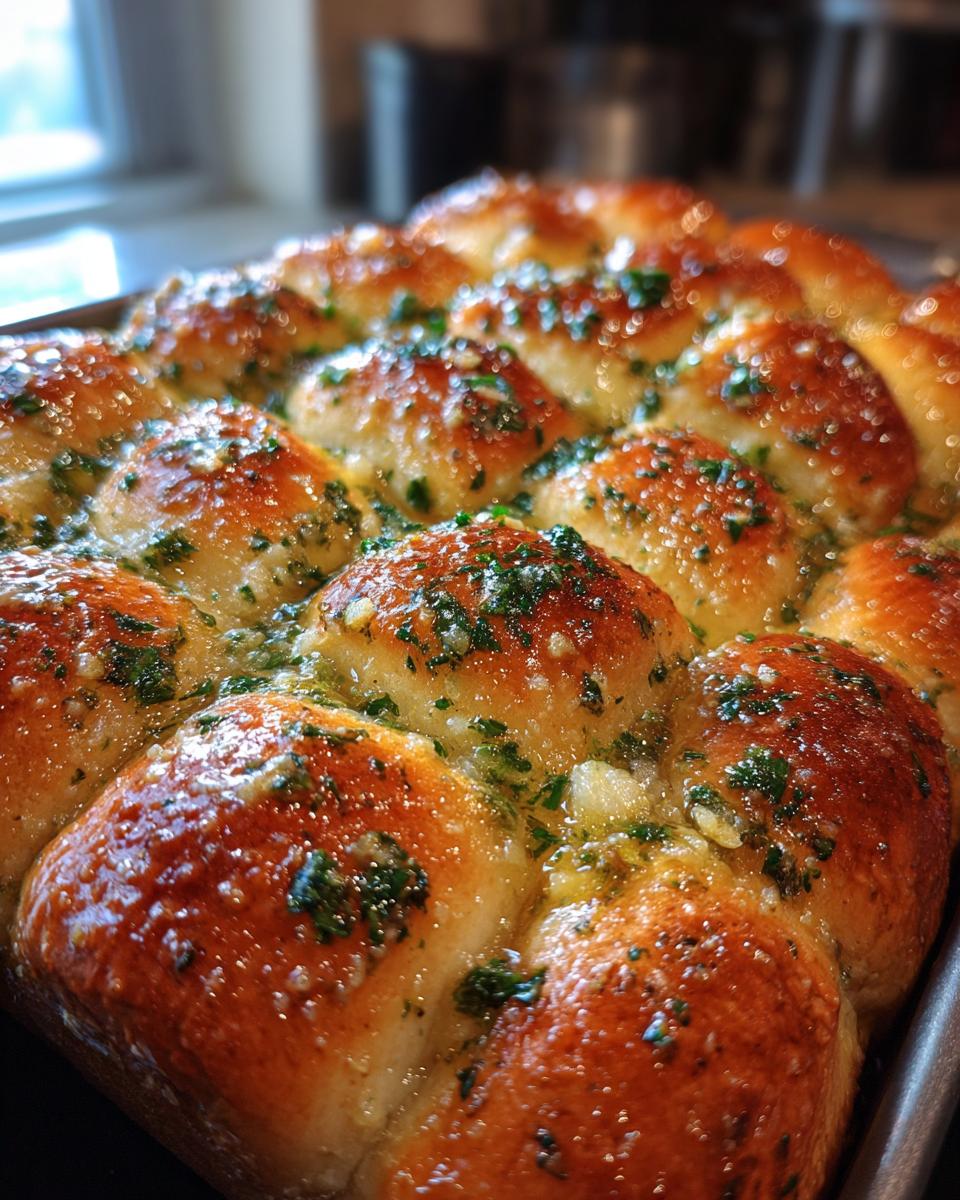
Once your dough has had its first big rise, go ahead and punch it down gently. Now, divide that lovely dough into 12 equal pieces. While you’re doing that, get your garlic butter ready! In a small bowl, mix together the 1/2 cup of softened butter, the 4 minced garlic cloves, and the 2 tablespoons of chopped fresh parsley. Oh, and if you like a little kick, this is where you can stir in a pinch of red pepper flakes! Shape each piece of dough into a nice little ball. Then, dip each ball into that glorious garlic butter mixture, making sure it’s coated all over. Arrange these butter-dipped dough balls snugly together in your greased 9×13 inch baking pan. Cover the pan again and let them have their second rise for another 30 to 45 minutes. Once they’ve puffed up again, preheat your oven to 375°F (190°C). Pop those babies in and bake for about 20 to 25 minutes, or until they’re beautifully golden brown. The smell that fills your kitchen will be absolutely divine!

Essential Equipment for Garlic Butter Pull-Apart Rolls
To whip up these amazing garlic rolls, you don’t need anything too fancy, but having the right tools makes the job so much easier! Let’s get you prepped so you’re ready to go.
Baking Pan and Bowls
You’ll need a good-sized 9×13 inch baking pan for these rolls to snuggle up in. For mixing, grab a small bowl for your yeast and a nice, large mixing bowl for the dough. Having a couple of extra small bowls handy for the garlic butter mixture and any other bits is always a good idea, too!
Measuring Tools and Utensils
Make sure you’ve got your trusty measuring cups (both dry and liquid) and measuring spoons ready. A sturdy wooden spoon or a spatula is perfect for mixing the dough. You’ll also want a whisk for getting the yeast mixture going and a knife for mincing garlic and chopping parsley. And of course, a clean surface for kneading, possibly with a little extra flour for dusting!
Tips for Perfect Garlic Butter Pull-Apart Rolls
Want to make sure your garlic rolls turn out absolutely perfect every single time? Here are a few little tricks I’ve learned! First, really pay attention to that yeast. Make sure it’s foamy after resting – if it’s not, your dough won’t rise properly, and nobody wants a flat roll! When you’re kneading, don’t be afraid to add a tiny bit more flour if the dough is sticking like crazy, but go slow. You want it smooth and elastic, not tough. And for that gorgeous rise, find a nice warm spot for the dough to do its thing – maybe near a slightly warm oven or on top of the fridge. A good rise means a light and airy pull-apart bread!
Serving and Storing Your Garlic Rolls
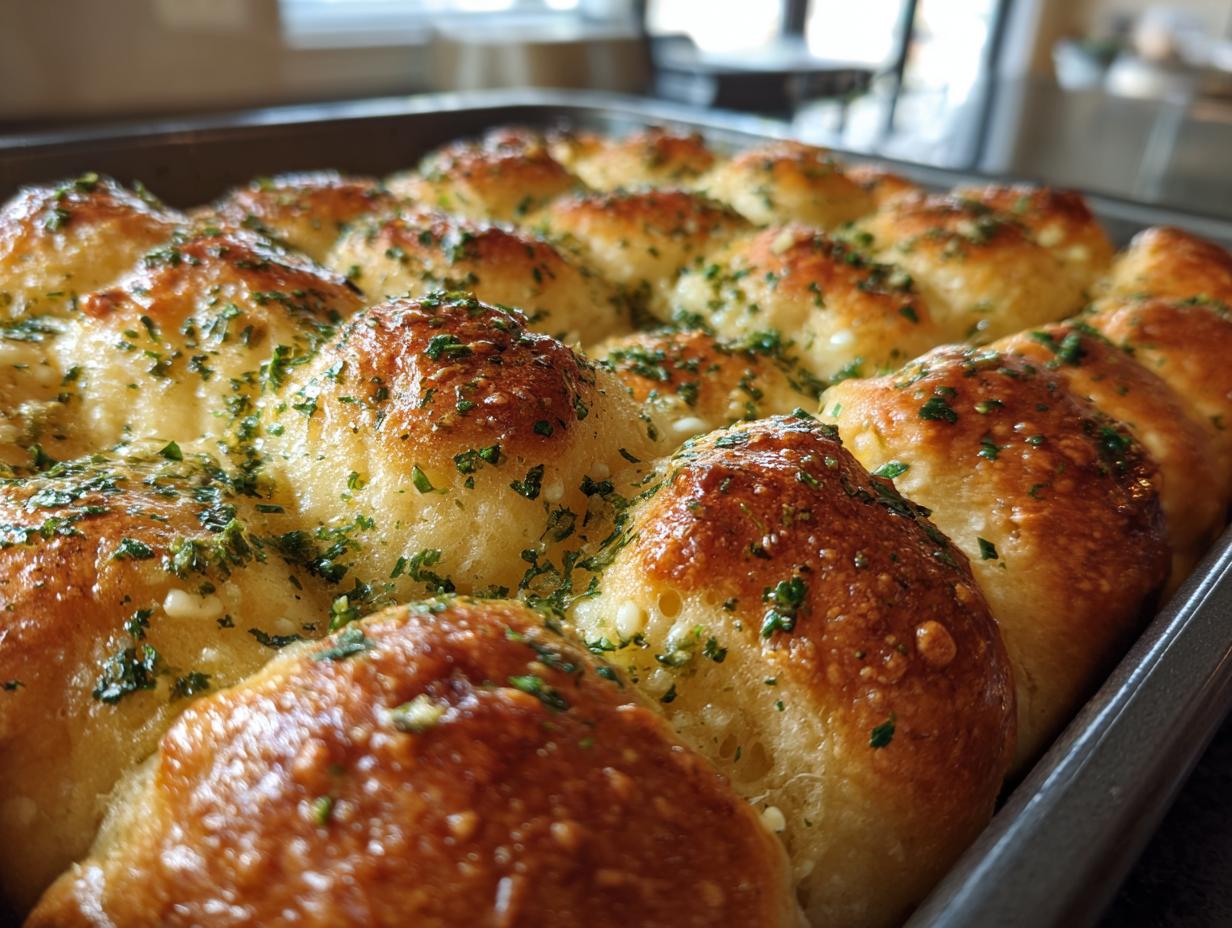
Okay, so these garlic butter pull-apart rolls are best enjoyed warm, right out of the oven! That’s when they’re at their absolute fluffiest and the garlic butter is perfectly melty and fragrant. Seriously, the aroma alone is enough to make your mouth water. If you happen to have any leftovers (which is rare in my house, but hey, it happens!), don’t worry, they’re still delicious!
Best Ways to Serve Garlic Rolls
These garlic rolls are like the perfect little hug for any meal. They’re fantastic alongside a hearty bowl of tomato soup, a rich pasta dish like spaghetti or lasagna, or even with a nice big salad. They also make a wonderful addition to a barbecue spread or a holiday dinner. Honestly, I’ve just eaten them plain, torn right from the pan, and they were divine!
Storing and Reheating Leftovers
If you have any leftover rolls, just let them cool completely. Then, wrap them up tightly in plastic wrap or pop them into an airtight container. They should stay good at room temperature for a day or two. To reheat, you can pop them back in a 300°F (150°C) oven for about 5-10 minutes until they’re warmed through and smell amazing again. You could even give them a little brush of melted butter before reheating for extra deliciousness!
Frequently Asked Questions About Pull-Apart Bread
Got questions about making these amazing garlic butter pull-apart rolls? I’ve got you covered! People always ask me about getting the dough just right. If your dough feels too sticky, don’t panic! Just add a tablespoon of flour at a time while kneading until it’s smooth and elastic, but still a little soft. If it feels too dry, a tiny splash of milk or water can help.
And what about rising times? They can vary depending on how warm your kitchen is! If it’s chilly, your dough might take a little longer to double. Just be patient and let it do its thing. For flavor variations, you can totally get creative! Try adding a pinch of dried herbs like rosemary or thyme to the garlic butter, or even a sprinkle of Parmesan cheese. These garlic rolls are super forgiving and always turn out delicious!
Estimated Nutritional Information for Garlic Butter Pull-Apart Rolls
Just a heads-up, the nutritional info here is an estimate, because, you know, we all use slightly different ingredients! But for one glorious roll, you’re looking at roughly 250-300 calories. It’s got about 10-15g of fat, with 6-8g of that being saturated, and around 35-40g of carbohydrates. You’ll also get about 5-7g of protein. Remember, these numbers can shift a bit depending on the exact brands of butter, flour, and milk you use, but it gives you a good idea!
For more delicious recipes and inspiration, check out our Pinterest board!
Print
Amazing Garlic Butter Pull-Apart Rolls 20 min
- Total Time: 2 hours 45 minutes
- Yield: 12 rolls
- Diet: Vegetarian
Description
Soft and savory garlic butter pull-apart rolls, perfect for any meal.
Ingredients
- 2 1/4 teaspoons active dry yeast
- 1 teaspoon granulated sugar
- 1/4 cup warm water (105-115°F or 40-46°C)
- 1 cup warm milk (105-115°F or 40-46°C)
- 1/4 cup unsalted butter, melted
- 1 teaspoon salt
- 3 1/2 to 4 cups all-purpose flour
- 1/2 cup unsalted butter, softened
- 4 cloves garlic, minced
- 2 tablespoons fresh parsley, chopped
Instructions
- In a small bowl, combine yeast, sugar, and warm water. Let stand for 5-10 minutes until foamy.
- In a large bowl, whisk together warm milk, melted butter, and salt.
- Add the yeast mixture to the milk mixture. Gradually add 3 1/2 cups of flour, mixing until a soft dough forms.
- Turn the dough out onto a lightly floured surface and knead for 5-7 minutes, adding more flour as needed, until smooth and elastic.
- Place the dough in a greased bowl, cover, and let rise in a warm place for 1-1.5 hours, or until doubled in size.
- Punch down the dough and divide it into 12 equal pieces.
- In a small bowl, mix together the softened butter, minced garlic, and chopped parsley.
- Shape each piece of dough into a ball. Dip each ball into the garlic butter mixture, ensuring it’s well coated.
- Arrange the coated dough balls closely together in a greased 9×13 inch baking pan.
- Cover the pan and let the rolls rise for another 30-45 minutes.
- Preheat oven to 375°F (190°C).
- Bake for 20-25 minutes, or until golden brown.
- Serve warm.
Notes
- For extra flavor, add a pinch of red pepper flakes to the garlic butter mixture.
- You can make the dough ahead of time and refrigerate it overnight before shaping and baking.
- Prep Time: 20 minutes
- Cook Time: 25 minutes
- Category: Bread
- Method: Baking
- Cuisine: American
Nutrition
- Serving Size: 1 roll
- Calories: Approximately 250-300
- Sugar: Approximately 5-7g
- Sodium: Approximately 300-400mg
- Fat: Approximately 10-15g
- Saturated Fat: Approximately 6-8g
- Unsaturated Fat: Approximately 4-7g
- Trans Fat: 0g
- Carbohydrates: Approximately 35-40g
- Fiber: Approximately 1-2g
- Protein: Approximately 5-7g
- Cholesterol: Approximately 25-35mg


