
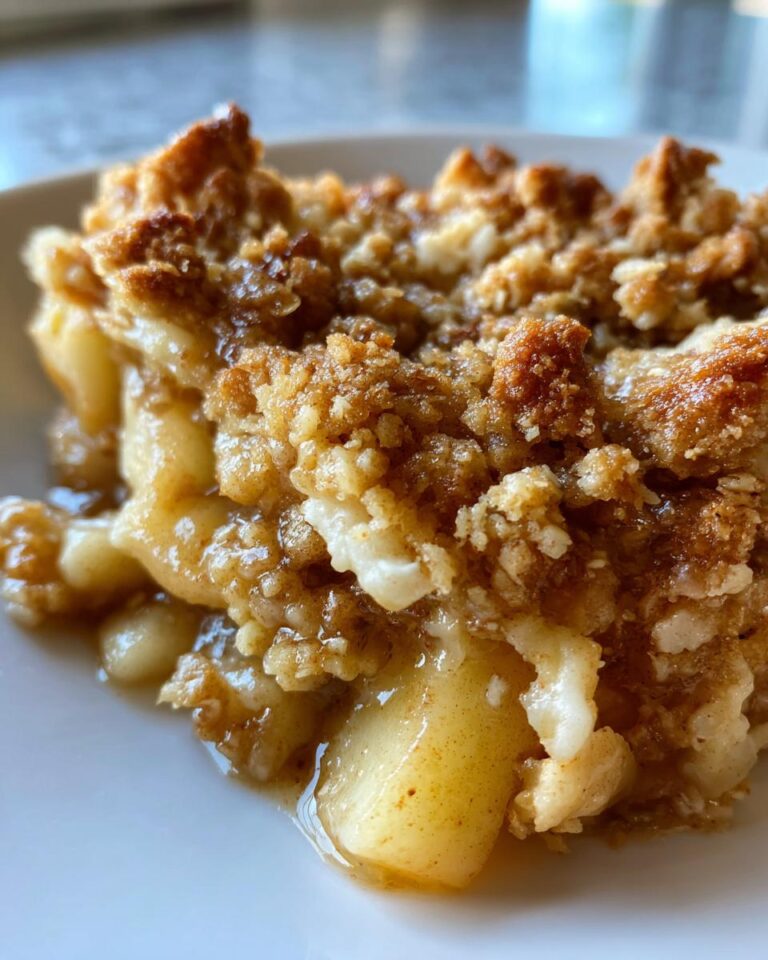
Okay, friends, gather ’round because I’m about to spill the secrets to the most amazing apple crisp you’ll ever sink your teeth into! Forget those boring, basic versions – we’re talking about a **Brown Sugar Version** that’ll knock your socks off. Seriously, this recipe is a game-changer. It’s got that perfect balance of sweet, tart, and crumbly goodness that’ll make your kitchen smell like pure autumn heaven. And the best part? It’s super easy to whip up, even if you’re a total beginner in the kitchen.
The magic is all in the brown sugar, trust me. It adds this incredible depth of flavor and a rich, molasses-y sweetness that takes this classic dessert to a whole new level. You know, that slightly caramelized, almost smoky taste? Yeah, that’s what we’re after! I’ve been making this recipe for years, and it’s always a crowd-pleaser. Whether you’re making it for a cozy night in or a big family gathering, this **Brown Sugar Version** apple crisp is guaranteed to disappear fast. So, grab your aprons, and let’s get baking!
Ingredients for the Perfect Brown Sugar Version Apple Crisp
Alright, let’s get down to the good stuff: the ingredients! You’ll need some yummy apples, of course – about 6 cups, peeled and sliced. I like to mix it up with a few different varieties for the best flavor, but we’ll get to that in a sec. Then, you’ll need 1 cup of brown sugar – packed, so you get that lovely molasses richness. Also, 1 cup of all-purpose flour, 1/2 cup of rolled oats, and a half a cup (that’s one stick!) of cold, unsalted butter, cut into little cubes. And for the spices? Just a teaspoon of ground cinnamon, a 1/4 teaspoon of nutmeg, and a tiny pinch of salt.
Ingredient Breakdown
Okay, so let’s talk about those apples! You can use whatever kind you like, but I always recommend a mix. Granny Smith apples give you that nice tartness, while something like Honeycrisp or Gala adds sweetness and a bit of a softer texture. For the flour, all-purpose is perfect, but you could try a gluten-free blend if you need to. As for the butter, make sure it’s cold, cold, cold! That’s key for getting that perfect crumbly topping. And don’t skimp on the brown sugar – it’s the star of the show in this **Brown Sugar Version** apple crisp! You can also add a pinch of cloves for a bit of extra warmth if you like!
Step-by-Step Instructions: Making Your Brown Sugar Version Apple Crisp
Alright, friends, let’s get this **Brown Sugar Version** apple crisp party started! It’s super easy, I promise. First things first: preheat your oven to 375°F (190°C). Then, grab your favorite baking dish – I usually go for a 9×13 inch, but whatever you have will work. And don’t worry, even if you’re a beginner, I’ll walk you through it step-by-step. Just follow along, and you’ll have a delicious dessert in no time!
Preparing the Apples
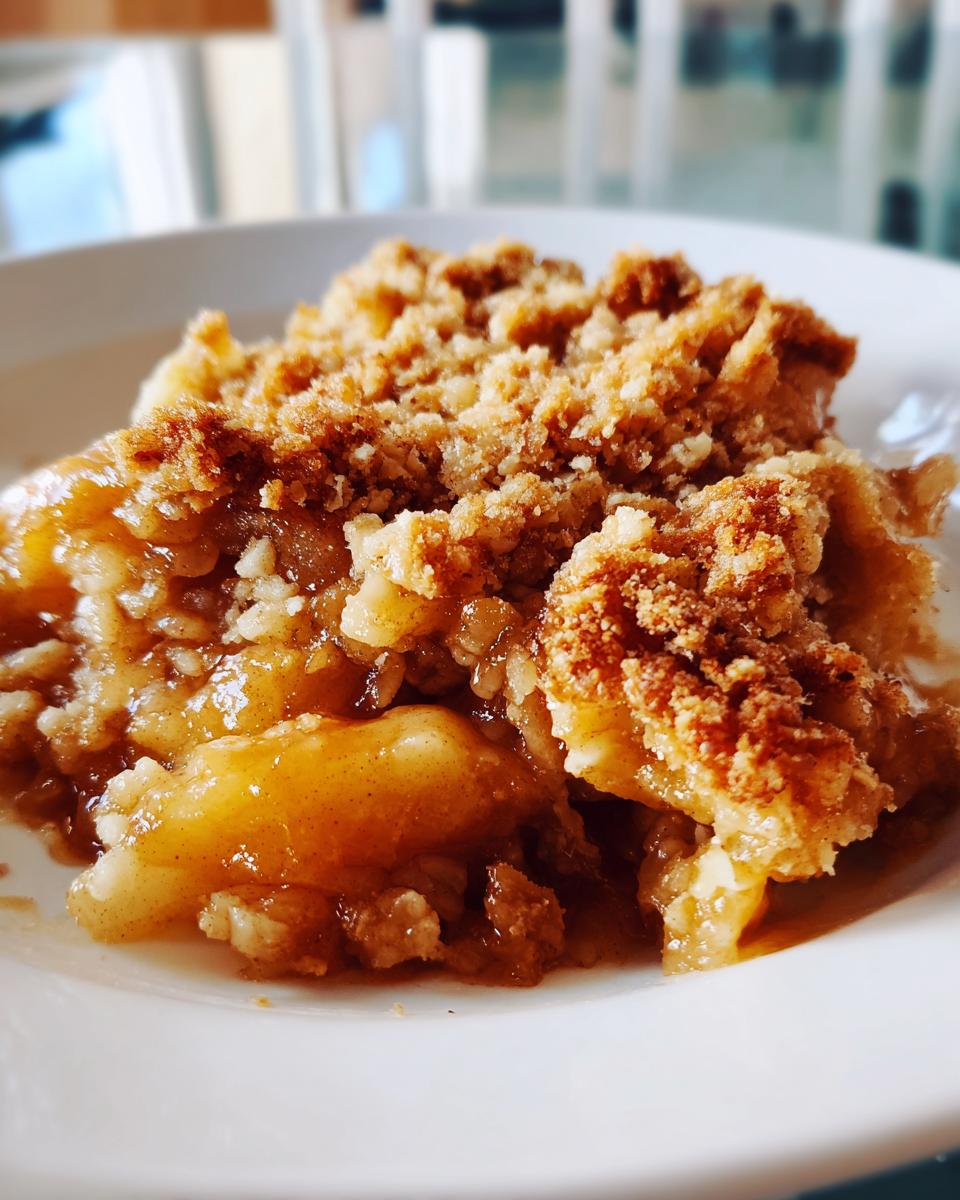
Okay, let’s get those apples ready! Peel and slice them – about 6 cups worth. I like to keep the slices a little thick so they hold their shape during baking. Toss those apple slices in a bowl with 1/4 cup of that delicious brown sugar. Give ’em a good mix, making sure all the apples are coated. This little step helps the apples soften up and get all juicy and delicious while they bake. Careful, it will be tempting to eat the apples before they go into the oven!
Creating the Crumb Topping
Now, let’s make that heavenly crumb topping! In a separate bowl, mix together the flour, oats, the rest of the brown sugar (that’s 3/4 cup!), the cinnamon, nutmeg, and salt. Now, for the secret to a perfect crumble: the butter! Add your cold, cubed butter to the dry ingredients, and then use your fingers or a pastry blender to cut it in. You want the mixture to look like coarse crumbs, almost like wet sand. Don’t overwork it – a few bigger pieces are totally fine. Trust me, it’s all going to bake up perfectly.
Baking and Cooling Your Brown Sugar Version Apple Crisp
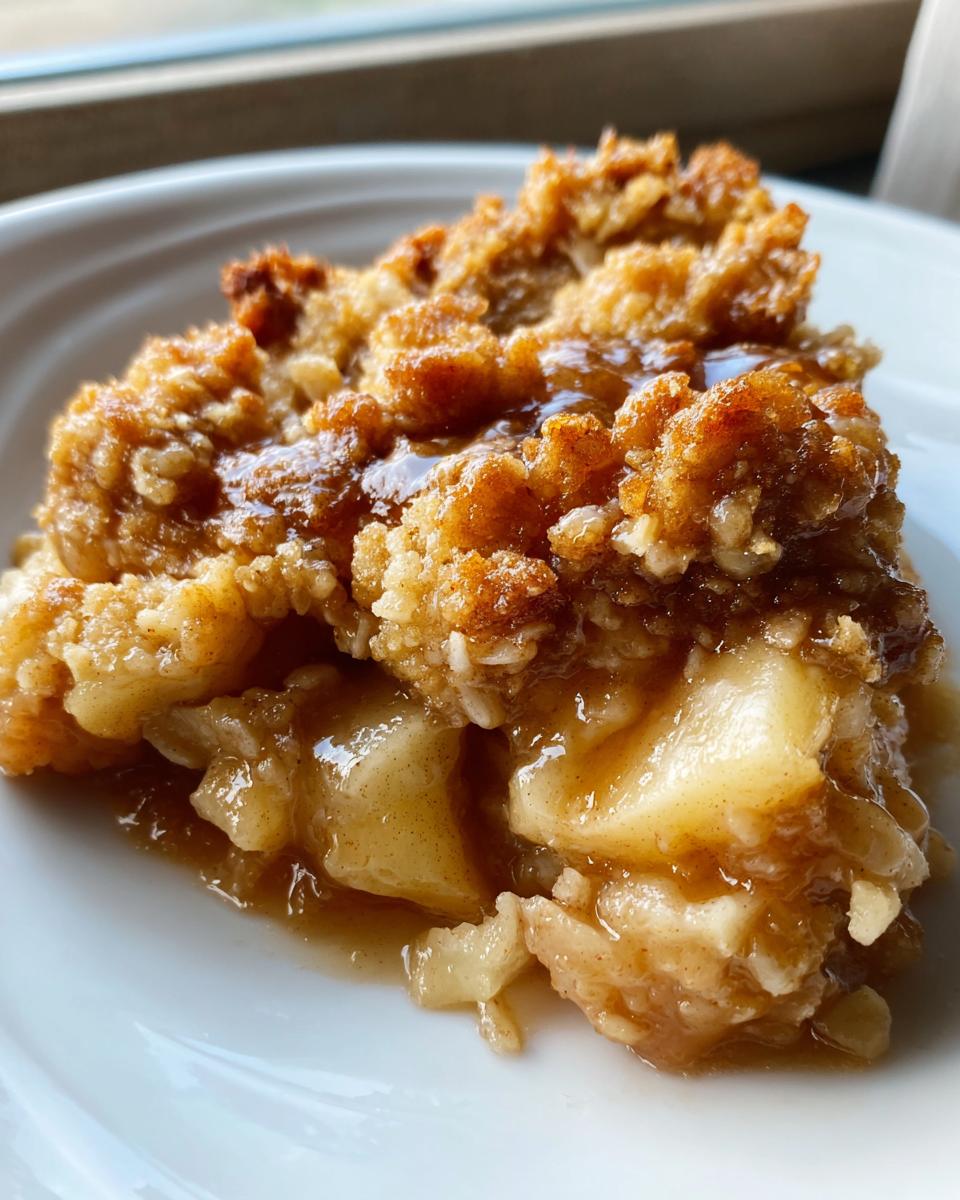
Alright, time to assemble! Pour your apple mixture into your baking dish. Then, sprinkle that glorious crumb topping evenly over the apples. Make sure every single apple is covered. Pop it in the preheated oven and bake for about 40-45 minutes, or until the topping is golden brown and the apples are tender. Keep an eye on it! Once it’s done, take it out and let it cool for at least 15 minutes before serving. I know, it’s torture, but trust me, it needs to set up a bit. Serve it warm with a scoop of vanilla ice cream or a dollop of whipped cream – pure bliss!
Why You’ll Love This Brown Sugar Version Apple Crisp
- That incredible brown sugar flavor! It’s the star of the show.
- The perfect balance of sweet and tart – a total tastebud party.
- Easy to make, even if you’re a beginner baker!
- Warm, cozy, and comforting – the ultimate dessert for any occasion.
- It’s a guaranteed crowd-pleaser; everyone will want seconds!
Tips for Success with Your Brown Sugar Version Apple Crisp
So, you want to make sure your **Brown Sugar Version** apple crisp is absolutely perfect, huh? I get it! Here are a couple of pro tips I’ve learned over the years to help you nail it every single time. Trust me, these little tricks make a big difference in the final result. You’ll be a crisp-making pro in no time!
Apple Selection
Choosing the right apples is seriously important! I love using a mix of apples for the best flavor and texture. Granny Smith apples are great for that tartness, and they hold their shape well. Honeycrisp or Gala apples add sweetness and a softer texture that complements the tartness perfectly. Don’t be afraid to experiment, though! Fuji, Braeburn, and even Pink Lady apples are delicious choices too. The key is to find a blend of flavors you love!
Achieving the Perfect Crumble
The crumb topping is where the magic happens, so let’s make sure it’s perfect! Make sure your butter is super cold. This is key! If you have one, use a pastry blender to cut the butter into the flour mixture, but you can also use your fingers. You want the mixture to look like coarse crumbs, so don’t overmix it. You can even pop the topping in the freezer for a few minutes before you sprinkle it on the apples. This helps it bake up extra crispy. You’ll want to sprinkle it evenly over the apples, so every bite has that delicious crumble!
Serving Suggestions for Your Brown Sugar Version Apple Crisp
Okay, so you’ve got this amazing **Brown Sugar Version** apple crisp, fresh out of the oven! Now, how to serve it? Well, classic is always a winner: a big scoop of vanilla ice cream melting on top is pure heaven. But don’t be afraid to get creative! A dollop of whipped cream, a drizzle of caramel sauce, or even a sprinkle of chopped pecans will take it to the next level. Or, you can make a custard and pour the crisp over it!
Frequently Asked Questions About Brown Sugar Version Apple Crisp
Got questions about this amazing **Brown Sugar Version** apple crisp? I’ve got you covered! Here are a few things I get asked all the time – hopefully, these answers will help you bake the perfect crisp every single time. And remember, baking should be fun, so don’t stress too much! Just follow these tips, and you’ll be golden.
Can I use different types of apples?
Absolutely! That’s the beauty of apple crisp – you can totally customize it with your favorite apples. Like I mentioned earlier, I love a mix. Granny Smith apples give you that tartness that balances the sweetness of the brown sugar. Honeycrisp or Gala apples add a bit of sweetness and a softer texture. Fuji, Braeburn, and Pink Lady apples are also great choices! Just keep in mind that different apples have different levels of moisture, so the baking time might vary slightly. If you’re using a super juicy apple, you might need to bake it a little longer.
Can I make the crisp ahead of time?
Yes, absolutely! This **Brown Sugar Version** apple crisp is a great make-ahead dessert. You can assemble the whole thing – apples and crumb topping – and then cover it tightly and store it in the refrigerator for up to a day. When you’re ready to bake, just take it out of the fridge and bake as usual. You might need to add a few extra minutes to the baking time since it’s chilled. Or, you can bake it completely and then reheat it later. Just let it cool completely, then cover it and store it in the fridge for up to 3 days.
How do I store leftover apple crisp?
Leftover **Brown Sugar Version** apple crisp? If you have any, lucky you! Let it cool completely. Then, cover it tightly with plastic wrap or foil, or transfer it to an airtight container. Store it in the refrigerator for up to 3-4 days. To reheat, you can pop it in the oven at 350°F (175°C) for about 15-20 minutes, or until it’s warmed through. You can also microwave individual portions for a quick and easy treat. Don’t forget to serve it with a scoop of ice cream or a dollop of whipped cream!
Estimated Nutritional Information for Brown Sugar Version Apple Crisp
Alright, so you’re probably wondering about the nitty-gritty, right? I get it! Here’s a rough estimate of the nutritional info per serving, but keep in mind, it can vary depending on the exact ingredients and brands you use. We’re looking at around 350 calories, 15g of fat, 3g of protein, and a whopping 50g of carbs. Of course, that includes about 30g of sugar, so you know, everything in moderation! This is just an estimate, but it’ll give you a general idea!
Print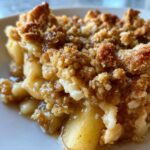
**Brown Sugar Version**: 1 Perfect Apple Crisp Recipe!
- Total Time: 1 hour 5 minutes
- Yield: 6 servings
- Diet: Vegetarian
Description
A delicious apple crisp with a brown sugar twist.
Ingredients
- 6 cups apples, peeled and sliced
- 1 cup brown sugar
- 1 cup all-purpose flour
- 1/2 cup rolled oats
- 1/2 cup (1 stick) unsalted butter, cold and cubed
- 1 teaspoon ground cinnamon
- 1/4 teaspoon ground nutmeg
- Pinch of salt
Instructions
- Preheat your oven to 375°F (190°C).
- In a bowl, combine the sliced apples with 1/4 cup of the brown sugar.
- In a separate bowl, mix the flour, oats, remaining brown sugar, cinnamon, nutmeg, and salt.
- Cut in the cold butter until the mixture resembles coarse crumbs.
- Pour the apple mixture into a baking dish.
- Sprinkle the crumb topping evenly over the apples.
- Bake for 40-45 minutes, or until the topping is golden brown and the apples are tender.
- Let it cool slightly before serving.
Notes
- Serve warm with vanilla ice cream or whipped cream.
- You can use different types of apples for varied flavors.
- For a crispier topping, use a food processor to cut in the butter.
- Prep Time: 20 minutes
- Cook Time: 45 minutes
- Category: Dessert
- Method: Bake
- Cuisine: American
Nutrition
- Serving Size: 1 serving
- Calories: 350
- Sugar: 30g
- Sodium: 100mg
- Fat: 15g
- Saturated Fat: 9g
- Unsaturated Fat: 5g
- Trans Fat: 0g
- Carbohydrates: 50g
- Fiber: 5g
- Protein: 3g
- Cholesterol: 25mg


