
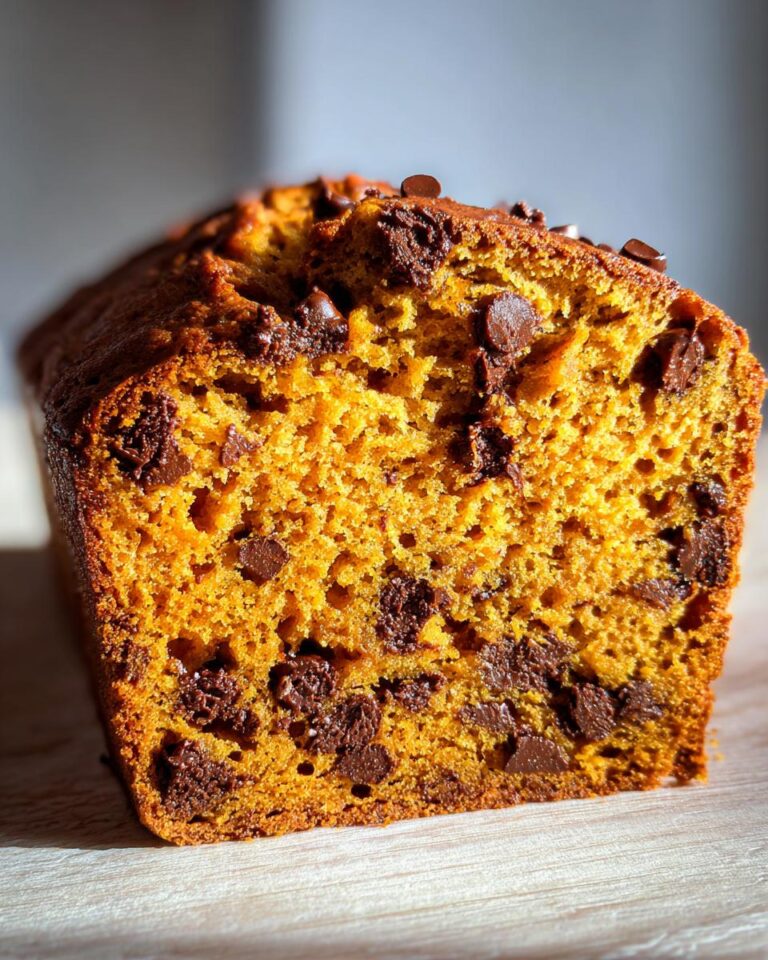
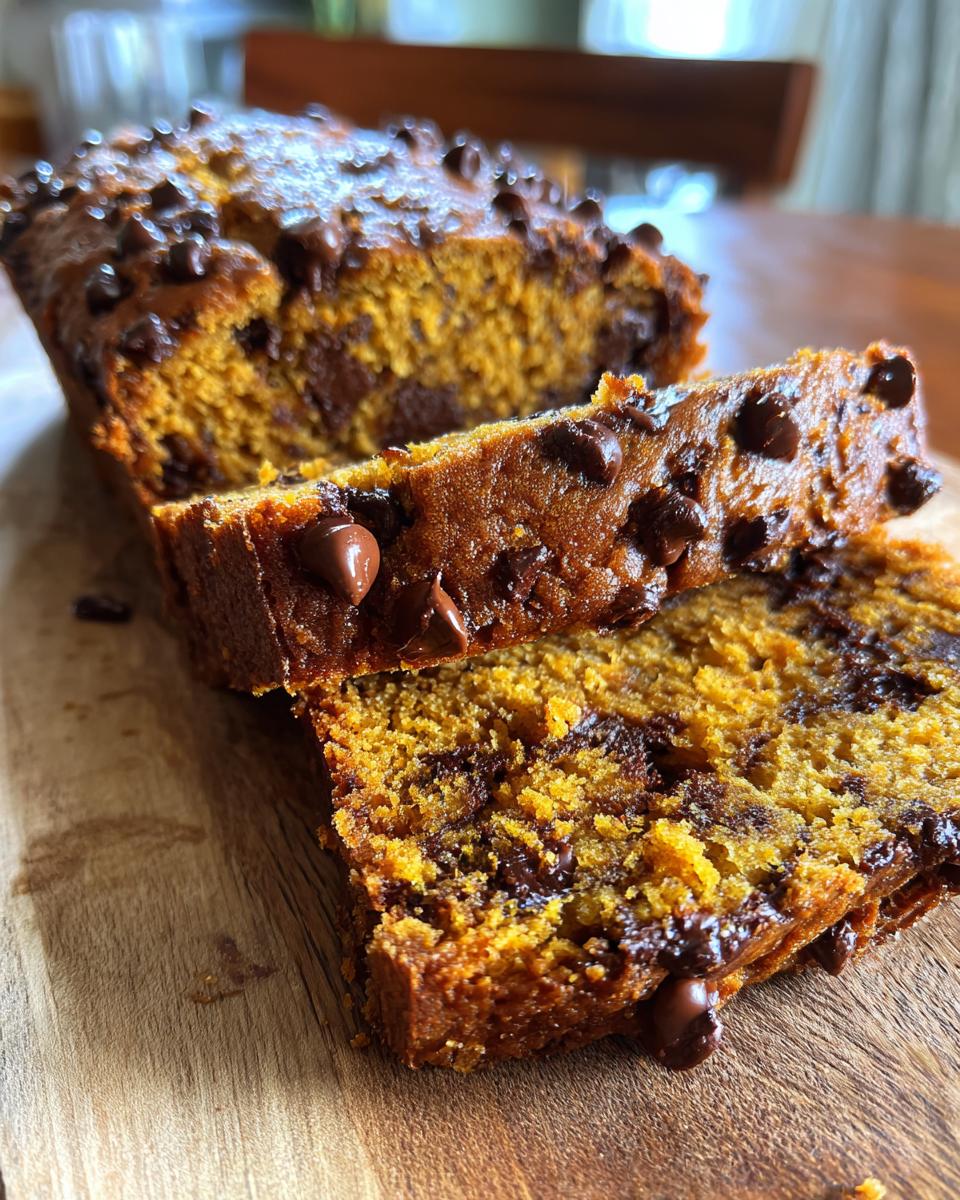
Oh my goodness, you guys, get ready for the best **Pumpkin Chocolate Chip Bread** EVER! Seriously, I’m not kidding. This recipe is like a warm hug on a chilly day, and it’s so easy, even if you, like me, aren’t exactly a baking wizard. Think moist, perfectly spiced pumpkin bread studded with melty chocolate chips… mmm, pure heaven! I’ve been making this for years, tweaking it here and there, and let me tell you, it always disappears in a flash. My family begs for it every autumn, and I’m pretty sure it’s the secret to keeping everyone happy during the holidays. You’re going to love it!
Ingredients for Pumpkin Chocolate Chip Bread
Okay, so here’s what you’ll need to whip up this amazing **Pumpkin Chocolate Chip Bread**. Don’t worry, the ingredient list is pretty straightforward, and you probably have most of it already! I always double-check before I start, just to make sure I’m not missing anything. It’s a total bummer to get halfway through and realize you’re out of something!
Dry Ingredients
These are the things you’ll want to measure out and have ready to go. I always whisk these together in a big bowl, so everything’s nice and evenly distributed. You know, no surprise clumps of baking soda!
Flour, Baking Soda, and Spices
- 1 3/4 cups all-purpose flour – Yep, just your regular ol’ all-purpose.
- 1 teaspoon baking soda – Make sure it’s fresh! Trust me, it makes a difference.
- 1 teaspoon ground cinnamon – Gotta have that warm, cozy spice!
- 1/2 teaspoon ground nutmeg – Adds a little extra somethin’ somethin’.
- 1/2 teaspoon ground cloves – Don’t be shy! This gives it a little bite.
- 1/2 teaspoon salt – Balances out all the sweetness.
Wet Ingredients and Mix-ins
And now, for the yummy, moist stuff! Measure these out in a separate bowl. It’s also a good idea to have your eggs at room temperature. I usually just set them out on the counter while I gather everything else.
- 1 1/2 cups granulated sugar – Sweetness is key!
- 3/4 cup vegetable oil – Keeps it nice and moist.
- 2 large eggs – Adds richness and helps bind everything together.
- 1 teaspoon vanilla extract – Always use the good stuff!
- 1 cup pumpkin puree – Make sure it’s pumpkin puree, not pumpkin pie filling!
- 1 cup chocolate chips – I like semi-sweet, but use your favorite!
How to Make Pumpkin Chocolate Chip Bread: Step-by-Step Instructions
Alright, friends, let’s get baking! This **Pumpkin Chocolate Chip Bread** is super simple, I promise. Just follow these steps, and you’ll be smelling that amazing aroma in no time. I always put on some good tunes or a fun podcast while I bake – it makes it even more enjoyable!
Preparing the Pan and Dry Ingredients
First things first, preheat your oven to 350°F (175°C). Then, grab your loaf pan. I like to grease it really well with cooking spray, and then dust it with flour. You can use parchment paper if you want, but I usually just go straight for the spray. Make sure you get all the sides! No one wants a stuck loaf.
Next, get your dry ingredients ready. Remember that big bowl from earlier? Toss in your flour, baking soda, cinnamon, nutmeg, cloves, and salt. Give it a good whisk to make sure everything’s mixed up. This step is super important, so you don’t end up with pockets of baking soda (yikes!).
Combining Wet and Dry Ingredients
Now, in a separate bowl, whisk together your sugar, oil, eggs, and vanilla extract. Whisk it until it’s all combined. Then, add in that lovely pumpkin puree. Give it another whisk until it’s smooth and gorgeous. Smell that? It’s the start of something amazing!
Here’s the key: Gently add the dry ingredients to the wet ingredients. Mix until just combined. Don’t overmix! Overmixing develops the gluten in the flour, which can make your bread tough. We want moist and tender, remember? Once it’s almost mixed, gently fold in those glorious chocolate chips.
Baking the Pumpkin Chocolate Chip Bread
Pour your batter into the prepared loaf pan. Spread it out evenly. Now, pop that baby into the preheated oven. You’ll want to bake it for about 50-60 minutes. But here’s the thing: ovens can be a little temperamental. So, start checking it around 50 minutes.
How do you know when it’s done? The most important test is the toothpick test. Stick a toothpick into the center of the loaf. If it comes out clean (or with just a few moist crumbs), it’s ready! If it comes out with wet batter, it needs a little more time. Keep an eye on it and check every few minutes until it’s perfect.
Cooling and Serving Your Pumpkin Chocolate Chip Bread
Once your bread is done, take it out of the oven. Let it cool in the pan for about 10 minutes. This helps it firm up a little. After 10 minutes, carefully transfer it to a wire rack to cool completely. This part is crucial! If you cut into it too soon, it might be a little gummy.
Once it’s cooled, slice it up and enjoy! You can serve it plain, or you can get fancy! A little butter or cream cheese is always a good idea. Or, if you’re feeling extra indulgent, a sprinkle of powdered sugar is perfect. Oh, and don’t forget the coffee or tea! You deserve it!

Why You’ll Love This Pumpkin Chocolate Chip Bread Recipe
Okay, so why is this **Pumpkin Chocolate Chip Bread** the BEST? Well, let me tell you! There are a million reasons, but here are a few of my faves. Seriously, you’re going to be obsessed, I guarantee it!
- Quick & Easy: Seriously, this recipe is a breeze! From start to finish, you’re looking at about an hour and ten minutes. Perfect for a weekend treat or a last-minute get-together.
- Flavor Explosion: The combination of warm spices, sweet pumpkin, and melty chocolate chips is just… *chef’s kiss*! It’s the ultimate fall flavor, but honestly, I make it all year round.
- Moist & Delicious: Nobody wants dry bread! This recipe is all about that moist, tender crumb. It’s the kind of bread that practically melts in your mouth.
- Perfect for Fall (and Beyond!): Okay, yes, it’s a fall classic. But honestly, this **Pumpkin Chocolate Chip Bread** is amazing any time of year. It’s sunshine in a slice!
- Versatile: You can totally customize it! Add nuts, use different chocolate chips, or even add a glaze. Make it your own, and have fun with it!
- Kid-Friendly (and Adult-Approved!): My kids go absolutely bonkers for this bread. And let’s be honest, so do I! It’s the perfect treat for everyone.
Trust me, once you try this recipe, it’ll become a staple in your house too. It’s that good!
Ingredient Notes and Substitutions for Pumpkin Chocolate Chip Bread
Okay, let’s talk about the ingredients! I get a lot of questions about this, so I figured I’d break it down. Sometimes, you gotta make do with what you have, right? And sometimes, you just want to tweak things to your own taste! So, here are a few notes and some easy swaps for your **Pumpkin Chocolate Chip Bread**.
Chocolate Chip Variations
Alright, let’s get to the good stuff: the chocolate chips! I usually use semi-sweet, because I find it’s the perfect balance of sweet and not-too-bitter. But hey, feel free to get creative! This is your bread, after all!
You could try milk chocolate chips if you like things sweeter. Dark chocolate chips are great if you want a more intense chocolate flavor. Or, if you’re feeling fancy, try some chocolate chunks. Ooh, and white chocolate chips? YES! They add a totally different dimension and are amazing with the pumpkin spice. You could even do a mix of different kinds of chips, go wild! Just make sure you use about a cup total, whatever you choose.
Spice Adjustments
Now, let’s talk spices, because this is where you can REALLY make this **Pumpkin Chocolate Chip Bread** your own. I love the classic blend I’ve given you, but maybe you’re a cinnamon fanatic, or maybe you’re not a big fan of cloves. No problem!
If you want more cinnamon, go for it! Add an extra half teaspoon, or even a full teaspoon. If you’re not a fan of cloves, you can leave them out completely, or just reduce the amount. Nutmeg is also a star, so don’t be afraid to bump that up a bit too. Honestly, taste your batter as you go – just a tiny bit, of course! – and adjust the spices until it smells and tastes perfect to you.
And hey, if you want to get *really* adventurous, try adding a pinch of allspice or even a tiny bit of cardamom. Just remember, a little goes a long way with those stronger spices! Have fun experimenting, and find your perfect spice blend!
Tips for Success: Achieving the Perfect Pumpkin Chocolate Chip Bread
Okay, so you’ve got your ingredients, you’ve got your oven preheated, and you’re ready to bake! Awesome! But before you dive in, here are a few little tips and tricks I’ve learned over the years that will help you make the BEST **Pumpkin Chocolate Chip Bread** ever. Trust me, these little things make a HUGE difference!
First things first: *measure your flour correctly!* I can’t stress this enough. If you just scoop your measuring cup directly into the flour bag, you’ll end up with way too much flour, and your bread will be dry. The best way to measure flour is to spoon it into your measuring cup and then level it off with a knife. Or, even better, use a kitchen scale! It’s super accurate, and it makes baking so much easier.
Next up: *don’t overmix!* This is a big one. Overmixing develops the gluten in the flour, which makes the bread tough. We want tender and moist, remember? So, once you add the dry ingredients to the wet ingredients, just mix until everything is *just* combined. A few streaks of flour are totally fine!
And finally: *don’t open the oven door too much while it’s baking!* I know, it’s tempting to peek in and see how things are going, but every time you open the door, you let out heat, and that can mess with the baking process. Try to resist the urge! Use the oven light to check on it, and only open the door to do the toothpick test. Careful, it splatters!
One more thing: *let it cool completely!* I know, it’s torture waiting, but trust me, it’s worth it. If you cut into the bread while it’s still warm, it’ll be a little gummy. Letting it cool completely allows the bread to set and the flavors to meld together. Patience, grasshopper, patience!
Follow these tips, and you’ll be well on your way to **Pumpkin Chocolate Chip Bread** perfection! Happy baking!
Storage and Reheating Instructions for Your Delicious Pumpkin Chocolate Chip Bread
Okay, so you’ve baked your amazing **Pumpkin Chocolate Chip Bread**, and you’ve got leftovers (fingers crossed!). First off, pat yourself on the back, because you did it! Now, let’s talk about how to keep that bread tasting its absolute best. I’m all about making sure nothing goes to waste, and proper storage is key!
The best way to store your **Pumpkin Chocolate Chip Bread** is in an airtight container or a tightly sealed plastic bag. I usually let it cool completely, then wrap the whole loaf in plastic wrap, and then pop it in a big Ziploc bag. This helps keep it moist and prevents it from drying out. You can store it at room temperature for up to three days. But honestly? It usually doesn’t last that long in my house!
If you want to keep your bread around for longer, you can totally freeze it! Wrap the loaf tightly in plastic wrap, then a layer of foil. You can also slice the bread and freeze individual slices. That way, you can just grab a slice or two whenever you want a treat. Thaw the whole loaf overnight in the refrigerator, or let individual slices thaw at room temperature for a little while.
Now, let’s talk about reheating! You can totally eat the bread at room temperature, of course. But if you want that warm, just-baked taste, here’s how to do it: For individual slices, you can pop them in the microwave for about 15-20 seconds. Be careful, though, because they can get hot quickly! Or, you can toast them in a toaster oven for a few minutes.
If you want to reheat the whole loaf, wrap it in foil and bake it in the oven at 350°F (175°C) for about 10-15 minutes, or until it’s heated through. Keep an eye on it so it doesn’t dry out! I’ve also been known to warm it in the oven for a few minutes with a tiny bit of butter on top. Seriously good! No matter how you choose to reheat it, your **Pumpkin Chocolate Chip Bread** will still taste amazing. Enjoy!
Alright, so you’re probably wondering about the nitty-gritty, right? Like, how many calories are in this amazing **Pumpkin Chocolate Chip Bread**? I get it! I’m always curious too. While I’m not a nutritionist (I leave that to the pros!), I can give you an estimated nutritional breakdown. Keep in mind, this is just an estimate, and it can vary a little depending on the exact ingredients you use and how big you slice your bread. But it’ll give you a pretty good idea!
I usually use a nutrition calculator online to get these numbers, and here’s what it comes out to, per slice (and remember, I usually get about 10-12 slices from my loaf):
- Calories: About 300 – Yep, it’s a treat! But totally worth it, I promise!
- Sugar: Around 25g – It’s a dessert, so it’s going to have some sugar. But hey, it’s also got pumpkin and spices, so it’s basically healthy, right? (Just kidding… mostly!)
- Sodium: Roughly 150mg – Not too shabby!
- Fat: About 15g – The butter and oil contribute to that delicious moistness.
- Saturated Fat: Around 5g – Everything in moderation!
- Unsaturated Fat: About 8g – Good fats are important!
- Trans Fat: 0g – Yay!
- Carbohydrates: Roughly 40g – Fuel for your day! Or, you know, a cozy afternoon.
- Fiber: About 2g – Every little bit helps!
- Protein: Around 4g – Not bad for bread!
- Cholesterol: About 30mg – Again, everything in moderation!
So there you have it! A rough idea of what you’re getting yourself into. And honestly? I think the joy and deliciousness of this **Pumpkin Chocolate Chip Bread** far outweigh any of those numbers. Enjoy it, friends! You deserve it!
Frequently Asked Questions About Pumpkin Chocolate Chip Bread
Okay, so you’ve got questions? I’ve got answers! Here are some of the most common things people ask me about this **Pumpkin Chocolate Chip Bread** recipe. Hopefully, these will clear up any confusion and get you baking ASAP!
Can I use fresh pumpkin puree instead of canned?
Absolutely! You totally can use fresh pumpkin puree! In fact, it can be even *better*! Fresh pumpkin puree will give your bread a slightly more intense pumpkin flavor, and it can be a little less watery than canned. Just make sure you cook down your fresh pumpkin puree a bit to remove some of the excess moisture before you measure it out. You want to make sure the consistency is right, so your bread bakes up perfectly! The baking time might be a little different, so keep an eye on it. And if you’re using fresh pumpkin, I highly recommend adding a pinch of pumpkin pie spice to the mix, just to amp up those cozy fall flavors!
How can I make this recipe gluten-free?
Yes, you can absolutely adapt this recipe to be gluten-free! The easiest swap is to replace the all-purpose flour with a good quality gluten-free all-purpose flour blend. Make sure your blend contains xanthan gum – this is super important for helping the bread hold its structure. Gluten-free baking can be a little tricky, so you might need to experiment a bit to get it just right. The texture might be slightly different, but the flavor will still be amazing! Just follow the instructions on your gluten-free flour blend for best results. Also, be sure to check all your other ingredients to make sure they’re gluten-free, too!
Can I freeze Pumpkin Chocolate Chip Bread?
Yes, yes, YES! You can absolutely freeze this **Pumpkin Chocolate Chip Bread**! It’s actually a great way to make sure you always have some on hand. After the bread has completely cooled, wrap the loaf tightly in plastic wrap, then wrap it again in foil. You can also slice the bread and freeze individual slices. Just wrap each slice individually in plastic wrap, then place them in a freezer bag.
To thaw, you can either let the whole loaf thaw in the refrigerator overnight, or you can let individual slices thaw at room temperature for a little while. You can also pop a slice straight into the toaster or toaster oven for a quick and easy breakfast or snack! Frozen and thawed, it’s still just as delicious! Freezing is a lifesaver, trust me!
Okay, you guys, you’ve got the recipe, you’ve got the ingredients, and now it’s time to get baking! I am SO excited for you to try this **Pumpkin Chocolate Chip Bread**! Seriously, I can’t wait to hear what you think.
Once you’ve baked your bread (and hopefully eaten a slice or two!), I want to see it! Please, please, *please* share your creations! Take a picture, tell me what you thought, and let’s all celebrate the joy of delicious baking!
You can leave a comment below and tell me all about it. Did you add nuts? Did you use a different type of chocolate chip? Did you make any other tweaks? Tell me all the juicy details! And if you’re feeling extra social, share your photos on social media! Tag me in your posts (if you want!), and use the hashtag #MyPumpkinChocolateChipBread. I can’t wait to see your beautiful, delicious loaves!
Happy baking, friends! I know you’re going to love it!
For more delicious recipes and baking inspiration, check out my Pinterest page!
Print
Irresistible Pumpkin Chocolate Chip Bread: 1 Hour!
- Total Time: 1 hour 10 minutes
- Yield: 1 loaf
- Diet: Vegetarian
Description
Delicious pumpkin chocolate chip bread recipe.
Ingredients
- 1 3/4 cups all-purpose flour
- 1 teaspoon baking soda
- 1 teaspoon ground cinnamon
- 1/2 teaspoon ground nutmeg
- 1/2 teaspoon ground cloves
- 1/2 teaspoon salt
- 1 1/2 cups granulated sugar
- 3/4 cup vegetable oil
- 2 large eggs
- 1 teaspoon vanilla extract
- 1 cup pumpkin puree
- 1 cup chocolate chips
Instructions
- Preheat oven to 350°F (175°C). Grease and flour a loaf pan.
- Whisk together flour, baking soda, cinnamon, nutmeg, cloves, and salt.
- In a separate bowl, whisk together sugar, oil, eggs, and vanilla.
- Stir in pumpkin puree.
- Gradually add dry ingredients to wet ingredients, mixing until just combined.
- Fold in chocolate chips.
- Pour batter into the prepared pan.
- Bake for 50-60 minutes, or until a toothpick inserted into the center comes out clean.
- Let cool in pan for 10 minutes before transferring to a wire rack to cool completely.
Notes
- You can substitute the chocolate chips with nuts.
- Ensure your baking soda and powder are fresh for best results.
- Prep Time: 15 minutes
- Cook Time: 55 minutes
- Category: Bread
- Method: Bake
- Cuisine: American
Nutrition
- Serving Size: 1 slice
- Calories: 300
- Sugar: 25g
- Sodium: 150mg
- Fat: 15g
- Saturated Fat: 5g
- Unsaturated Fat: 8g
- Trans Fat: 0g
- Carbohydrates: 40g
- Fiber: 2g
- Protein: 4g
- Cholesterol: 30mg


