
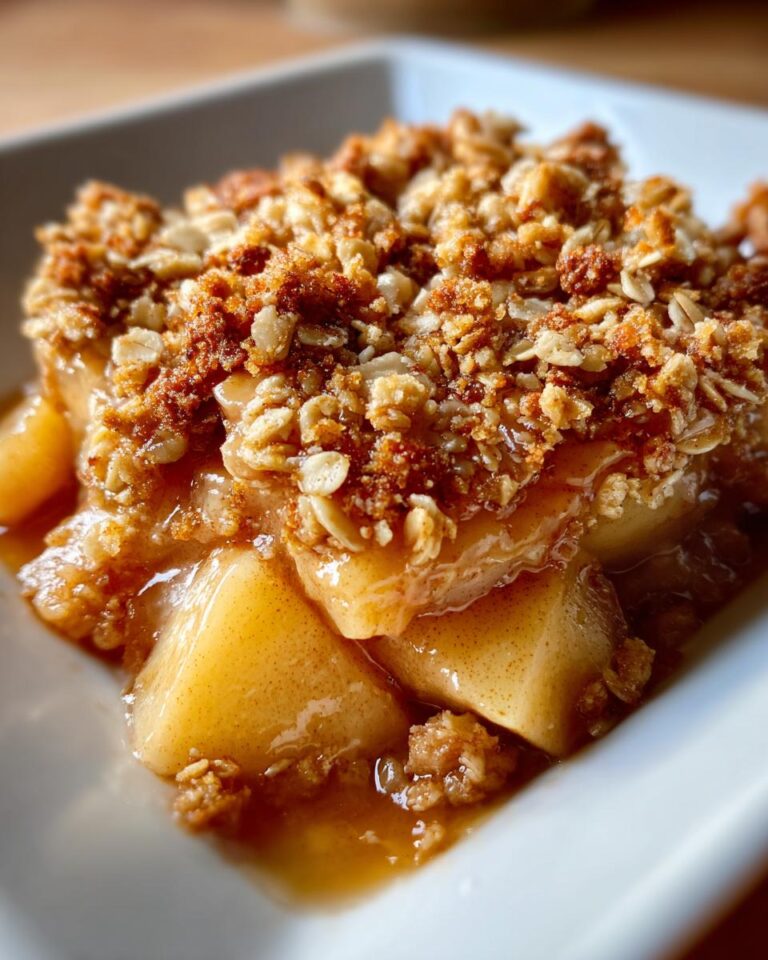
Okay, friends, gather ’round because I’m about to spill the beans on a dessert that’s so ridiculously easy, you’ll be making it every week! We’re talking about a **No-Fuss Apple Dessert Made in One Pan**, and seriously, it’s a game-changer. Forget slaving away in the kitchen for hours. This recipe is all about simple ingredients, minimal effort, and maximum deliciousness. I’m telling you, it’s the perfect treat for those nights when you crave something sweet but don’t want a ton of fuss.
I stumbled upon this gem a few years back when I was craving an apple crisp but was completely wiped. I didn’t want a sink full of dishes, and I definitely didn’t want to spend all afternoon baking. That’s when this **No-Fuss Apple Dessert Made in One Pan** came into my life, and let me tell you, it’s been a love affair ever since! It’s warm, comforting, and bursting with apple-y goodness. The best part? Everything bakes together in one single pan, so cleanup is a breeze. Seriously, you just toss everything in, bake it, and *voila* – dessert is served! This is the kind of recipe that makes you look like a kitchen superstar with minimal effort. Trust me, once you try it, you’ll be hooked!
Ingredients for Your Delicious No-Fuss Apple Dessert Made in One Pan
Alright, let’s get down to business! You won’t believe how few things you need for this magic to happen. You’ll need some lovely, juicy apples, a bit of melted butter, a sprinkle of brown sugar, a dash of cinnamon, some quick oats, and a touch of flour. That’s it! I told you it was simple, didn’t I? Get ready for deliciousness!
How to Gather Your Ingredients
Essential Ingredients
Okay, now for the fun part: gathering all the goodies! Here’s what you’ll need, and trust me, it’s a breeze to find everything. We’re keeping it simple, folks, because that’s the name of the game with this **No-Fuss Apple Dessert**!
Apples: The Core of Your No-Fuss Apple Dessert
For the apples, I always grab about four medium-sized ones, and I love to peel and slice them. Now, you can use whatever apples you have on hand, but if you want my honest opinion, some varieties hold up better in the oven. Honeycrisp, Granny Smith, or even Fuji apples work beautifully. They keep their shape a bit, which is fantastic!
The Crumble: Oats, Flour, and Butter
Next up, we need the crumble topping! You’ll want about 1/2 cup of quick-cooking oats – not the instant kind, mind you, because we want a little texture. Then, grab 1/4 cup of all-purpose flour. And finally, for the butter, I usually go with 2 tablespoons of unsalted butter, melted. But, hey, if you only have salted butter, it’ll still be delish!
Sweeteners and Spices
For a touch of sweetness and warmth, you’ll need 1/4 cup of packed light brown sugar. It gives the perfect caramel-y flavor! And last but not least, a teaspoon of ground cinnamon. It adds that cozy, comforting aroma that makes your kitchen smell like fall! Yum!
Step-by-Step Instructions: Baking Your No-Fuss Apple Dessert Made in One Pan
Preparing the Apples
Okay, let’s get those apples ready! First things first, preheat your oven to 375°F (190°C). Then, grab your apples and get peeling. I like to use a vegetable peeler to make it easy, but whatever method you prefer works! Once they’re peeled, core them – I usually just slice around the core to remove it. Then, slice those beauties into nice, even pieces. Aim for about 1/4-inch thick slices so they cook evenly.
Assembling the No-Fuss Apple Dessert: The Perfect Combination
Now, for the fun part: putting it all together! Grab a baking pan – I usually use an 8×8 inch square one, but a round one works too. First, toss those apple slices in the pan. Next, drizzle the melted butter over the apples, then sprinkle on the brown sugar and cinnamon. Give it a good toss with a spoon or spatula until everything is nicely coated. In a separate bowl, mix together your oats and flour, and sprinkle that mixture evenly over the apples.
Baking Your One Pan Dessert to Perfection
Now, pop that pan into your preheated oven! You’ll want to bake it for about 30-40 minutes. Keep an eye on it! You’ll know it’s done when the apples are tender and bubbly, and the topping is golden brown and crispy. The edges might be a little caramelized – that’s a good thing! The aroma filling your kitchen should be absolutely divine, like a warm hug. Trust me, it’s torture waiting for it to cool down! But it’s worth it!
Serving Your Delicious Baked Apples
Once it’s out of the oven, let it cool for a few minutes. Then comes the best part: serving! I love to serve this warm, straight from the pan. A scoop of vanilla ice cream on top is absolute heaven, or a dollop of whipped cream is perfect, too. You can’t go wrong either way! Enjoy!
Why You’ll Love This No-Fuss Apple Dessert Made in One Pan
Honestly, you’re going to fall head-over-heels for this dessert. It’s just so darn easy, and the results are incredible! Here’s why I think it’s the best thing since, well, sliced apples!
Quick and Easy Baking
Seriously, it comes together in minutes! Prep time is a breeze, and the baking time is perfect for getting other things done. You know, like maybe sipping a cup of tea, or just relaxing!
Minimal Cleanup
One pan, people! That’s all you need. No mountains of dirty dishes to face after you’re done. Just pure, unadulterated deliciousness with a minimum of fuss. Score!
Delicious Flavor
The combination of sweet apples, warm spices, and a crispy oat topping is just perfection. It’s the kind of dessert that makes everyone smile. Trust me on this one!
Perfect for Any Occasion
Whether it’s a weeknight treat or a holiday gathering, this dessert fits the bill. It’s simple enough for everyday, but impressive enough to share with friends and family. That’s the best combo, ever!
Ingredient Notes and Possible Substitutions
Okay, so let’s talk about the ingredients a little more. You know, sometimes you might not have *exactly* what the recipe calls for, and that’s totally fine! That’s the beauty of cooking – you can get creative! Here are a few thoughts on specific ingredients and some easy swaps you can make.
Apple Varieties and Their Impact
Like I said, you can use pretty much any apple you have for this **No-Fuss Apple Dessert**, but some apples work better than others. For a crispier texture that holds up well, try using a mix of apples! Granny Smith apples bring a nice tartness, while Honeycrisp or Gala apples add sweetness. If you use softer apples, they’ll break down a bit more, which is perfectly fine too. It’ll just be a different texture, you know?
Flour and Oat Alternatives
If you’re looking for a gluten-free option, no worries! You can easily swap out the all-purpose flour for a gluten-free all-purpose blend. Just make sure it’s a blend that works well for baking. For the oats, you can use quick-cooking oats or even rolled oats – the texture will just vary slightly. I love using a mix of both sometimes!
Butter Substitutes
Now, if you don’t have butter, or prefer not to use it, you can totally substitute it! Melted coconut oil works great for a slightly different flavor. Or, you can use margarine, though I personally prefer the taste of butter. Just make sure whatever you choose, it’s melted and ready to mix! The flavor will change a bit, but it’ll still be delicious, I promise!
Tips for Success: Making the Best No-Fuss Apple Dessert
Okay, so you want to really knock this **No-Fuss Apple Dessert** out of the park? I’ve got a few little tricks up my sleeve that’ll take it from “good” to “OMG, this is amazing!” Trust me, these tips are game-changers, and they’re super easy to implement. You’ll be a one-pan dessert pro in no time!
Achieving the Perfect Apple Texture
The key to a good apple dessert is the texture of the apples! Make sure you don’t overbake them. You want them tender, but still holding their shape a little. Keep an eye on them towards the end of baking time, and test with a fork. You want them to give a little when poked.
Preventing a Soggy Crumble
Nobody likes a soggy crumble! To avoid this, make sure your apples aren’t *too* juicy. If you find they’re releasing a lot of liquid, you can add a tablespoon or two of flour to the apple mixture before baking. It helps absorb some of that excess moisture. Also, don’t over-mix your crumb topping!
Adjusting Sweetness to Your Preference
Taste as you go! Some apples are naturally sweeter than others, so you might want to adjust the amount of brown sugar you use. If your apples are tart, you might want to add a little extra. That’s the beauty of cooking, you can totally customize it to your taste!
Frequently Asked Questions about this One Pan Dessert
Okay, so you’ve got questions, I’ve got answers! I get it, sometimes you just want to know the nitty-gritty details before you dive in, and that’s totally cool. Here are a few frequently asked questions I get about this **One Pan Dessert**, to help you out.
Can I use frozen apples?
Hmm, that’s a good question! You *can* technically use frozen apples, but I wouldn’t recommend it for this recipe. Frozen apples tend to release a lot more liquid when they thaw and bake, which can make your dessert a bit soggy. Fresh apples are best for the texture. If you’re in a pinch, though, make sure you thaw the apples completely and drain off any excess liquid before using them.
How do I store leftovers?
If (and it’s a big *if*) you have any leftovers, lucky you! Let your **No-Fuss Apple Dessert** cool completely to room temperature. Then, you can store it in an airtight container in the refrigerator for up to 3-4 days. You can also cover the pan and store it in the fridge, if you don’t have a container. To reheat, you can pop it in the microwave for a bit, or warm it up in the oven – it’s delicious either way!
Can I double the recipe?
Absolutely! If you want to make a bigger batch, you can definitely double the recipe. Just use a larger baking pan, like a 9×13 inch, and you might need to add a few minutes to the baking time. Keep an eye on it to make sure the apples are tender and the topping is golden brown. Easy peasy! And sharing is caring, right?
Estimated Nutritional Information for No-Fuss Apple Dessert Made in One Pan
Okay, so, let’s talk numbers! I know some of you are curious about the nutritional information for this delicious **No-Fuss Apple Dessert Made in One Pan**, and I get it! I’ve included the estimated values in the recipe details for you. But, and this is a big BUT, keep in mind that these are just estimates. The exact values can change depending on the specific ingredients and brands you use.
For example, using different types of apples or a different brand of oats can change things up a bit. Also, if you’re heavy-handed with the brown sugar, well, that’ll make a difference too! So, consider these numbers as a general guideline, okay? It’s all about enjoying the yummy goodness, not stressing over the details!
Check out more delicious recipes on Pinterest!
Print
Delicious: 1 Pan, 10-Minute **No-Fuss Apple Dessert**
- Total Time: 50 minutes
- Yield: 6 servings
- Diet: Vegetarian
Description
Simple apple dessert baked in one pan.
Ingredients
- Apples: 4, peeled and sliced
- Butter: 2 tablespoons, melted
- Brown sugar: 1/4 cup
- Cinnamon: 1 teaspoon
- Oats: 1/2 cup
- Flour: 1/4 cup
Instructions
- Preheat oven to 375°F (190°C).
- Toss apples with melted butter, brown sugar, and cinnamon in a pan.
- Mix oats and flour. Sprinkle over apples.
- Bake for 30-40 minutes, or until apples are tender.
Notes
- Serve warm with ice cream.
- Adjust sweetness to your liking.
- Prep Time: 15 minutes
- Cook Time: 35 minutes
- Category: Dessert
- Method: Baking
- Cuisine: American
Nutrition
- Serving Size: 1 serving
- Calories: 200
- Sugar: 15g
- Sodium: 20mg
- Fat: 8g
- Saturated Fat: 5g
- Unsaturated Fat: 3g
- Trans Fat: 0g
- Carbohydrates: 30g
- Fiber: 3g
- Protein: 2g
- Cholesterol: 15mg


