
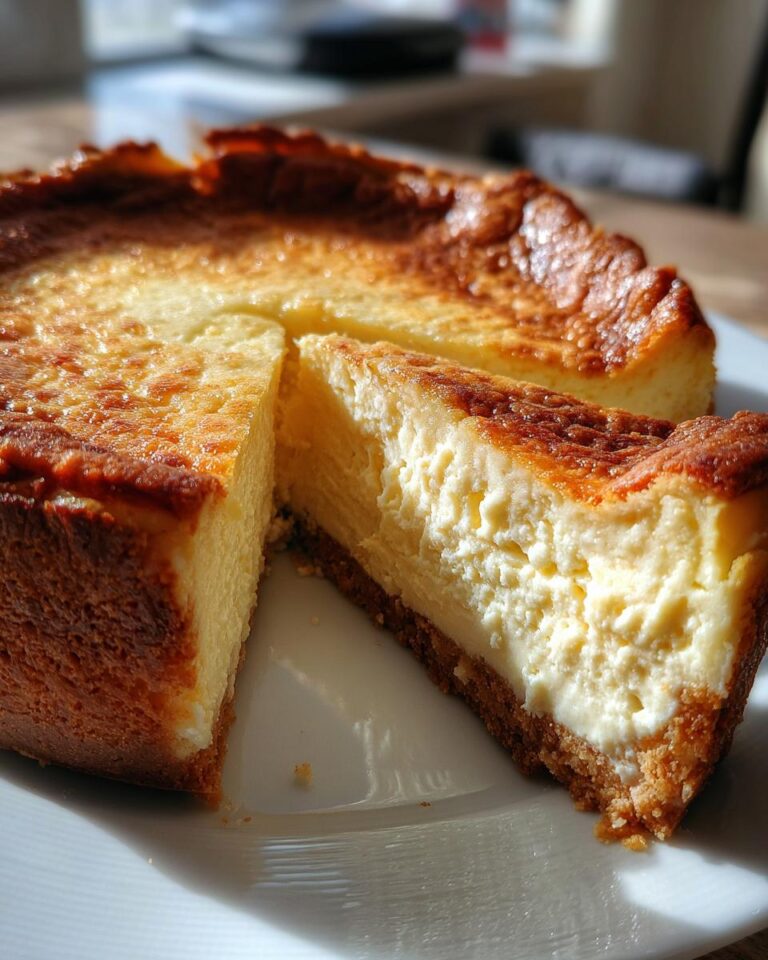
Okay, friends, gather ’round because I’m about to spill the beans on my absolute favorite winter dessert: a No-Fail Winter Cheesecake! Seriously, it’s the recipe I whip out when I need a guaranteed crowd-pleaser, something rich, creamy, and oh-so-delicious. I’ve been making this cheesecake for, well, let’s just say a *long* time. It’s my go-to for holiday gatherings, cozy nights in, or when I just need a little slice of heaven. And the best part? It really is no-fail! Even if you’re a little nervous in the kitchen, trust me, you can totally do this.
I’ve tweaked and perfected this recipe over the years, and now it’s a staple in my kitchen. It’s a classic cheesecake, but with a few wintery twists that make it extra special. You’re going to love it! So, let’s get baking!
Ingredients You’ll Need for This *No-Fail Winter Cheesecake*
Alright, before we get to the fun part, let’s gather our troops – aka, the ingredients! Don’t worry, nothing too crazy here, but having everything prepped and ready to go makes the whole process so much smoother. I always measure everything out beforehand – it’s a lifesaver, trust me!
For the Graham Cracker Crust
The crust is the foundation, right? And for this classic cheesecake, we’re going with a graham cracker crust. It’s easy, adds a lovely texture, and pairs perfectly with that creamy filling. You can totally make this ahead of time, too!
Graham Cracker Crumbs
You’ll need 1 1/2 cups of graham cracker crumbs. Now, you can totally buy these pre-made, which is totally fine, I’ve done it a million times. But, if you’re feeling ambitious and want the *absolute* best flavor, grab a box of fresh graham crackers and crush them yourself. I usually just toss them in a food processor for a few pulses. Makes a huge difference!
Sugar
We’re adding a touch of sweetness to the crust with 1/4 cup of plain ol’ granulated sugar. This helps the crust hold together and adds a little extra flavor.
Melted Butter
This is the glue that holds everything together! You’ll need 6 tablespoons of unsalted butter, melted. I always use unsalted so I can control the saltiness. Microwave it in 15-second intervals, watching closely, until it’s completely melted. Careful, it splatters!
Cheesecake Filling Ingredients
Now, for the star of the show! This creamy dessert is all about the filling, and these ingredients are key to that perfect texture and flavor. I have a few tips I’ll share as we go, but honestly? It’s pretty straightforward.
Cream Cheese
You’ll need a whopping 32 ounces (that’s two standard packages) of cream cheese. And here’s the *most* important tip: Make sure your cream cheese is softened to room temperature! This is non-negotiable, folks. It’s gotta be soft enough that you can easily press a finger into it. Otherwise, you’ll end up with lumps, and nobody wants a lumpy cheesecake. I usually take mine out of the fridge an hour or two before I start.
I usually use full-fat cream cheese for the creamiest results. You *can* use reduced-fat, but the texture might be a little different. It’s up to you!
Sugar
You’ll need 1 1/2 cups of granulated sugar. This adds sweetness, of course, but also helps with the cheesecake’s structure. Make sure you measure it properly – I usually spoon it into the measuring cup and level it off with a knife. You don’t want too much!
Vanilla Extract
A teaspoon of good-quality vanilla extract is the secret weapon for a flavor boost. This brings out all the other flavors and makes the cheesecake sing! I usually splurge on pure vanilla extract, but imitation works in a pinch.
Large Eggs
Finally, we need 4 large eggs. And just like the cream cheese, these *need* to be at room temperature. Room temperature eggs blend into the batter much more easily and help the cheesecake bake evenly. I usually set mine out with the cream cheese. So easy!
Step-by-Step Instructions: Making Your *No-Fail Winter Cheesecake*
Okay, now for the fun part: actually making this amazing creamy dessert! Don’t be intimidated by the steps; it’s honestly easier than you think. I break it down so it’s super simple. Just follow along, and you’ll have a gorgeous cheesecake in no time. I always put on some music while I bake, it makes it more fun!
Preparing the Crust for Your *No-Fail Winter Cheesecake*
First things first: let’s get that crust ready! This is super quick, and it’s the perfect way to start. We want to get this in the oven so it can cool a little bit while we make the filling.
Mixing the Crust Ingredients
In a medium bowl, combine your graham cracker crumbs, sugar, and melted butter. Use a fork or a spoon to mix it all together until it’s evenly moistened. You want everything to be combined so the crust holds together nicely. Make sure there are no dry spots. I always give it a taste test at this point (shhh, don’t tell anyone!).
Pressing the Crust into the Pan
Grab your 9-inch springform pan. I love springform pans because they make it so easy to get the cheesecake out! Pour the crumb mixture into the pan and press it firmly and evenly into the bottom. I use the bottom of a measuring cup to really pack it down. You want a nice, solid crust, people! I usually go all the way up the sides a little bit, too, for extra protection. You could also use a regular pie pan if you don’t have a springform pan. It’ll still work great!
Then, pop that pan into a preheated oven (350°F / 175°C) for about 8-10 minutes. This pre-baking firms up the crust and gives it a nice, toasty flavor. While that’s baking, we can get started on our creamy filling. Careful when you take it out; it’ll be hot!
Creating the Creamy Filling
Alright, time for the *best* part! This filling is what makes this cheesecake so incredibly delicious. This is where you get to show off your mixing skills! Just be careful not to overmix, or you could end up with a cracked cheesecake. We don’t want that!
Cream Cheese and Sugar
In a large bowl (or in the bowl of your stand mixer, if you have one), beat the softened cream cheese and sugar together until smooth and creamy. I use a low speed on my mixer, or a hand mixer if I’m feeling lazy. You want to make sure there are no lumps of cream cheese left, so keep mixing until it’s totally smooth. This might take a few minutes, but be patient – it’s worth it!
Adding Vanilla and Eggs
Next, stir in your vanilla extract. And now, the eggs! Add them one at a time, mixing *just* until each egg is incorporated. Don’t overmix at this stage; you want to avoid adding too much air into the batter. This is another tip for avoiding cracks. I always crack my eggs into a separate bowl first, just in case any shells sneak in. Trust me, it happens to the best of us!
Baking the *No-Fail Winter Cheesecake*
Okay, get ready to bake! This is where the magic happens. We want to make sure the cheesecake bakes evenly and comes out perfectly. I have a few tricks up my sleeve!
Baking Time and Temperature
Pour the filling over the pre-baked crust. Make sure to smooth out the top with a spatula. Now, carefully place the pan into the preheated oven (still at 350°F / 175°C). Bake for 55-65 minutes. Keep an eye on it! The edges should be set, but the center should still have a slight wobble. That wobble is good! I usually start checking at 55 minutes, but the baking time can vary depending on your oven.
Cooling the Cheesecake
Once the cheesecake is done, turn off the oven and prop the oven door open a crack. Let the cheesecake cool in the oven for about an hour. This slow cooling helps prevent cracks. Then, take it out and let it cool completely at room temperature. After that, cover it with plastic wrap and refrigerate for at least 4 hours, or preferably overnight, before serving. This chilling time is essential for the cheesecake to set properly. This is the hardest part for me – the waiting! But trust me, it’s worth it!
And there you have it! Your *No-Fail Winter Cheesecake* is ready to enjoy! You did it!
Why You’ll Love This *No-Fail Winter Cheesecake*
Okay, so why is this cheesecake my go-to? Let me count the ways! Seriously, this recipe has it all. Here’s why you’re going to fall head-over-heels for it, too:
- Quick and Easy: Seriously, this is a pretty straightforward recipe. It’s perfect for those times when you want something impressive but don’t want to spend all day in the kitchen.
- Incredibly Flavorful: That creamy filling, the buttery crust… it’s a symphony of flavors in every bite! It’s rich, decadent, and just plain delicious.
- Guaranteed Success: I’m not kidding when I say this is a no-fail recipe! I’ve made this countless times, and it always turns out perfectly.
- Versatile: You can customize this cheesecake to your heart’s content! I’ll give you some ideas for different toppings and flavor variations later on, but honestly, it’s amazing on its own.
- Perfect for Any Occasion: Whether it’s a holiday get-together, a birthday celebration, or just a Tuesday night craving, this cheesecake is always a hit.
- Makes Everyone Happy: You bring this to a party, and you *will* be the hero. Trust me; I speak from experience!
Honestly? It’s just the perfect dessert. Simple as that!
Tips for *No-Fail Winter Cheesecake* Success
Alright, so you’ve got your ingredients, you’ve followed the steps, and you’re ready for cheesecake glory! But, like any good home cook, I’ve learned a few tricks along the way to make *absolutely* sure this cheesecake comes out perfect every single time. Here are my tried-and-true tips for cheesecake success!
Achieving the Perfect Texture
That creamy, dreamy texture is what makes a cheesecake truly irresistible, right? Here’s how I get it *just* right:
- Room Temperature is Key (Again!): Okay, I know I mentioned it before, but seriously, room temperature everything is SO important. Room temperature cream cheese and eggs blend together beautifully, creating a silky-smooth batter. It’s the secret weapon against lumps!
- Don’t Overmix: This is a big one! Overmixing incorporates too much air, which can lead to cracks and a less-than-perfect texture. Mix the cream cheese and sugar until just combined, and then add the eggs one at a time, mixing only until they disappear.
- Low and Slow: When mixing, use a low speed on your mixer. This helps prevent overmixing and keeps the batter nice and smooth.
Follow these tips, and you’ll be well on your way to cheesecake perfection!
Preventing Cracks in Your *Classic Cheesecake*
Cracks! The bane of every cheesecake baker’s existence! But don’t worry, I’ve got you covered. Here’s what I do to keep those pesky cracks at bay:
- Cool Slowly: The slow cooling process in the oven is crucial. It helps prevent the cheesecake from shrinking too quickly, which can cause cracks.
- Avoid Overbaking: Overbaked cheesecakes are prone to cracking. Bake until the edges are set, but the center still has a slight wobble.
- Water Bath (Optional, but awesome!): For extra insurance, you can bake your cheesecake in a water bath. Wrap the outside of your springform pan in foil to prevent water from seeping in. Then, place the pan in a larger baking dish and fill the dish with hot water, about halfway up the sides of the springform pan. This creates a moist environment that helps prevent cracking. I don’t always do a water bath, but if I’m really trying to impress, I will!
Follow these cracking prevention tips, and you’ll have a gorgeous, crack-free cheesecake every time!
Using Room Temperature Ingredients
I know, I’m repeating myself, but I just can’t stress this enough! Using room temperature ingredients is the foundation for a successful cheesecake. It affects everything from the texture to the baking process, and it makes a huge difference.
So, plan ahead! Take your cream cheese and eggs out of the fridge a couple of hours before you start baking. Trust me; your cheesecake will thank you!
And there you have it! My top tips for a *No-Fail Winter Cheesecake*! Now go forth and bake!
Winter Baking Ideas: Variations and Additions
Okay, so you’ve mastered the basics, and you have a gorgeous classic cheesecake! But, you know me, I’m always looking for ways to jazz things up! This creamy dessert is a fantastic blank canvas for all sorts of fun flavors. Whether you want to embrace the winter vibes or just mix things up, here are some ideas to get your creative juices flowing!
Flavor Variations for Your *No-Fail Winter Cheesecake*
Let’s play with some flavors! The beauty of this recipe is how easily you can customize it. Here are a few ideas to get you started. Experiment, have fun, and find your favorite!
- Citrus Zing: Add the zest of an orange or lemon to the filling for a bright, refreshing twist. You can even add a tablespoon or two of fresh juice, but be careful not to add too much liquid.
- Chocolate Dream: Add some cocoa powder to the filling (about 1/4 cup) for a rich, chocolatey cheesecake. You could even swirl in some melted chocolate before baking!
- Spiced Delight: Add a teaspoon of cinnamon, nutmeg, or allspice to the filling for a warm, cozy flavor, perfect for winter. You could even add a pinch of ground cloves. Wow!
- Peppermint Patty: Add a teaspoon of peppermint extract to the filling and crush some candy canes on top for a festive, holiday treat.
- Coffee Buzz: Add a tablespoon of instant coffee granules or espresso powder to the filling for a mocha cheesecake.
Honestly, the possibilities are endless! Just have fun and get creative!
Topping Suggestions
Alright, let’s talk toppings! Because a great cheesecake deserves a great topping, right? Here are some of my faves, but seriously, anything goes! These are just ideas, so don’t be afraid to experiment!
- Whipped Cream: Classic, simple, and always a crowd-pleaser! Make your own fresh whipped cream, or use store-bought if you’re short on time. I like to add a touch of vanilla extract for extra flavor.
- Fruit Compote: A warm fruit compote is the *perfect* winter topping! Try a cranberry compote, a spiced apple compote, or even a mixed berry compote.
- Chocolate Ganache: For the chocolate lovers out there, a rich, decadent chocolate ganache is the way to go! Simply heat some heavy cream and pour it over chopped chocolate. Let it sit for a few minutes, then stir until smooth.
- Caramel Sauce: Drizzle some store-bought or homemade caramel sauce over your cheesecake for a sweet, gooey treat.
- Salted Caramel: Take the caramel sauce up a notch by sprinkling some flaky sea salt on top! Trust me, it’s amazing!
I usually go for something simple, like whipped cream or a dusting of powdered sugar. But hey, sometimes you gotta go big! Whatever you choose, make it your own and enjoy!
Serving Suggestions
So, you’ve baked your masterpiece, and now it’s time to serve it up! But what goes *with* a No-Fail Winter Cheesecake? Well, the beauty of this creamy dessert is that it’s pretty darn perfect on its own. But, if you want to elevate the experience, here are a few ideas that will really make your guests swoon. I always try to pair my cheesecake with something that complements the flavors, you know?
- Coffee or Tea: A warm cup of coffee or tea is the *perfect* pairing for any cheesecake. The warmth of the drink and the richness of the cheesecake just go hand in hand. I’m a big fan of a strong coffee with a splash of cream. Or maybe a festive spiced tea!
- A Glass of Wine: Yep, you read that right! A sweet dessert wine like Moscato d’Asti or a late-harvest Riesling pairs beautifully with the creamy, rich flavors of the cheesecake. It’s a fancy touch that always impresses.
- Fresh Fruit: While the cheesecake is delicious on its own, a simple side of fresh berries or sliced fruit can add a refreshing counterpoint to the richness. Strawberries, raspberries, or even a simple orange segment can be a great contrast.
- A Scoop of Ice Cream: Okay, this might sound a little over the top, but hey, why not? A scoop of vanilla ice cream or even a flavor like salted caramel can take your dessert to the next level. It’s a party in your mouth!
- Nothing at All! Honestly, sometimes the best thing to serve *with* cheesecake is absolutely nothing! It’s delicious all on its own, and that’s perfectly okay. Sometimes, the simplicity is the best part!
Honestly, you can’t really go wrong! Just pick whatever you and your guests enjoy, and enjoy that delicious classic cheesecake! Have fun with it!
Storage and Reheating Instructions
So, you’ve baked this gorgeous creamy dessert, and there are leftovers? (I *love* when that happens!) Don’t worry, my friend! This No-Fail Winter Cheesecake stores and reheats like a dream. Here’s the lowdown on how to keep that deliciousness fresh and ready to enjoy whenever the craving strikes!
First things first: Once your cheesecake has completely cooled (and I mean *completely* – no one wants a soggy crust!), wrap it tightly with plastic wrap. Make sure to cover the entire cheesecake, including the sides. This helps prevent it from drying out and absorbs any fridge odors. Then, pop it in the fridge! It’ll keep beautifully for up to 5 days. You really want to make sure you use a good quality plastic wrap, too. I find that it helps it last longer.
Now, what about reheating? Well, honestly? I usually eat it straight from the fridge! Chilled cheesecake is just *divine*! But, if you want to warm it up a bit (maybe to melt those toppings!), here are a few options:
- Room Temperature: Simply take a slice out of the fridge about 30 minutes before you want to eat it. This lets it soften up a bit and allows the flavors to come alive!
- Microwave (Use with Caution!): You *can* microwave a slice for a few seconds (5-10 seconds) to soften it up. But be careful! Microwave too long, and you’ll end up with a rubbery mess. Start with a short burst and add more time as needed.
- Oven (For Larger Pieces): If you’re reheating a larger piece, you can warm it gently in the oven. Preheat your oven to 300°F (150°C), and place the cheesecake on a baking sheet. Bake for 5-10 minutes, or until warmed through. Keep an eye on it to make sure it doesn’t overbake!
That’s it! Simple as can be! With these easy storage and reheating tips, you can enjoy your No-Fail Winter Cheesecake for days to come. Just remember, keep it cold and enjoy! And if you don’t have any leftovers? Well, that’s a sign of a truly amazing dessert!
Estimated Nutritional Information for Your *No-Fail Winter Cheesecake*
Okay, so I’m not a nutritionist, and I don’t have a fancy lab to test every single slice of this amazing creamy dessert! But, you know, sometimes it’s nice to have a *general* idea of what you’re eating, right? So, here’s a rough estimate of the nutritional information per serving of this classic cheesecake. Keep in mind, these are just estimates, and the actual values might vary depending on the specific ingredients you use and how you slice it. I always try to be as accurate as I can, but baking is a bit of an art, too!
So, per serving (which I’m estimating as 1/12th of the cake), you can expect roughly:
- Calories: 400
- Sugar: 30g (Yep, it’s a dessert!)
- Sodium: 200mg
- Fat: 30g (Hey, it’s rich and delicious!)
- Saturated Fat: 18g
- Unsaturated Fat: 8g
- Trans Fat: 0g (Hooray!)
- Carbohydrates: 30g
- Fiber: 1g
- Protein: 6g
- Cholesterol: 100mg
Remember, this is just an estimate! But, hey, enjoy that delicious No-Fail Winter Cheesecake! You deserve it! And hey, at least you know what you’re getting into, right?
Frequently Asked Questions About *Creamy Dessert*
Got questions? I’ve got answers! Over the years, I’ve gotten asked all sorts of things about this classic cheesecake recipe. So, to save you some time, I figured I’d put together a little FAQ section. Here are some of the most common questions I get, plus my best tips for success!
Can I freeze this cheesecake?
Absolutely! This No-Fail Winter Cheesecake freezes like a dream! It’s actually a great way to make it ahead of time. Just let the cheesecake cool completely, then wrap it tightly in plastic wrap, then wrap it in a layer of aluminum foil. This helps prevent freezer burn. You can freeze the whole cheesecake or individual slices. Wrap the slices individually, so you can grab one whenever the craving strikes!
To thaw, simply move the cheesecake from the freezer to the refrigerator the night before you want to serve it. Or, if you’re in a hurry, you can thaw individual slices at room temperature for an hour or so. Just remember, don’t leave it out for too long, or it might get a little soft! It’s like a present you can give yourself later!
What if I don’t have a springform pan?
No springform pan? No problem! While a springform pan makes it super easy to remove the cheesecake, you can absolutely use a regular 9-inch round cake pan. The only trick is getting the cheesecake out! I recommend lining the bottom of the pan with parchment paper, so you can lift the cheesecake out easily. You can also carefully invert the pan onto a plate and then flip it back over. It takes a little more finesse, but it totally works! Just make sure to grease the pan well, too. You want this creamy dessert to come out in one piece, right?
You could also use a square pan, or even make mini cheesecakes in muffin tins! Just adjust the baking time accordingly. Have fun with it!
How do I know when the cheesecake is done?
Ah, the million-dollar question! Knowing when your cheesecake is done is key to a perfect result. Here are a few tell-tale signs. Just remember, every oven is different, so you want to keep a close eye on it!
- The Edges: The edges of the cheesecake should be set, but the center should still have a slight wobble. This wobble is what you want!
- The Toothpick Test (Sort of): Insert a toothpick into the center of the cheesecake. It should come out with a few moist crumbs attached, but not wet batter.
- The Touch Test: Gently tap the top of the cheesecake with your finger. If it feels set and not jiggly, it’s probably done.
I usually start checking around the 55-minute mark, but it can take up to 65 minutes. I always err on the side of caution and take it out a little early, as the cheesecake will continue to set as it cools. You got this, and you’ll be enjoying that delicious creamy dessert in no time!
Final Thoughts
And there you have it, folks! My No-Fail Winter Cheesecake recipe, shared with all my heart! I hope you enjoy baking this as much as I do. It’s truly a labor of love, and I hope it brings as much joy to your kitchen and your gatherings as it has to mine. Baking this classic cheesecake always makes me feel warm and fuzzy inside – it’s like a hug in dessert form! And, hey, if you try it, please let me know what you think! Happy baking, and happy winter!
For more delicious recipes and inspiration, check out my Pinterest page!
Print
**No-Fail Winter Cheesecake: 1 Easy Recipe**
- Total Time: 4 hours 20 minutes
- Yield: 12 servings
- Diet: Vegetarian
Description
A rich and creamy cheesecake perfect for winter. It’s a guaranteed success.
Ingredients
- 1 1/2 cups graham cracker crumbs
- 1/4 cup sugar
- 6 tablespoons unsalted butter, melted
- 32 ounces cream cheese, softened
- 1 1/2 cups sugar
- 1 teaspoon vanilla extract
- 4 large eggs
Instructions
- Preheat oven to 350°F (175°C).
- Mix crumbs, sugar, and melted butter. Press into a 9-inch springform pan.
- Beat cream cheese and sugar until smooth.
- Add vanilla.
- Add eggs one at a time, mixing until just combined.
- Pour filling into crust.
- Bake for 55-65 minutes.
- Let cool completely.
- Refrigerate for at least 4 hours.
Notes
- For best results, use room temperature ingredients.
- You can add a topping like whipped cream or fruit.
- Prep Time: 20 minutes
- Cook Time: 60 minutes
- Category: Dessert
- Method: Bake
- Cuisine: American
Nutrition
- Serving Size: 1 slice
- Calories: 400
- Sugar: 30g
- Sodium: 200mg
- Fat: 30g
- Saturated Fat: 18g
- Unsaturated Fat: 8g
- Trans Fat: 0g
- Carbohydrates: 30g
- Fiber: 1g
- Protein: 6g
- Cholesterol: 100mg


