
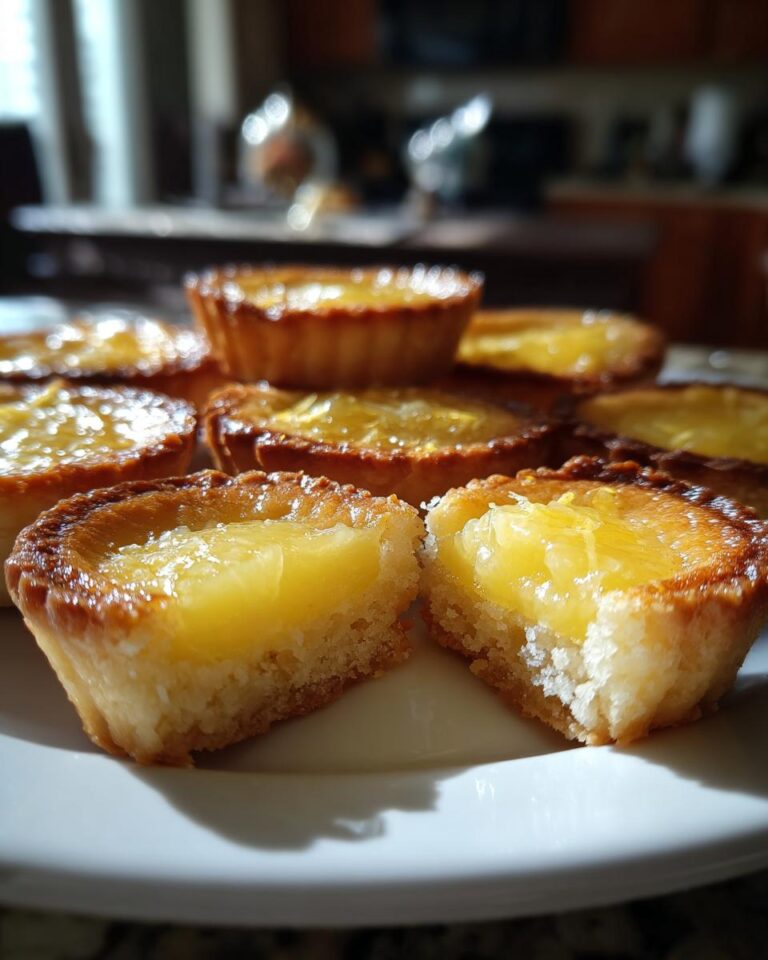
Oh, you HAVE to try these Mini Lemon Tarts (Classic)! Seriously, they’re like a little burst of sunshine in every bite. I’ve been making these for, well, let’s just say a *long* time, and trust me, this recipe is the real deal. What makes these extra special? They’re unbelievably simple! You get that perfect balance of sweet and tart, and the buttery crust just melts in your mouth. Whether you’re a seasoned baker or just starting out, you can totally nail these. I’m all about easy recipes that taste like a million bucks, and these mini tarts are exactly that. You’ll be the star of the show, I promise!
Ingredients for Perfect Mini Lemon Tarts (Classic)
Okay, let’s talk ingredients! You won’t believe how simple these are. The key is to use good quality stuff, and don’t skimp on the fresh lemon juice – it makes all the difference, trust me! This list is your golden ticket to the best Mini Lemon Tarts ever, so let’s get started!
Ingredients List
- 1 1/4 cups all-purpose flour – yep, the regular stuff!
- 1/4 cup powdered sugar – sifted, if you’re feeling fancy!
- 1/4 teaspoon salt – just a pinch to balance the sweetness.
- 1/2 cup (1 stick) cold unsalted butter, cut into cubes – make sure it’s *cold*!
- 3-5 tablespoons ice water – start with 3 and add more if needed.
- 1 cup granulated sugar – for that perfect sweetness.
- 1/2 cup fresh lemon juice – squeeze it yourself for the best flavor, trust me!
- 2 large eggs – gotta bind it all together!
- 2 tablespoons unsalted butter, melted – adds richness.
- Lemon zest for garnish (optional) – because it makes them look so pretty!
Step-by-Step Instructions: How to Make Mini Lemon Tarts (Classic)
Alright, let’s get down to the fun part: making these gorgeous Mini Lemon Tarts! Don’t worry, it’s easier than you think. I’m going to walk you through it step by step, so you’ll feel like a pro in no time. The key is to take your time and follow the steps – trust me, it’s worth it!
Making the Tart Crust
First up, we’re making the crust. In a bowl, whisk together your flour, powdered sugar, and salt. Then, cut in the cold butter. I usually use a pastry blender, but your fingers work too – just pinch the butter into the flour mixture until it looks like coarse crumbs. Next, add ice water, a tablespoon at a time, mixing until the dough comes together. Don’t overmix! Form it into a disc, wrap it up, and pop it in the fridge for at least 30 minutes. This is super important for a flaky crust, so don’t skip it!
Forming and Baking the Tart Shells
Now, take your chilled dough and roll it out on a lightly floured surface. You want it about 1/8 inch thick. Use a cookie cutter or the rim of a glass to cut out circles a bit bigger than your mini tart pans. Gently press the dough into the pans, making sure it fits snugly. Trim off any excess dough. Next, blind bake the tart shells at 375°F (190°C) for 12-15 minutes, or until the edges are golden brown. I usually use pie weights or dried beans in the shells to keep them from puffing up, but it’s not totally necessary.
Preparing the Lemon Filling
While the crusts are baking, let’s whip up that zesty filling! In a separate bowl, whisk together your granulated sugar, fresh lemon juice, eggs, and melted butter. That’s it! See? Super simple. Make sure everything is well combined and smooth. Be careful with that melted butter – it can splatter!
Baking and Cooling the Mini Lemon Tarts (Classic)
Once the crusts are baked, pour the lemon filling into the warm tart shells. Pop them back in the oven and bake for another 15-20 minutes, or until the filling is set. You’ll know they’re done when the filling jiggles just a little bit. Let the Mini Lemon Tarts cool completely before removing them from the pans. This is crucial – I know, it’s hard to wait, but it’ll make them so much easier to handle!
Garnish and Serving
For an extra touch of elegance, you can garnish the Mini Lemon Tarts with some fresh lemon zest. It adds a beautiful pop of color and a burst of fresh lemon flavor! Then, dig in and enjoy those lovely Mini Lemon Tarts!
Why You’ll Love These Mini Lemon Tarts (Classic)
Seriously, these Mini Lemon Tarts are a total crowd-pleaser! Not only are they absolutely delicious, but they’re also surprisingly easy to make. Here’s why you’re going to fall head over heels for this recipe:
Benefits of Mini Lemon Tarts
Quick and Easy
Seriously, you can whip these up in under an hour (including baking time!).
Refreshing Flavor
That perfect balance of sweet and tart is just heavenly!
Perfect for Any Occasion
Birthdays, holidays, or just a Tuesday night treat – these Mini Lemon Tarts fit the bill!
Impressive Presentation
They look so fancy, but they’re secretly super simple. Your friends will think you’re a baking genius!
Tips for Success: Making the Best Mini Lemon Tarts
Okay, so you want to make these Mini Lemon Tarts absolutely perfect? Here are a few secrets I’ve learned over the years to help you out. Trust me, these little tricks will take your tarts from good to AMAZING!
Working with the Dough
First off, don’t overwork that dough! Mix it just until it comes together. Overmixing will make it tough. And remember that chilling time? Don’t skip it! It’s super important for a flaky, tender crust. I usually chill mine for at least an hour for the best results, but 30 minutes is the minimum.
Important of Fresh Lemon Juice
Listen, fresh lemon juice is non-negotiable! The bottled stuff just doesn’t have the same zing and brightness. Freshly squeezed lemons make all the difference in the world! You’ll taste the difference, I promise.
Cooling is Crucial
Patience, my friend, is key! Let those Mini Lemon Tarts cool *completely* before you even think about touching them. This allows the filling to set properly, and prevents a soggy bottom. I know, it’s torture, but it’s worth the wait!
Mini Lemon Tarts (Classic) Variations
Ready to get creative? Once you’ve mastered the classic recipe, you can totally play around with the flavors and crusts! It’s fun to experiment, just to see what kind of tasty results you get. Trust me, it’s a great way to make these Mini Lemon Tarts your own!
Flavor Variations
Think beyond just lemon! Try adding a pinch of lavender or a tiny bit of cardamom to the filling. You could also swap in lime or grapefruit juice for a different citrusy twist! A little orange zest never hurt anyone either, it’s all good!
Crust Variations
If you’re feeling adventurous (or short on time), try a graham cracker crust! Just crush up some graham crackers, mix them with melted butter and sugar, and press them into the tart pans. You could also try different flours for the crust, like almond flour or spelt flour, for a nutty flavor!
Serving Suggestions for Your Mini Lemon Tarts
So, you’ve got these gorgeous Mini Lemon Tarts ready to go? Awesome! They’re fantastic all on their own, but if you want to take them up a notch, here are a few ideas. I love serving them with a dollop of whipped cream (homemade, if you’re feeling fancy!), a scoop of vanilla ice cream, or even just a few fresh berries. Yum!
Storage and Reheating Instructions for Mini Lemon Tarts
Okay, so you made a batch of these amazing Mini Lemon Tarts, but you didn’t eat them all (I’m impressed!). No worries! You can store any leftovers in the fridge, in an airtight container, for up to 3 days. To refresh them, just let them sit at room temperature for a bit before serving. I don’t recommend reheating them; they’re best enjoyed cold, in my opinion! But, hey, you do you!
Estimated Nutritional Information for Mini Lemon Tarts (Classic)
Alright, so, I’m not a nutritionist, so this is just an *estimate*, okay? But it’s always good to have a general idea, right? Keep in mind that these values can vary depending on your ingredients and how you make them. Here’s a rough idea of what you might expect per serving:
Frequently Asked Questions About Mini Lemon Tarts
Got questions? I’ve got answers! I get asked these all the time, so I figured I’d put them all in one place. Hopefully, these will help you make the perfect Mini Lemon Tarts, stress-free! Don’t be afraid to ask, and happy baking!
Can I make the tart shells ahead of time?
Absolutely! That’s one of the best parts about this recipe. You can totally make the tart shells a day or two in advance and store them in an airtight container at room temperature. Just fill them with the lemon filling right before serving. It’s a lifesaver when you’re planning a party!
Can I freeze Mini Lemon Tarts?
Yes, you can! Before you add the filling, freeze the baked tart shells. Once frozen, pop them in a freezer bag. They’ll keep for up to a month. Thaw them completely before filling. As for the filled Mini Lemon Tarts, freezing isn’t ideal because the filling texture might change. But if you must, freeze them and thaw them slowly in the fridge.
What if I don’t have mini tart pans?
No problem! You can totally use a muffin tin instead. Just press the dough into the muffin cups and bake as directed. You might need to adjust the baking time slightly, so keep an eye on them. You could also make one big tart in a pie plate – just adjust the baking time accordingly. Get creative!
How can I prevent a soggy bottom crust?
A soggy bottom crust is the worst, I know! To avoid it, make sure you blind bake your tart shells properly. Also, make sure the filling isn’t too wet. If you’re really worried, you can brush the inside of the baked tart shells with a thin layer of egg white before adding the filling. It’ll create a barrier!
What can I substitute for the lemon juice?
If you don’t have lemons, no worries! You can use lime juice instead. It’ll give you a slightly different flavor, but it’s still delicious. You could also try grapefruit juice, but it’ll be a bit more bitter. Just make sure it’s fresh-squeezed for the best results! I love to mix it up sometimes!
Final Thoughts
There you have it! My absolute favorite recipe for Mini Lemon Tarts (Classic). I hope you love it as much as I do! Seriously, give it a try. You won’t regret it! And hey, if you make them, let me know how they turn out in the comments below! Happy baking, friends!
Print
Make 12: The Perfect Mini Lemon Tarts (Classic)
- Total Time: 1 hour 20 minutes
- Yield: 24 mini tarts
- Diet: Vegetarian
Description
These mini lemon tarts are a classic dessert. They are zesty, sweet, and perfect for any occasion.
Ingredients
- 1 1/4 cups all-purpose flour
- 1/4 cup powdered sugar
- 1/4 teaspoon salt
- 1/2 cup (1 stick) cold unsalted butter, cut into cubes
- 3-5 tablespoons ice water
- 1 cup granulated sugar
- 1/2 cup fresh lemon juice
- 2 large eggs
- 2 tablespoons unsalted butter, melted
- Lemon zest for garnish (optional)
Instructions
- Make the crust: Whisk together flour, powdered sugar, and salt. Cut in cold butter until the mixture resembles coarse crumbs.
- Gradually add ice water, mixing until the dough comes together. Form into a disc, wrap, and chill for at least 30 minutes.
- Roll out the dough and cut out circles to fit mini tart pans. Press the dough into the pans.
- Blind bake the tart shells at 375°F (190°C) for 12-15 minutes, or until golden.
- Make the filling: Whisk together sugar, lemon juice, eggs, and melted butter.
- Pour the filling into the baked tart shells.
- Bake for 15-20 minutes, or until the filling is set.
- Let the tarts cool completely. Garnish with lemon zest (optional).
Notes
- For best results, use fresh lemon juice.
- You can make the tart shells a day ahead.
- Store leftover tarts in the refrigerator.
- Prep Time: 45 minutes
- Cook Time: 35 minutes
- Category: Dessert
- Method: Baking
- Cuisine: American
Nutrition
- Serving Size: 1 tart
- Calories: 150
- Sugar: 15g
- Sodium: 25mg
- Fat: 8g
- Saturated Fat: 5g
- Unsaturated Fat: 3g
- Trans Fat: 0g
- Carbohydrates: 18g
- Fiber: 0g
- Protein: 2g
- Cholesterol: 35mg


