
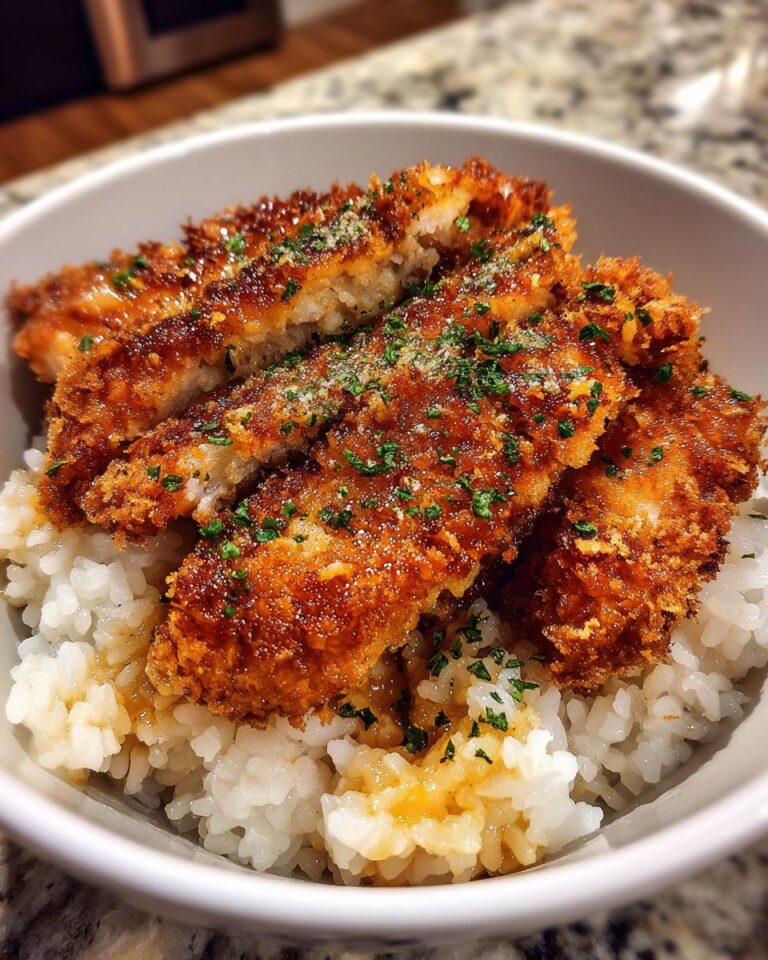
Okay, so you’re looking for that perfect weeknight dinner that feels special but doesn’t take forever? You’ve landed in the right spot! This Japanese Katsu Bowl is one of those recipes I come back to again and again. It’s got that amazing crispy chicken, which we’ll get perfectly golden in the oven, piled high on this fluffy, seasoned rice. Seriously, the combination of that savory chicken with the subtly sweet and salty rice? It’s just divine. It hits all the right notes – comforting, flavorful, and totally doable even when you’re juggling a million things. Trust me, this is going to be a new favorite in your rotation!
Why You’ll Love This Japanese Katsu Bowl – Crispy Chicken Over Fluffy Rice
Honestly, why wouldn’t you love this? It’s one of those meals that just *works*. Here’s the lowdown on why this Japanese Katsu Bowl is a winner:
- It’s super quick to whip up, making it a lifesaver on busy weeknights.
- The flavor is just out of this world – that perfect sweet and salty dance is pure magic.
- It’s the ultimate comfort food, hitting all the right cozy notes.
Quick and Easy Weeknight Meal
Seriously, you can have this on the table in under an hour, but it tastes like you spent all afternoon in the kitchen! It’s designed for those nights when you want something delicious without the fuss. The prep is straightforward, and the cooking happens mostly hands-off in the oven, which is my kind of cooking!
A Delightful Blend of Sweet and Salty Flavors
This is where the real magic happens. You get that wonderfully savory, crispy chicken, and then you pair it with rice that’s been kissed with soy sauce, mirin, and a touch of sugar. It’s that perfect sweet and salty combo that just makes your taste buds sing. It’s balanced, it’s delicious, and it’s totally addictive!
Satisfying Comfort Dish
There’s just something about a bowl piled high with fluffy rice and perfectly cooked chicken that feels like a warm hug. This Japanese Katsu Bowl is hearty, filling, and just plain satisfying. Whether you’ve had a long day or you’re just craving something truly comforting, this dish delivers every single time.
Gathering Your Ingredients for the Ultimate Japanese Katsu Bowl – Crispy Chicken Over Fluffy Rice
Alright, let’s get our game faces on and gather everything we need for this fantastic Japanese Katsu Bowl! It’s all about having the right bits and pieces ready to go. Don’t worry, it’s not complicated at all. Having everything prepped makes the actual cooking part a total breeze. You’ll see!
For the Crispy Chicken
We need about 1.5 pounds of boneless, skinless chicken thighs. They’re just more forgiving and tender than breasts, you know? Then, we’ll need 1/2 cup of all-purpose flour for dredging, 2 large eggs that you’ll give a good whisking, and a whole cup of panko breadcrumbs. Panko is key for that super crunchy coating we love!
For the Seasoned Rice
For the base, grab 1 cup of cooked short-grain rice. This type of rice is perfect because it’s a little sticky and holds together beautifully. To season it up, we’ll use 2 tablespoons of soy sauce, 1 tablespoon of mirin (that’s Japanese sweet rice wine, gives it a lovely depth!), 1 tablespoon of sake (optional, but nice!), and just 1 teaspoon of sugar to balance it all out.
Optional Garnishes
This is where you get to play! I love adding some thinly shredded cabbage for crunch, a drizzle of Japanese mayonnaise if I’m feeling fancy, and a little pickled ginger to cut through the richness. Totally up to you what you fancy!
Preparing Your Japanese Katsu Bowl – Crispy Chicken Over Fluffy Rice: A Step-by-Step Guide
Alright, let’s get this show on the road! Making this Japanese Katsu Bowl is like a little culinary adventure, and I promise it’s way easier than it looks. We’re going to break it down into simple steps so you can get that amazing crispy chicken and fluffy rice just right. Remember to preheat your oven first – that’s super important for getting that chicken perfectly cooked!
Preparing the Chicken for Crisping
First things first, let’s get our chicken ready for its crispy coating. Cut those chicken thighs into nice, bite-sized pieces, about an inch big. Now, set up your dredging station! You’ll want three shallow dishes. Put the flour in the first, the beaten eggs in the second, and those lovely panko breadcrumbs in the third. Take each chicken piece and give it a good dredge in the flour, making sure it’s all coated. Then, dip it into the egg wash, let any excess drip off, and finally, press it into the panko. Get a nice, even coating all around – this is where the crispiness magic starts!
Achieving Crispy Chicken Perfection
Now for the fun part! Heat about half an inch of vegetable oil in a large, oven-safe skillet over medium-high heat. You want that oil to be nice and hot – if you drop a panko crumb in, it should sizzle right away. Carefully place your breaded chicken pieces into the hot oil, making sure not to crowd the pan. Sear them for about 2-3 minutes per side until they’re beautifully golden brown. This initial sear is key for that amazing crunch! Once they look gorgeous and golden, carefully transfer the whole skillet into your preheated oven. Let them bake for about 10-12 minutes, or until they’re cooked all the way through. You want them to be juicy inside and super crispy outside.
Crafting the Fluffy Seasoned Rice
While the chicken is doing its thing in the oven, let’s whip up that delicious seasoned rice. In a small saucepan, combine your cooked short-grain rice with the soy sauce, mirin, sake (if you’re using it), and that little bit of sugar. Gently stir everything together. You don’t want to mash the rice, just get it nicely coated and heated through. Give it a taste and see if you want a little more sweetness or saltiness – you’re the boss! This rice is going to be the perfect fluffy bed for our crispy chicken.
Assembling Your Japanese Katsu Bowl
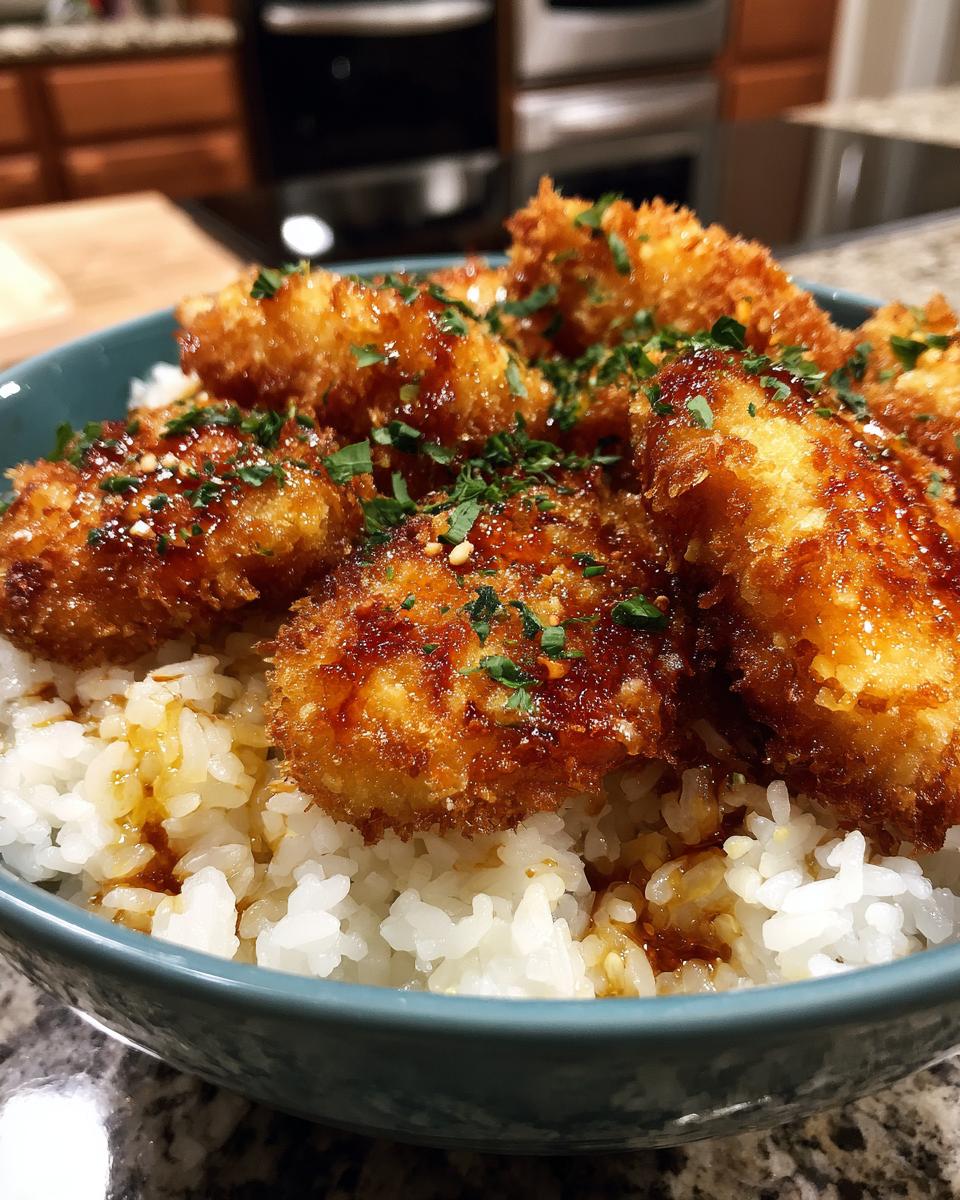
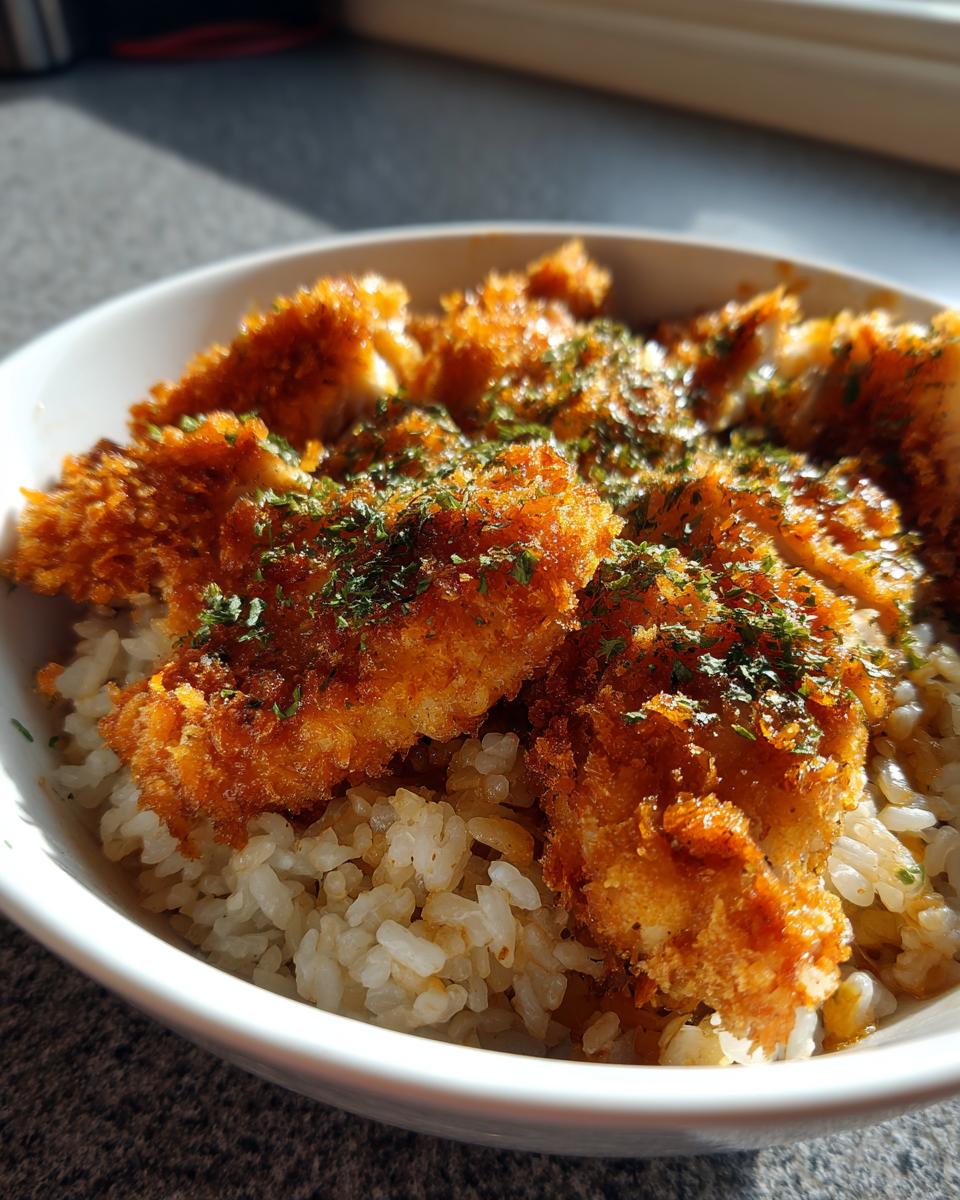
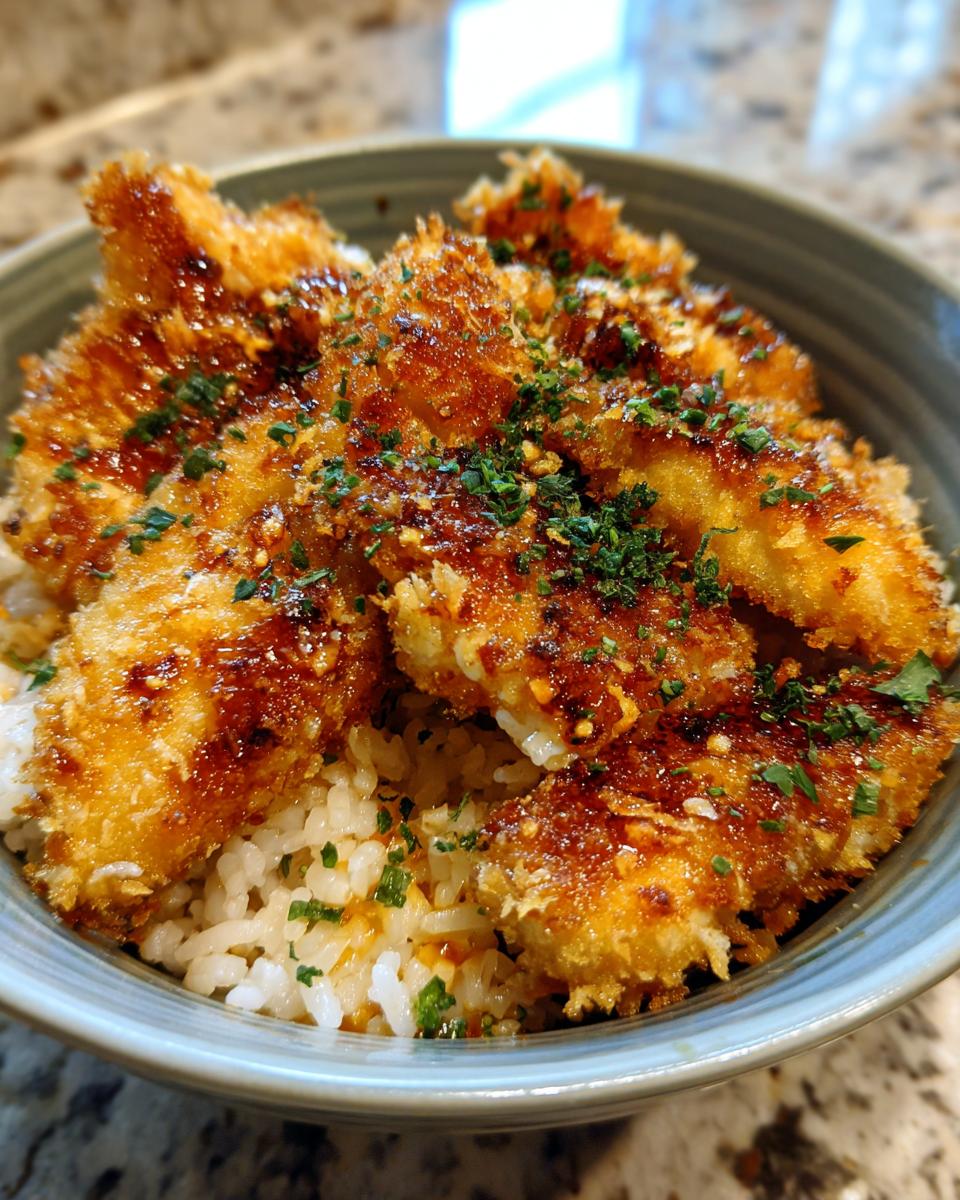
The grand finale! Grab your bowls. Spoon a generous amount of that warm, seasoned rice into the bottom of each bowl. Then, pile on those golden, crispy chicken pieces right on top of the rice. Now’s the time to add any of those fun optional garnishes like shredded cabbage, a swirl of Japanese mayo, or a little pickled ginger. Look at that! You’ve just made an incredible Japanese Katsu Bowl!
Essential Equipment for Your Japanese Katsu Bowl
Alright, you don’t need a whole professional kitchen for this Japanese Katsu Bowl, but a few key players will make your life SO much easier. Having the right tools means you can focus on the fun stuff – like getting that chicken perfectly crispy! Trust me, these are the essentials that make this recipe a breeze.
For Cooking the Chicken
You’ll definitely want a good oven-safe skillet for this. It lets you sear the chicken on the stovetop and then pop it right into the oven without dirtying another pan. A large one is best so you don’t crowd the chicken!
For Preparing the Rice
A small saucepan is all you need for the rice. Plus, you’ll want some shallow dishes – three, to be exact – for setting up your dredging station. A whisk or fork for the eggs is handy too!
Tips for Japanese Katsu Bowl Success
Okay, let’s talk about making this Japanese Katsu Bowl absolutely perfect. It’s all about a few little tricks that really elevate the dish. These are the things I’ve learned that make all the difference between a good katsu bowl and a truly *amazing* one!
Achieving Extra Crispy Chicken
Want that *really* satisfying crunch? Make sure your oil is hot enough before you sear the chicken – it should sizzle immediately! Also, don’t overcrowd the pan; give those chicken pieces some space to crisp up properly.
Perfecting the Seasoned Rice Balance
The rice seasoning is totally personal! After you mix in the soy sauce, mirin, and sugar, definitely give it a little taste. Need more salt? A tiny splash more soy sauce. Want it a bit sweeter? Add a pinch more sugar. Make it YOUR perfect sweet and salty balance.
Frequently Asked Questions about Japanese Katsu Bowl
Got questions about whipping up this awesome Japanese Katsu Bowl? I’ve got you covered! Let’s dive into some common things people ask to make sure your crispy chicken and fluffy rice dreams come true.
Can I make this a healthier option?
Absolutely! For a lighter take on this skillet dinner, you can skip the frying step and just bake the breaded chicken directly on a baking sheet until golden and cooked through. It won’t be *quite* as crispy, but still delicious!
What kind of rice is best for this dish?
Short-grain rice is your best friend here! It has a slightly sticky texture that holds up beautifully and absorbs all those yummy seasonings. Trust me, it forms the perfect fluffy bed for our crispy chicken in this comfort dish.
How can I make the chicken even crispier?
The secret weapon for extra crispy chicken is ensuring your oil is nice and hot before you sear it. It should sizzle right away! Also, don’t overcrowd the pan; give those lovely breaded pieces some breathing room to get perfectly golden and crunchy.
Storing and Reheating Your Japanese Katsu Bowl
Leftovers of this amazing Japanese Katsu Bowl? Lucky you! Store any extra crispy chicken and seasoned rice in separate airtight containers in the fridge. The chicken coating can get a little soft once it’s been chilled, but don’t worry, we can revive it! To reheat, I like to pop the chicken in a hot oven (around 375°F or 190°C) for about 5-8 minutes to get some of that crispiness back. You can gently warm the rice in the microwave or on the stovetop. Assemble it again and enjoy!
Your Next Steps with This Japanese Katsu Bowl
So, what are you waiting for? Give this Japanese Katsu Bowl a try this week! I’d absolutely love to hear how it turns out for you. Drop a comment below with your experience, or let me know if you added any special twists. And if you loved it, a quick rating would be fantastic! You can also find more recipe inspiration on Pinterest.
Print
Amazing Japanese Katsu Bowl: 1 Crispy Chicken Dream
- Total Time: 45 minutes
- Yield: 4 servings
- Diet: Vegetarian
Description
A delicious Japanese Katsu Bowl featuring crispy, oven-baked chicken served over fluffy seasoned rice. This dish offers a perfect balance of sweet and salty flavors, making it a satisfying weeknight meal.
Ingredients
- 1.5 lbs boneless, skinless chicken thighs
- 1 cup panko breadcrumbs
- 1/2 cup all-purpose flour
- 2 large eggs, beaten
- 1 cup cooked short-grain rice
- 2 tablespoons soy sauce
- 1 tablespoon mirin
- 1 tablespoon sake
- 1 teaspoon sugar
- Vegetable oil, for cooking
- Optional garnishes: shredded cabbage, Japanese mayonnaise, pickled ginger
Instructions
- Preheat oven to 400°F (200°C).
- Cut chicken thighs into 1-inch pieces.
- Set up three shallow dishes: one with flour, one with beaten eggs, and one with panko breadcrumbs.
- Dredge each chicken piece in flour, then dip in egg, and finally coat with panko.
- Heat about 1/2 inch of vegetable oil in a large oven-safe skillet over medium-high heat.
- Sear chicken pieces for 2-3 minutes per side until golden brown.
- Transfer skillet to the preheated oven and bake for 10-12 minutes, or until chicken is cooked through.
- While chicken bakes, prepare the rice. In a small saucepan, combine cooked rice with soy sauce, mirin, sake, and sugar. Stir gently to combine and heat through.
- Assemble the bowls by placing a generous portion of seasoned rice at the bottom.
- Top the rice with the crispy chicken.
- Add optional garnishes as desired.
Notes
- For a healthier option, you can bake the breaded chicken without frying, though it may not be as crispy.
- Adjust the sugar in the rice to your preference for sweetness.
- Ensure the oil is hot enough before adding chicken for a crispier coating.
- Prep Time: 20 minutes
- Cook Time: 25 minutes
- Category: Main Course
- Method: Oven Baked and Pan Fried
- Cuisine: Japanese
Nutrition
- Serving Size: 1 bowl
- Calories: 550 kcal
- Sugar: 8 g
- Sodium: 700 mg
- Fat: 25 g
- Saturated Fat: 5 g
- Unsaturated Fat: 20 g
- Trans Fat: 0 g
- Carbohydrates: 45 g
- Fiber: 3 g
- Protein: 35 g
- Cholesterol: 150 mg


