
Okay, so, you know how everyone raves about apple crisp? Well, honey, let me tell you, I’ve got a **Honey version** that’ll blow your socks off! Seriously, this isn’t just any apple crisp; it’s the kind that makes your kitchen smell like pure autumn happiness. And the best part? It’s ridiculously easy. I’m talking, like, you could whip this up even if you’re a kitchen newbie. I’ve made this recipe countless times, from family gatherings to potlucks, and it’s always a hit. I’ve even won a blue ribbon at the county fair with a slightly tweaked version!
I’ve always loved baking, and apple crisp is one of the first things I truly mastered. This recipe’s been tweaked and perfected over years, so trust me, it’s foolproof. The secret? That gorgeous drizzle of honey, of course! It adds this incredible depth of flavor that takes a simple dessert to the next level. So, grab your apples, and let’s get baking! You won’t regret it.
Ingredients for this Delicious Honey Version
Alright, friends, here’s what you’ll need to make this magic happen! First, you’ll want about six medium apples – whatever kind you love, but I’m partial to a mix of Granny Smith and Honeycrisp. Then, you’ll need a half-cup of good quality honey, a tablespoon of fresh lemon juice, and a teaspoon of cinnamon. For the topping, grab a cup of rolled oats, a half-cup of all-purpose flour, a half-cup of packed brown sugar, and, oh, so important, a half-cup of cold, cubed butter. Don’t skimp on the butter!
How to Make the Perfect Honey Version of Apple Crisp: Step-by-Step Instructions
Okay, now for the fun part: let’s get this **Honey Version** apple crisp going! Don’t worry, it’s super simple. Just follow these steps, and you’ll be smelling apple-y goodness in no time. I promise!
Preparing the Apple Filling
First things first, let’s get those apples ready. Peel and slice your apples – I usually aim for about 1/4-inch thick slices. Toss them in a big bowl with that glorious honey, the lemon juice (it brightens up the flavors!), and the cinnamon. Make sure everything is well coated. You want every single apple slice to be glistening with that honey goodness. Give it a good toss! It’s important to make sure all the apples are coated evenly, so every bite is packed with flavor.
Making the Crumb Topping
Next up, the topping! In a separate bowl, combine your oats, flour, and brown sugar. Whisk it all together – this is where the magic happens! Now, add the cold, cubed butter. Here’s a tip: the colder the butter, the better. You can use a pastry cutter, two knives, or even your fingertips (clean, of course!) to cut the butter into the dry ingredients. You want the mixture to look like coarse crumbs. Don’t overwork it – you still want some little clumps of butter for that perfect texture. It should be crumbly, not a paste.
Assembling and Baking Your Honey Version Apple Crisp
Alright, time to put it all together! Pour the apple mixture into a baking dish – I usually use an 8×8 inch dish, but a slightly bigger one is fine too. Then, sprinkle that glorious crumb topping evenly over the apples. Make sure the apples are completely covered. Now, pop it in a preheated oven at 375°F (190°C). Bake for about 30-40 minutes, or until the topping is golden brown and the apples are tender. You can tell the apples are ready when they’re bubbling around the edges. Keep an eye on it, though; every oven is different! And trust me, the aroma alone will tell you when it’s just right!
Why You’ll Love This Honey Version Recipe
- Seriously simple: Seriously, even if you’re a beginner, you can totally nail this! There’s nothing complicated about it.
- That honey flavor: The honey just elevates everything! It adds such a rich, complex sweetness that regular apple crisp just can’t match. It’s my secret weapon!
- Perfect texture: You get that wonderful contrast of tender, honey-glazed apples and a perfectly crumbly, buttery topping. It’s a match made in dessert heaven.
- Crowd-pleaser: Everyone loves apple crisp, and this **Honey Version** always disappears fast. It’s great for potlucks, family dinners, or just because!
- Customizable: You can totally play around with the spices and add-ins to make it your own. I’ll give you some ideas later, but feel free to experiment!
Tips for Success with Your Honey Version Apple Crisp
Okay, friends, let me give you a few little secrets to make your **Honey Version** apple crisp absolutely perfect every single time! First off, the apples! Don’t skimp on a good mix. I love a blend of tart and sweet – Granny Smith for that zing, and Honeycrisp for their juicy sweetness is a killer combo. You can also play around with different apple varieties, though. Just remember, a little tartness cuts the sweetness of the honey beautifully.
Next, the butter! Make sure your butter is *cold* – like, straight-out-of-the-fridge cold. This is key for that perfect crumbly topping. I usually cube it and then pop it back in the fridge while I prep the apples to make sure it stays nice and chilled. And finally, baking time! Every oven is a little different, so keep an eye on your crisp. You want that topping golden brown and the apples tender. If the top starts to brown too quickly, you can always tent it with some foil. Trust me, these little tips make all the difference!
Variations for Your Honey Version Apple Crisp
Okay, so you’ve got the basic **Honey Version** down, right? Awesome! Now, let’s get creative! One of my favorite things about this recipe is how easy it is to tweak. Want to jazz things up? How about adding a pinch of nutmeg or cardamom to the apple mixture? Oh, so good! You could also throw in some chopped walnuts or pecans to the crumb topping for a bit of crunch. And, for the ultimate treat, try adding a handful of dried cranberries or raisins to the apples.
For a real treat, a drizzle of caramel before serving is fantastic! The possibilities are truly endless, so don’t be afraid to experiment and find your favorite twist on this classic dessert. Trust me; it’s hard to mess up!
Frequently Asked Questions About Honey Version Apple Crisp
Alright, let’s tackle some of the most common questions I get about my **Honey Version** of Apple Crisp. I get these all the time, so hopefully, this will clear things up for you! Don’t worry, even if you’re new to baking, it’s all super straightforward.
Can I use different types of apples for this Honey Baked Apple Crisp?
Absolutely! That’s the beauty of this recipe – you can totally mix and match your apples! While I love a combo of Granny Smith for tartness and Honeycrisp for sweetness, feel free to experiment. Braeburns, Galas, Fujis – they all work wonderfully. Just remember that different apples have different textures, so your crisp might be slightly softer or firmer depending on what you use. The key is to find a mix you enjoy. Don’t be afraid to get creative with it! I’ve even used a mix of baking apples and some of those little, sweeter apples sometimes. The honey will do its job of keeping everything flavorful!
How do I store leftover Honey Baked Apple Crisp?
If you *somehow* have leftovers (which is rare in my house!), storing your **Honey Baked Apple Crisp** is pretty easy. Let it cool completely first, then cover it tightly with plastic wrap or pop it into an airtight container. It’ll keep in the refrigerator for about 3-4 days. You can reheat it in the microwave (30 seconds at a time) or in the oven (at 350°F or 175°C) until it’s warmed through. Just a heads-up: the topping might lose a little of its crispiness, but trust me, it’ll still taste amazing!
Can I make this Honey Version Apple Crisp ahead of time?
You bet! This **Honey Version** Apple Crisp is actually great for making ahead. You can prep the apple filling and the crumb topping separately, then store them in the fridge. When you’re ready to bake, just assemble and bake as usual. I wouldn’t recommend assembling the whole thing *too* far in advance, as the apples might release a bit of liquid. But, if you do want to assemble it completely, you can cover it tightly and put it in the fridge for a few hours before baking. Just add a few extra minutes to the baking time if it’s coming straight from the fridge. Easy peasy!
Nutritional Information for the Honey Version Apple Crisp
Okay, so, listen up, because I have to say this: the nutritional info can vary *wildly* depending on your ingredients and the brands you use! These numbers are just estimates, and they’re not exact. But, hey, it’s dessert, right? I can’t give you the exact values, but I can tell you it’s delicious! And that’s what matters most, right?
Serving Suggestions for Your Honey Version Apple Crisp
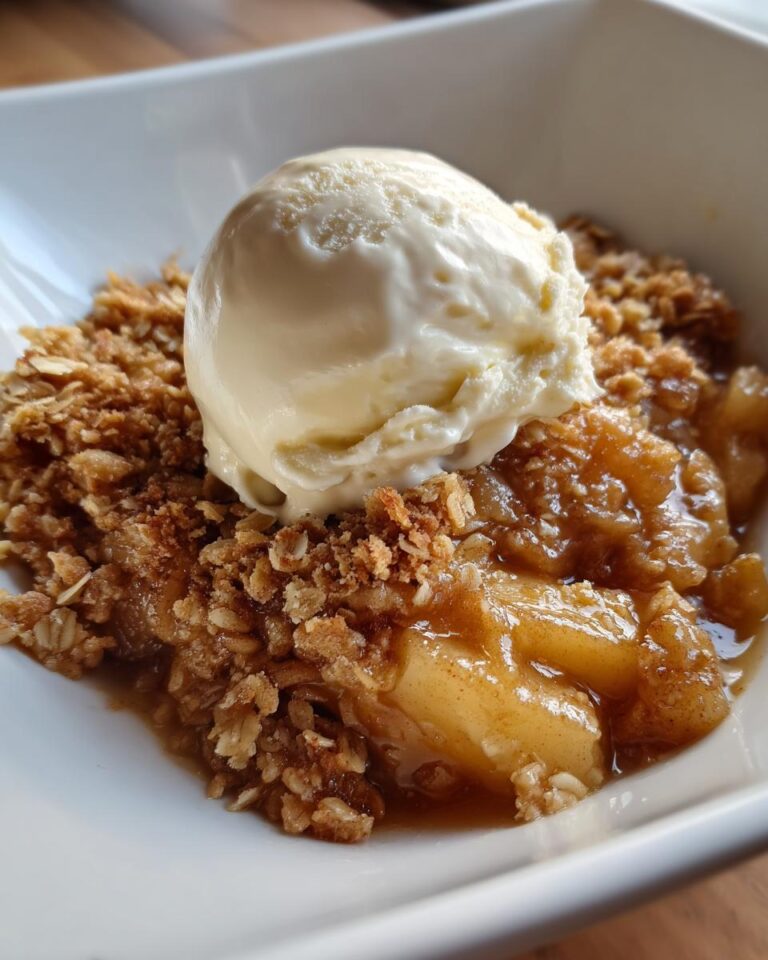
Okay, now for the best part – serving! You can totally enjoy this **Honey Version** apple crisp on its own, warm from the oven, and it’s fantastic. But, if you want to take it over the top (and trust me, you do!), a scoop of vanilla ice cream is the classic pairing. Or, if you’re feeling fancy, a dollop of fresh whipped cream is divine. And, for an extra touch of decadence, a drizzle of caramel sauce… oh my goodness! Whatever you choose, it’s gonna be amazing!
Enjoy Your Honey Version Apple Crisp!
Woohoo! You did it! I hope you love this **Honey Version** of apple crisp as much as I do. Now, the best part? Dig in and enjoy! I’d *love* to hear what you think, so please rate the recipe and leave a comment below. If you loved it, be sure to share it with your friends and family – and don’t forget to tag me if you post a picture on social media! Happy baking, everyone!
Print
Irresistible Honey Version Apple Crisp: 1 Recipe!
- Total Time: 1 hour
- Yield: 6 servings
- Diet: Vegetarian
Description
A delicious Honey Baked Apple Crisp recipe.
Ingredients
- Apples (6 medium, peeled and sliced)
- Honey (1/2 cup)
- Lemon juice (1 tablespoon)
- Cinnamon (1 teaspoon)
- Oats (1 cup)
- Flour (1/2 cup)
- Brown sugar (1/2 cup)
- Butter (1/2 cup, cold and cubed)
Instructions
- Preheat oven to 375°F (190°C).
- Toss apples with honey, lemon juice, and cinnamon.
- Combine oats, flour, and brown sugar.
- Cut in butter until crumbly.
- Place apple mixture in a baking dish.
- Sprinkle the oat mixture over the apples.
- Bake for 30-40 minutes, or until golden brown and apples are tender.
Notes
- Serve warm with a scoop of vanilla ice cream.
- You can add a pinch of salt to the topping.
- Prep Time: 20 minutes
- Cook Time: 40 minutes
- Category: Dessert
- Method: Baking
- Cuisine: American
Nutrition
- Serving Size: 1 serving
- Calories: 300
- Sugar: 30g
- Sodium: 50mg
- Fat: 12g
- Saturated Fat: 7g
- Unsaturated Fat: 3g
- Trans Fat: 0g
- Carbohydrates: 48g
- Fiber: 5g
- Protein: 3g
- Cholesterol: 25mg


