
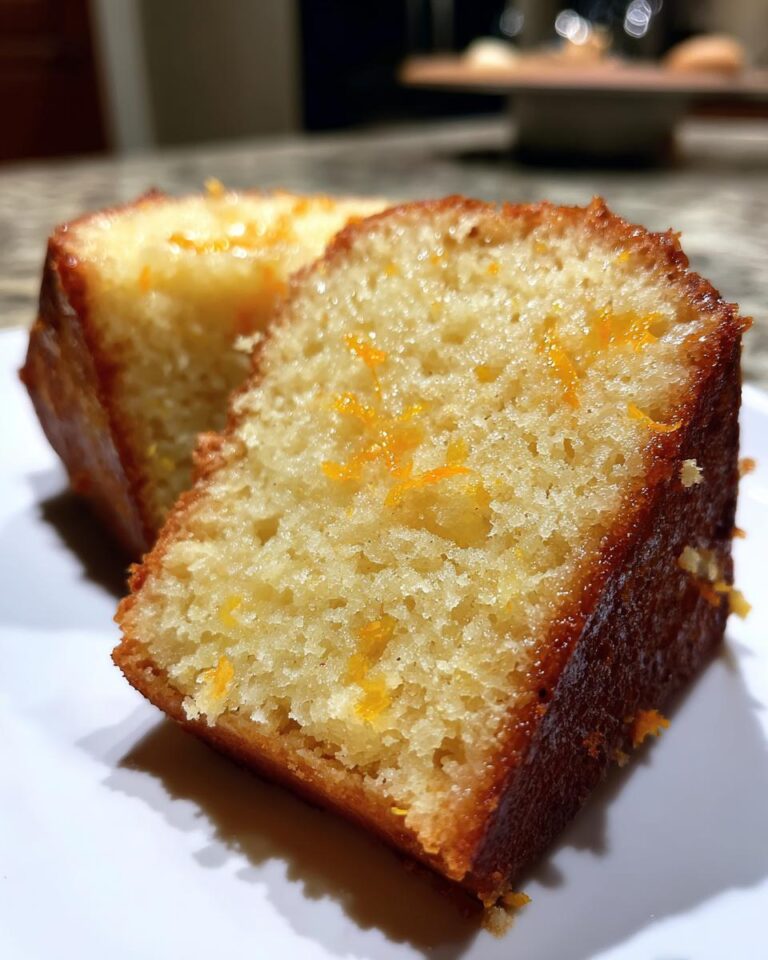
Okay, so listen, are you ready to bake something truly special? I’m talking about a *Grandma-Style Orange Pound Cake with Zest*! Seriously, this cake? It’s like a little slice of sunshine, and it always brings back the best memories. My grandma used to make this for every single family gathering, and the aroma alone… well, it just filled the whole house with happiness.
The secret? It’s all about that vibrant orange zest, which adds a zing you won’t believe! It’s the perfect blend of sweet and tangy, and honestly, you’ll be the star baker of your family after making this. Trust me; I’ve baked hundreds of cakes, and this recipe is the one everyone asks for over and over. Plus, it’s not complicated at all. I’ll walk you through every step, so even if you’re a beginner, you’ll be whipping up this *Grandma-Style Orange Pound Cake* like a pro in no time!
My favorite part? That first bite. It’s so moist and tender, and the orange flavor just bursts in your mouth. You’ll want to make this again and again. So, let’s get baking!
Ingredients for Your Delicious Grandma-Style Orange Pound Cake with Zest
Alright, so before we get started, let’s gather all our goodies! Trust me, having everything prepped and ready to go makes the whole process so much smoother. You know, like a well-oiled baking machine! Here’s what you’ll need to make this sunshine-y treat:
- 2 cups all-purpose flour – Yep, just your regular, everyday flour.
- 1 teaspoon baking powder – This is what gives our cake a little lift!
- 1/2 teaspoon salt – Don’t skip the salt! It balances out all that sweetness.
- 1 cup (2 sticks) unsalted butter, softened – Super important! Make sure your butter is soft, but not melted. I usually take it out of the fridge about an hour before I start.
- 2 cups granulated sugar – Sweet, sweet goodness!
- 4 large eggs – These help bind everything together and give the cake its structure.
- 1 teaspoon vanilla extract – A little splash of vanilla just makes everything better.
- 1/2 cup milk – I usually use whole milk, but you can use whatever you have on hand.
- Zest of 2 oranges – Ah, the star of the show! Make sure you zest those oranges before you juice them.
- 1/2 cup orange juice – Freshly squeezed is best, but store-bought works too.
- Powdered sugar (for dusting, optional) – For a pretty finish, and a little extra sweetness!
See? Nothing too crazy, right? Most of these things, you probably already have in your pantry. Now, let’s get those mixing bowls ready!
Equipment You’ll Need
Okay, before we get our hands dirty, let’s talk about the gear! You know, baking is way easier when you have the right tools. Trust me, I’ve learned the hard way that a good setup makes all the difference! Here’s what you’ll need to whip up this amazing *Grandma-Style Orange Pound Cake*:
Essential Baking Tools
First up, the basics! You’ll want to make sure you have these on hand.
- Loaf Pan: A classic 9×5 inch loaf pan is perfect. I love using a non-stick one, but if you don’t have one, just make sure to grease and flour it really well.
- Mixing Bowls: You’ll need a couple of good-sized mixing bowls – one for your wet ingredients and one for the dry ones. I like using glass or stainless steel bowls, but whatever you have works!
- Electric Mixer: While you *can* do this by hand (Grandma did!), an electric mixer (handheld or stand mixer) makes creaming the butter and sugar a breeze. It’s a lifesaver, honestly.
- Whisk: For whisking together those dry ingredients!
- Rubber Spatula: For scraping down the sides of the bowl and making sure you get every last bit of that delicious batter.
- Zester or Fine Grater: Essential for getting that fresh orange zest.
- Toothpick or Cake Tester: To check if your cake is done – you’ll see!
See? Nothing too fancy, just the things that make baking fun and easy!
Measuring Tools for Accuracy
Next up, let’s talk about measuring. Baking is a science, you know! So, accuracy is key to a perfect *Grandma-Style Orange Pound Cake*.
- Measuring Cups: You’ll need both dry measuring cups (for the flour, sugar, etc.) and liquid measuring cups (for the milk and orange juice).
- Measuring Spoons: For those smaller measurements, like baking powder and salt.
I always recommend using actual measuring cups and spoons, not just guessing! It really does make a difference in the end result. And, you know, measuring the ingredients is one thing that’s super important to Grandma, so I try to do it right for her. Alright, with all our tools ready, let’s get baking!
Step-by-Step Instructions: How to Bake the Grandma-Style Orange Pound Cake with Zest
Okay, now for the fun part! This is where the magic happens, and trust me, it’s easier than you think. Just follow these steps, and you’ll be smelling that amazing orange scent in no time! So, put on some music, grab your apron, and let’s do this!
Preparing Your Oven and Pan
First things first, let’s get that oven ready. You’ll want to preheat it to 350°F (175°C). Then, grab your loaf pan. This is super important! You want to make sure your cake doesn’t stick. I like to grease the pan with butter or cooking spray, and then dust it with flour. Don’t worry if you don’t have flour; you can use cocoa powder, too, for a different flavor! Make sure to tap out any extra flour. This helps the cake release perfectly, every single time.
Combining the Dry Ingredients
In a medium-sized bowl, whisk together your dry ingredients. So, that’s your flour, baking powder, and salt. Make sure you whisk it all together really well! This helps distribute the baking powder evenly, so your cake rises beautifully. A little whisking action gets rid of any lumps in the flour, too.
Creaming Butter and Sugar
In a separate, larger bowl (or the bowl of your stand mixer, if you’re lucky!), cream together your softened butter and sugar. This is where your electric mixer comes in handy. You’ll want to beat the butter and sugar together until the mixture is light and fluffy. It should look pale and almost like whipped cream. This takes a few minutes, so be patient! You want those air pockets in there to make the cake nice and tender.
Adding Eggs and Vanilla
Next, add your eggs one at a time, mixing well after each addition. This is super important! You don’t want to add all the eggs at once, or your batter might curdle. Then, stir in that vanilla extract. Mmm, the vanilla smell alone is amazing, isn’t it?
Incorporating Dry and Wet Ingredients
Now, we’re going to alternate adding the dry and wet ingredients. Start with about one-third of the dry ingredients, and mix until just combined. Then, add half of the milk, and mix again. Repeat this process, ending with the dry ingredients. Be careful not to overmix! Overmixing can lead to a tough cake. Mix until everything is just combined. A few streaks of flour are okay.
Adding Orange Zest and Juice
This is where the magic happens! Gently stir in that glorious orange zest and orange juice. The kitchen should start smelling amazing right about now! Make sure everything is well combined and that the zest is evenly distributed throughout the batter.
Baking the Grandma-Style Orange Pound Cake
Pour the batter into your prepared loaf pan. Spread it out evenly. Pop that pan into your preheated oven and bake for 50-60 minutes, or until a toothpick inserted into the center comes out clean. Keep an eye on it! Oven times can vary. If the top starts to brown too quickly, you can loosely tent it with aluminum foil. Careful, it splatters!
Cooling and Serving
Once the cake is done, let it cool in the pan for about 10 minutes before transferring it to a wire rack to cool completely. This helps prevent the cake from sticking and makes it easier to remove. Once it’s cooled, you can dust it with powdered sugar, if you like. I usually do – it makes it look so pretty! Slice it up, and enjoy! This *Grandma-Style Orange Pound Cake* is just heavenly. I hope you enjoy it as much as my family does!
Why You’ll Love This Grandma-Style Orange Pound Cake with Zest
Okay, so why should *you* make this *Grandma-Style Orange Pound Cake*? Well, let me tell you! There are so many reasons, but here are a few of my favorites:
- It’s a Flavor Explosion! The combination of fresh orange zest and juice is just incredible. It’s bright, it’s zesty, and it’s the perfect balance of sweet and tangy. You’ll be hooked from the very first bite.
- It’s Surprisingly Easy! Don’t let the “pound cake” part scare you. This recipe is super straightforward, even for beginner bakers. I promise, you can totally do this!
- It’s a Crowd-Pleaser! Seriously, this cake disappears fast! It’s perfect for potlucks, parties, or just a cozy night in. Everyone always raves about it.
- It Makes Your House Smell Amazing! When this cake is baking, the aroma of oranges and vanilla fills your whole house. It’s like a warm hug, seriously.
- It’s Perfect for Any Occasion! Whether it’s a birthday, a holiday, or just a regular Tuesday, this cake is always a good idea. It’s simple enough for everyday, but special enough for any celebration.
- It Keeps Well! Unlike some cakes that dry out quickly, this one stays moist and delicious for days. Perfect for making ahead!
Honestly, what’s not to love? You need to make this *Grandma-Style Orange Pound Cake*! You won’t regret it, I promise!
Tips for Success: Achieving the Perfect Grandma-Style Orange Pound Cake
Okay, so you’ve got your ingredients, you’ve got your oven preheating, and you’re ready to bake. Awesome! But, you know, a few little tricks can make the difference between a good cake and a truly *amazing* *Grandma-Style Orange Pound Cake*. Here are a few things I’ve learned over the years that’ll help you bake the best cake ever!
The Importance of Fresh Orange Zest
Listen, I can’t stress this enough: fresh zest is a *must*! You could technically use some of that pre-made orange zest stuff, but trust me, it just won’t be the same. The fresh zest is where all the flavor lives. It’s where that incredible orange aroma comes from! You want that bright, citrusy punch, don’t you? And you can’t get that from a jar, I promise you.
So, grab a couple of oranges. Wash them well (because, you know, you’re going to be zesting the peel!). Then, use a zester or a fine grater. Just be careful! You only want to get the colorful part of the peel, not the white pith underneath. The pith is bitter, and we don’t want that ruining our cake! Zest those oranges right before you start mixing the batter. That way, the oils in the zest are still fresh and fragrant. You’ll be amazed at the difference it makes. Seriously, this tip alone will take your *Grandma-Style Orange Pound Cake* to the next level.
Avoiding Over-Baking
Okay, so here’s another thing: nobody likes a dry cake! Over-baking is the enemy, so we’ve got to watch out for it. The last thing you want is a cake that’s all crumbly and sad.
The best way to avoid over-baking is to keep a close eye on your cake as it gets close to the end of the baking time. Start checking it a little before the time the recipe says. You know, ovens can be a bit… unpredictable, so it’s always good to check early!
You can tell if it’s done by doing the toothpick test. Stick a toothpick into the center of the cake. If it comes out clean, or with a few moist crumbs, it’s done. If there’s wet batter on the toothpick, it needs more time. Just put it back in the oven and check again in a few minutes. Also, look at the cake! It should be golden brown, and the edges should be pulling away slightly from the sides of the pan. And remember, every oven is different, so baking times are always a suggestion. Keep an eye on your cake, and you’ll be golden!
So, fresh zest and careful baking—follow those two tips, and you’ll be on your way to *Grandma-Style Orange Pound Cake* heaven!
Variations: Spice Up Your Grandma-Style Orange Pound Cake with Zest
Okay, so you’ve mastered the *Grandma-Style Orange Pound Cake*. Congrats! But, you know, sometimes it’s fun to shake things up, right? This recipe is super versatile, so you can totally get creative and make it your own. Here are a few ideas to jazz things up and give your cake a little extra personality!
First off, let’s talk about spices! You know I love a good spice blend. You could add a pinch of ground cardamom or a dash of nutmeg to the batter for a warm, cozy flavor. Or, if you’re feeling adventurous, try a little bit of ground ginger or even a tiny pinch of cayenne pepper for a little kick! Just be careful not to go overboard. You don’t want to overpower that lovely orange flavor.
Now, let’s talk about additions! You could fold in some chopped nuts, like pecans or walnuts, to the batter before you bake it. That adds a nice crunch and a bit of extra texture. Or, if you’re a fan of dried fruit, try adding some dried cranberries or raisins. Just make sure to soak them in a little warm water (or even orange juice!) for a few minutes first so they don’t dry out your cake.
And what about a glaze? Oh, yes, a glaze is always a good idea! You could make a simple orange glaze by whisking together powdered sugar, orange juice (a bit more than you used in the cake!), and a touch of vanilla extract. Or, if you want something a little more decadent, you could make a cream cheese glaze. Just beat cream cheese until smooth, then add powdered sugar, a splash of milk or orange juice, and a little vanilla extract. Yum! Drizzle that glaze over your cooled cake, and you’ve got a dessert that’s truly irresistible.
So, go ahead and experiment! Try different spices, add some nuts or dried fruit, or whip up a delicious glaze. The beauty of this *Grandma-Style Orange Pound Cake* is that it’s a fantastic base for all sorts of fun flavor combinations. Have fun, and let me know what you come up with!
Serving Suggestions for Your Orange Pound Cake
Okay, so you’ve baked your *Grandma-Style Orange Pound Cake*—amazing! Now, how should you serve it? Well, the good news is, this cake is pretty darn perfect all on its own. But, you know, sometimes a little something extra makes it even better! Here are some of my favorite ways to serve this sunshine-y treat:
First off, a simple dusting of powdered sugar is always a winner. It’s classic, it’s elegant, and it adds a little extra sweetness. You can never go wrong with that!
But, if you’re feeling a bit more fancy, you could serve it with a dollop of whipped cream. Homemade is best, of course! It adds a light, airy texture and a touch of extra richness that complements the orange flavor beautifully. Or, if you’re feeling extra decadent, try a scoop of vanilla ice cream! The warm cake and cold ice cream… pure bliss!
Now, let’s talk about drinks! This *Orange Pound Cake* pairs perfectly with a cup of coffee or a nice, hot cup of tea. Seriously, it’s the perfect afternoon treat! If you’re serving it at a brunch, you could offer some mimosas or orange juice. The orange flavor in the cake just enhances the flavors of the drink.
And, if you want to add some fresh fruit? Go for it! Sliced oranges, fresh berries (strawberries, raspberries, or blueberries), or even a simple fruit salad would be amazing. The tartness of the berries plays so well with the sweetness of the cake. It’s a match made in heaven, seriously!
So, there you have it! Whether you keep it simple or get a little extra, your *Grandma-Style Orange Pound Cake* is sure to be a hit. Serve it with love, and enjoy every single bite!
Storage and Reheating Instructions
Okay, so you’ve baked up this amazing *Grandma-Style Orange Pound Cake*—now what? You might be wondering how to keep that deliciousness fresh and ready to eat! Don’t you worry, I’ve got you covered. Here’s what you need to know about storing and, if you have any leftovers (which I highly doubt!), reheating your cake.
The good news is, this *Orange Pound Cake* is pretty good at keeping. You can store it at room temperature for up to three days. Just make sure to keep it in an airtight container or wrap it tightly in plastic wrap. This is super important! If you leave it out in the open, it’ll dry out, and that’s a baking tragedy, trust me!
Now, if you want to keep your *Grandma-Style Orange Pound Cake* around for longer, you can totally freeze it. Wrap the whole cake (or individual slices) tightly in plastic wrap, then put it in a freezer bag. It should stay good in the freezer for up to two or three months. When you’re ready to eat it, just let it thaw at room temperature. It might take a few hours for the whole cake to thaw, depending on how big it is.
As for reheating, I usually don’t bother. This cake is so good, I’m happy to eat it straight from the fridge or at room temperature! But if you like your cake warm… well, I get it! You can warm a slice in the microwave for a few seconds (15-20 seconds should do it!). Or, if you want to be fancy, you can warm it in the oven at a low temperature (like 300°F or 150°C) for a few minutes. Just be careful not to overdo it! You don’t want to dry it out.
And that’s it! With these simple storage and reheating tips, you can enjoy your *Grandma-Style Orange Pound Cake* anytime you want. I always make extra, because, you know, sometimes you just need a slice (or two!) of cake. Enjoy!
Frequently Asked Questions about Grandma-Style Orange Pound Cake with Zest
Okay, so you’ve got questions? I’ve got answers! Baking can be a little tricky sometimes, and I’ve learned a thing or two over the years. So, here are a few questions I get asked all the time about this *Grandma-Style Orange Pound Cake*—hopefully, this helps you on your baking journey!
Can I use bottled orange juice instead of fresh?
You know, you *can* use bottled orange juice in a pinch. But, listen, if you really want that incredible orange flavor, fresh-squeezed is the way to go! It just adds so much more zing and brightness to the cake. It’s like the difference between listening to a song on a tinny speaker versus listening to it live. The bottled stuff will work, of course, but it might not have the same punch. You might also notice a slight difference in the texture of the cake. So, if you can, squeeze those oranges! Trust me, it’s worth it. But hey, if you’re short on time, bottled orange juice is better than no orange juice at all!
How can I tell if my cake is done?
Ah, the million-dollar question! Knowing when your cake is perfectly baked is a baking superpower. Luckily, there are a few easy ways to tell if your *Grandma-Style Orange Pound Cake* is done. First, look at the edges! The cake should be pulling away from the sides of the pan slightly. That’s usually a good sign! Next, the toothpick test: stick a toothpick into the center of the cake. If it comes out clean, or with a few moist crumbs, it’s done. If there’s wet batter on the toothpick, it needs a little more time. Just pop it back in the oven and check again in a few minutes. And, you know, every oven is different, so keep an eye on it—you’ll get the hang of it, I promise!
Can I freeze this Orange Pound Cake?
Absolutely! This *Orange Pound Cake* freezes beautifully, which is great if you want to make it ahead of time (or if you just want to have cake on hand for a special occasion!). Just let the cake cool completely. Then, wrap it tightly in plastic wrap, and then in a layer of aluminum foil (or put it in a freezer bag). It should freeze well for up to two or three months. When you’re ready to eat it, just let it thaw at room temperature. It might take a few hours for the whole cake to thaw, depending on how big it is. Or, if you’re in a hurry for a slice, you can thaw individual slices in the microwave. Freezing is a great way to have cake whenever you need it. So go ahead, bake a cake today and freeze some for later. I often do!
Nutritional Information for Grandma-Style Orange Pound Cake with Zest
Okay, so I’m not a nutritionist, and I don’t have a fancy lab to test every single cake I make. But, you know, it’s always good to have a rough idea of what you’re putting into your body, right? So, here’s an estimated nutritional breakdown for a single slice of my *Grandma-Style Orange Pound Cake with Zest*. Keep in mind, this is just an estimate, and it might vary depending on the exact ingredients you use and how you slice the cake (I always end up with bigger slices!).
I usually use a nutrition calculator online for this kind of thing, so I can give you a pretty good idea. Here’s what you can expect, per slice:
- Calories: Around 350 – Yep, it’s a treat! But totally worth it, in my opinion!
- Sugar: About 30g – Okay, so there’s sugar in the cake. That’s what makes it so darn delicious!
- Sodium: Approximately 150mg – This will depend on the salt you use.
- Fat: Around 18g – That butter makes it rich and tender.
- Saturated Fat: About 11g – Butter again!
- Unsaturated Fat: About 6g – Yay for the good fats!
- Trans Fat: 0g – Hooray!
- Carbohydrates: Around 45g – That’s where the energy comes from, right?
- Fiber: About 1g – Not a ton of fiber, but hey, it’s a cake!
- Protein: Around 4g – Every bit helps, right?
- Cholesterol: About 80mg – Eggs, baby!
So, there you have it! This is just a rough estimate, but it gives you a general idea. Enjoy your cake, and don’t worry too much about the numbers. It’s all about balance, and a little bit of *Grandma-Style Orange Pound Cake with Zest* is perfect for the soul!
Okay, so you’ve baked this *Grandma-Style Orange Pound Cake*, and it’s finally time to share the love! I’m so excited for you to try this recipe. I can almost smell it from here! I want to know all about your baking adventures. Did you add any fun twists? Did your family love it as much as mine does?
Seriously, I want to hear it all! Leave a comment below and tell me how it went. What did you think? Did you make any changes? Did you serve it with whipped cream or a dusting of powdered sugar? I want to see what you did! Also, if you loved this recipe, please give it a rating! It really helps other bakers find it. And, if you’re feeling extra generous, share this recipe with your friends and family! The more the merrier, right?
You can also share your *Grandma-Style Orange Pound Cake* creations on social media! Snap a pic of your beautiful cake and tag me! I’d love to see your baking masterpieces. You can find me on Pinterest. Use the hashtag #GrandmasOrangePoundCake so I can find your posts! Happy baking, everyone! Can’t wait to hear from you!
Print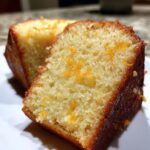
1 Secret to 1-Bowl Grandma-Style Orange Pound Cake with Zest
- Total Time: 1 hour 15 minutes
- Yield: 10-12 servings
- Diet: Vegetarian
Description
A classic Grandma-Style Orange Pound Cake, bursting with fresh citrus flavor and a tender crumb.
Ingredients
- 2 cups all-purpose flour
- 1 teaspoon baking powder
- 1/2 teaspoon salt
- 1 cup (2 sticks) unsalted butter, softened
- 2 cups granulated sugar
- 4 large eggs
- 1 teaspoon vanilla extract
- 1/2 cup milk
- Zest of 2 oranges
- 1/2 cup orange juice
- Powdered sugar (for dusting, optional)
Instructions
- Preheat your oven to 350°F (175°C). Grease and flour a loaf pan.
- In a bowl, whisk together flour, baking powder, and salt.
- In a separate bowl, cream together butter and sugar until light and fluffy.
- Beat in eggs one at a time, then stir in vanilla extract.
- Gradually add the dry ingredients to the wet ingredients, alternating with the milk, beginning and ending with the dry ingredients.
- Stir in orange zest and orange juice.
- Pour batter into the prepared loaf pan.
- Bake for 50-60 minutes, or until a toothpick inserted into the center comes out clean.
- Let the cake cool in the pan for 10 minutes before transferring it to a wire rack to cool completely.
- Dust with powdered sugar, if desired.
Notes
- For a richer cake, use full-fat milk.
- Make sure your butter is softened but not melted.
- Don’t overmix the batter.
- Cake can be stored at room temperature for up to 3 days.
- Prep Time: 20 minutes
- Cook Time: 55 minutes
- Category: Dessert
- Method: Baking
- Cuisine: American
Nutrition
- Serving Size: 1 slice
- Calories: 350
- Sugar: 30g
- Sodium: 150mg
- Fat: 18g
- Saturated Fat: 11g
- Unsaturated Fat: 6g
- Trans Fat: 0g
- Carbohydrates: 45g
- Fiber: 1g
- Protein: 4g
- Cholesterol: 80mg


