
Oh, the classic cheese ball! Seriously, if there’s one appetizer that just screams “party” and “comfort” all at once, it’s this one. I’ve been making this Classic Cheese Ball for what feels like forever, and trust me, it never, ever gets old. It’s the kind of recipe that just makes people happy, you know? You whip it up, maybe add a little extra something special that only you know about (we’ll get to that!), and then watch it disappear in minutes. It’s truly a staple, and I’m so excited to share my go-to version with you!
Why This Classic Cheese Ball is a Must-Have Appetizer
Honestly, what’s not to love about this cheese ball? It’s one of those truly simple cheese ball recipes that just works every single time. You can whip it up in no time, and it always looks so impressive on a platter. Plus, the flavor? Oh my goodness, it’s just perfectly balanced – creamy, savory, with that delightful crunch from the pecans. It’s the kind of thing that makes people ask, “Who made this?!” and you can proudly say, “Me!” It’s honestly one of my favorite easy cheese ball recipes because it delivers big on taste without any fuss.
Quick Preparation for Any Occasion
Seriously, this is the ultimate last-minute appetizer hero. You can literally mix it up and shape it in about 15 minutes, then just let it chill while you get ready for guests. Since it’s a no-bake wonder, there’s no oven involved, which is a lifesaver when you’re already juggling a million things. It’s perfect for those spontaneous get-togethers or when you just need a guaranteed crowd-pleaser.
Flavorful Ingredients, Unforgettable Taste
The magic really is in the simplicity here. We’ve got that super creamy base from the cream cheese and sharp cheddar, which just melts in your mouth. Then, the herbs and seasonings add this wonderful savory depth, and those pecans? They give it the perfect nutty crunch that makes every bite so satisfying. It’s the kind of flavor that keeps people coming back for more!
Gather Your Ingredients for a Classic Cheese Ball
Alright, let’s get down to business! To make this amazing Classic Cheese Ball, you’ll need just a few simple things. Don’t worry, nothing fancy here, just good old reliable ingredients that come together like magic. I always make sure I have everything ready before I start mixing, it just makes the whole process so much smoother!
Creamy Base Ingredients
First up, the heart of our cheese ball: 8 ounces of cream cheese. Make SURE it’s softened! I usually leave mine on the counter for about an hour before I plan to mix. This makes it super easy to blend. Then, we need 1 cup of shredded cheddar cheese. I like a sharp cheddar for a nice punch, but use whatever you love!
Flavor and Texture Enhancers
Now for the good stuff that makes it sing! You’ll need 1/2 cup of finely chopped pecans. We’ll actually split these – half go IN the mix, and half get rolled on the outside for that gorgeous coating and extra crunch. Grab 1/4 cup of fresh parsley, also finely chopped, for a bit of color and freshness. And for that savory kick, we’re adding 1/4 teaspoon each of garlic powder and onion powder, plus a tiny pinch of salt and black pepper. Don’t skip the salt, it really wakes everything up!
Serving Accompaniments
This is super simple: just have your favorite assorted crackers and some bread slices ready to go. They’re the perfect vehicle for scooping up all that cheesy goodness. Think of them as the supporting cast for our star!
Step-by-Step Guide to Making Your Classic Cheese Ball
Alright, ready to make the magic happen? This part is so easy, you’ll be amazed at how quickly you end up with a show-stopping appetizer. Let’s get this Classic Cheese Ball assembled!
Combining the Cheese Ball Mixture
First things first, grab a medium-sized bowl. Toss in your softened cream cheese, that lovely shredded cheddar, half of your finely chopped pecans (save the rest for later!), your fresh parsley, and those seasonings – garlic powder, onion powder, salt, and pepper. Now, get in there and mix it all up! You can use a sturdy spoon or even your hands for this part. Just keep mixing and mashing until everything is super smooth and well combined. Honestly, if you have a food processor, you can totally cheat and pulse it all together in there for an extra smooth texture. It’s my secret weapon sometimes!
Shaping the Classic Cheese Ball
Once it’s all blended beautifully, it’s time to shape it! You can totally use your hands for this – just make sure they’re clean! Scoop out the mixture and gently roll it between your palms, working it into a nice, round ball. If you’re not a fan of getting your hands messy, no worries! You can use two spoons to kind of pat and shape the mixture into a ball on the side of the bowl. Aim for a nice, even shape – it makes the next step so much prettier.
Coating and Chilling for Perfect Texture
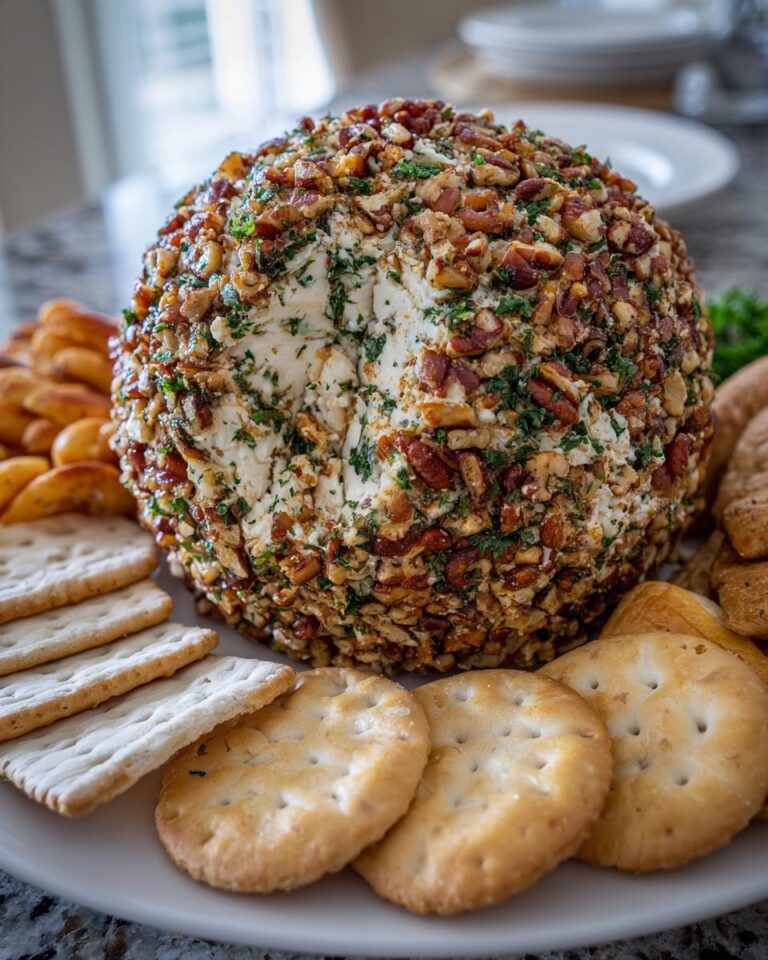
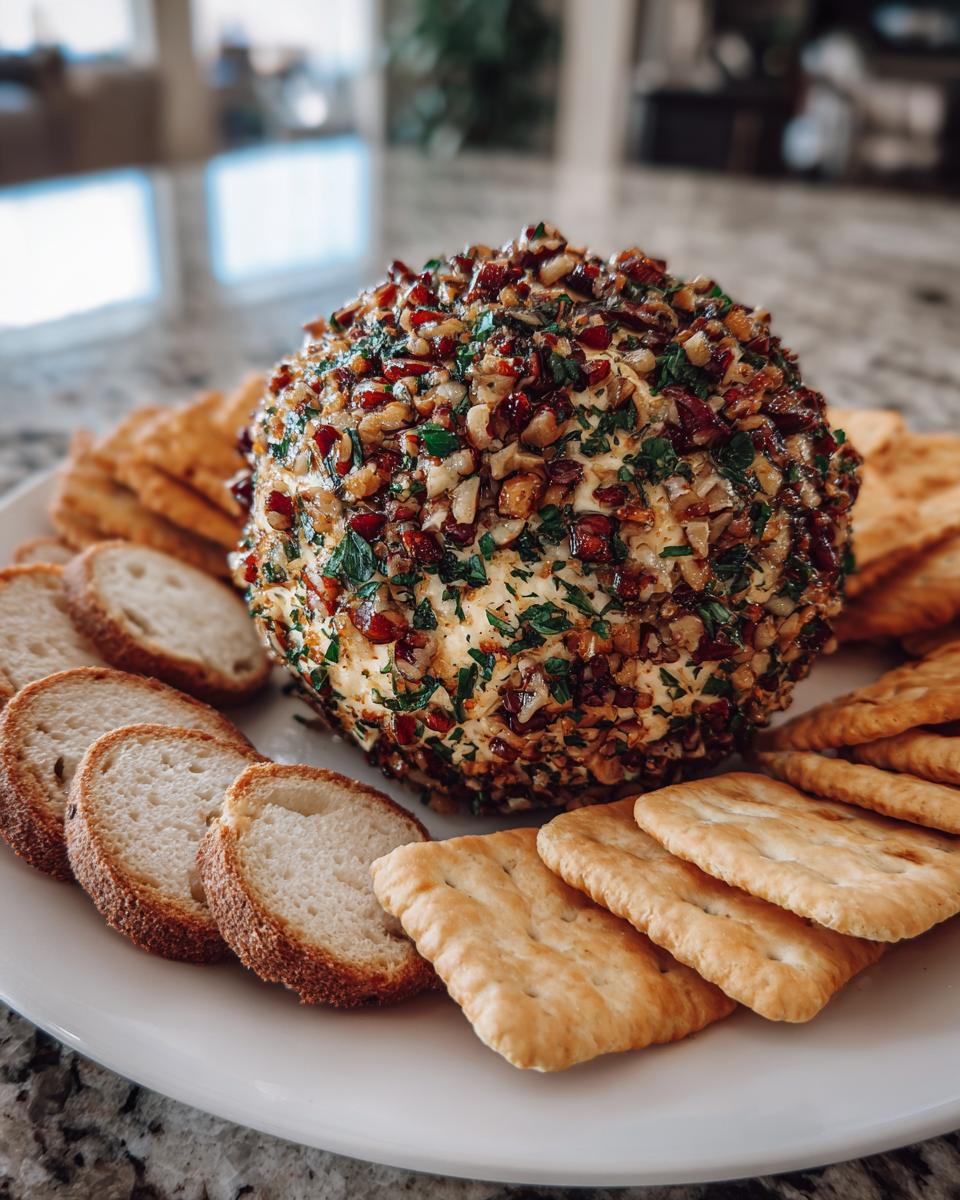
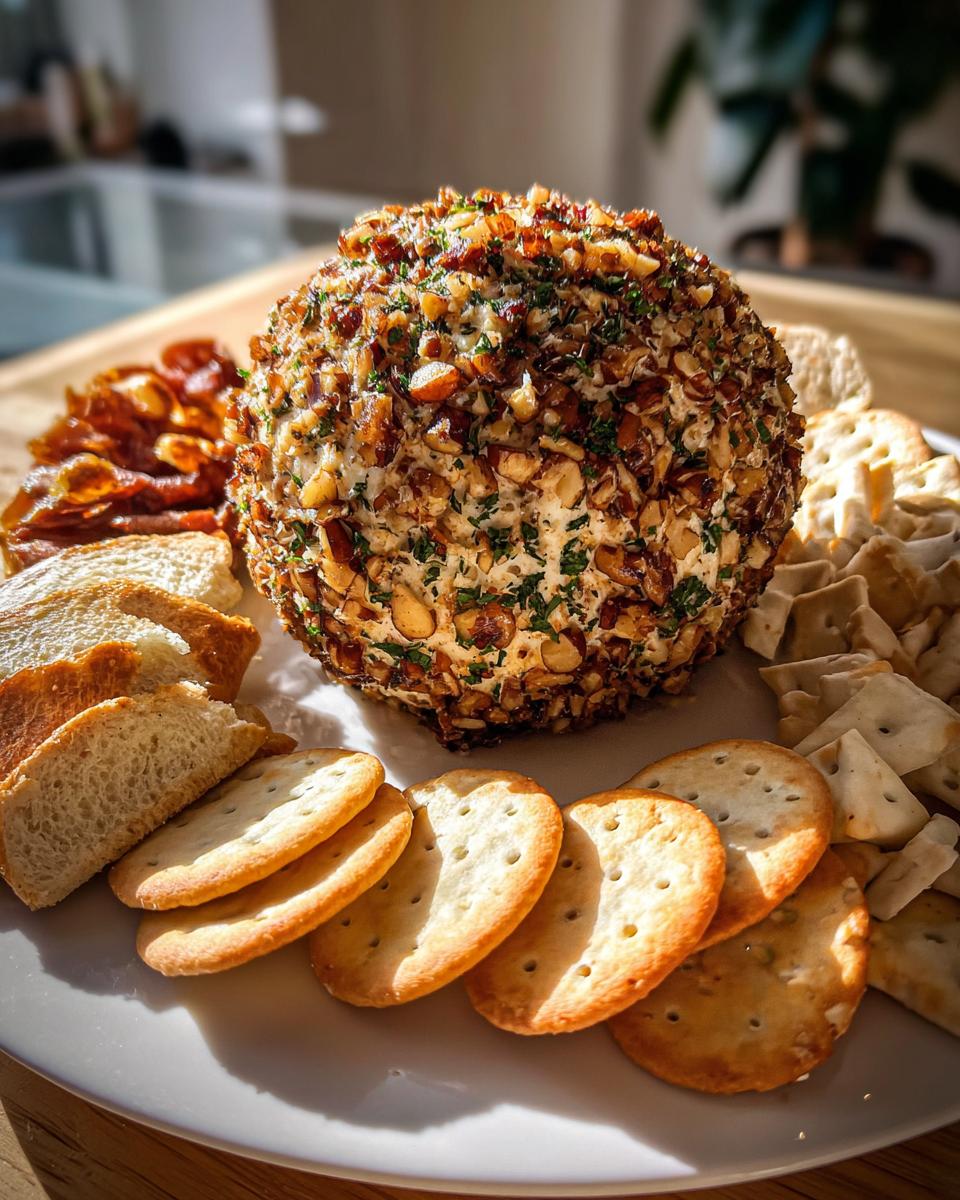
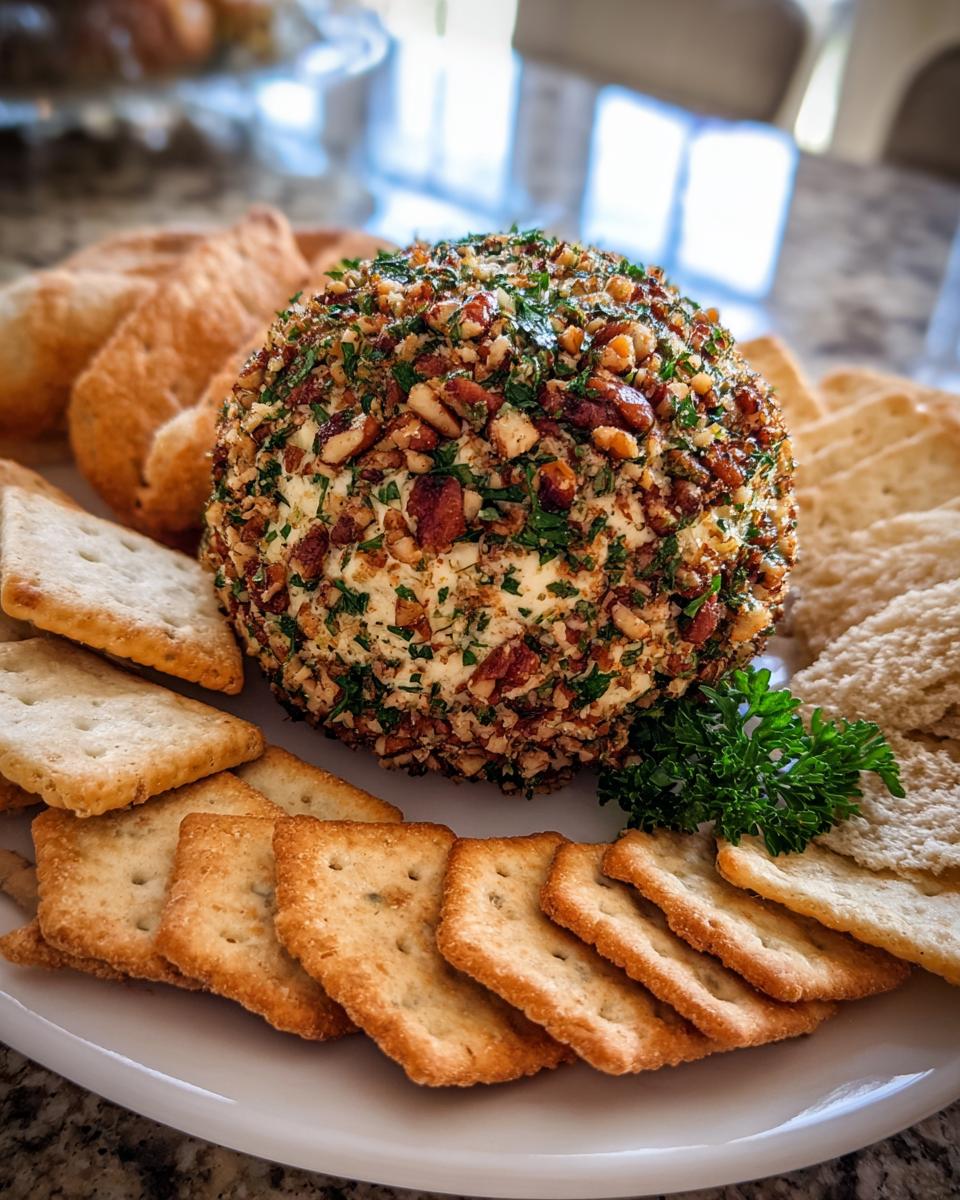
Now for that gorgeous outer layer! Spread those remaining chopped pecans out onto a plate or a piece of parchment paper. Gently roll your shaped cheese ball in the pecans, pressing lightly so they stick all over. Make sure you get a nice, even coating. This is what gives it that amazing crunch and look! Once it’s all coated, carefully wrap the whole thing up tightly in plastic wrap. Pop it into the fridge for at least 30 minutes. This chilling step is super important because it firms everything up, making it easy to handle and serve without it falling apart.
Presentation for Serving
The grand finale! Once your cheese ball has chilled and is nice and firm, unwrap it and place it on your favorite serving platter. Now, arrange all those assorted crackers and bread slices all around it. You want to make it look abundant and inviting! Think about adding some little serving spreaders or cheese knives nearby. It’s seriously that easy, and it looks so spectacular!
Tips for the Best Classic Cheese Ball
Okay, so you’ve made the cheese ball, but let’s talk about how to make it *absolutely perfect* every single time. These are the little tricks I’ve picked up that really take this from good to unforgettable. It’s all about those small details that make these best cheese ball recipes truly shine, and thankfully, they’re all part of these cheeseballs recipes easy enough for anyone.
Achieving the Right Consistency
Seriously, the most crucial step for a smooth, easy-to-work-with cheese ball is making sure your cream cheese is *really* softened. I usually pull it out at least an hour before, sometimes two if my kitchen is cool. You want it soft enough that you can easily indent it with your finger, but not so warm that it’s melty or greasy. This makes mixing a breeze and ensures you don’t end up with little lumps of cold cream cheese in your otherwise perfect ball.
Creative Coating Ideas
Pecans are classic for a reason, but don’t be afraid to get creative! I’ve rolled these beauties in finely chopped walnuts, almonds, or even a mix. For something a little different, try rolling it in some fresh, finely chopped chives or parsley for a vibrant green look, or even some crushed, crispy bacon bits for a savory kick. Sometimes, I’ll even do a mix of nuts and herbs – it’s totally up to you!
Flavor Boosters
While this recipe is fantastic as is, sometimes I like to add a little something extra. A dash of Worcestershire sauce mixed into the cheese blend adds this amazing umami depth that’s just incredible. If you like a little heat, a tiny pinch of cayenne pepper is your best friend – it gives it a subtle warmth without being overpowering. Trust me, these little tweaks can make your cheese ball stand out even more!
Frequently Asked Questions About This Classic Cheese Ball Recipe
Got questions about my favorite appetizer? I’ve got answers! This easy cheese ball recipe is pretty foolproof, but I know sometimes you just want to double-check. Let’s dive into some of the most common things people ask me about these delightful cream cheese balls.
Can I make this Classic Cheese Ball ahead of time?
Absolutely! This is one of the best things about it. You can totally make the cheese ball up to a day in advance. Just follow all the steps, shape it, roll it in the pecans, and then wrap it up tightly in plastic wrap. Keep it in the fridge until you’re ready to serve. It actually benefits from the chilling time, letting those flavors meld together even more.
What are good serving suggestions for a Classic Cheese Ball?
Oh, the possibilities are endless! Beyond the classic assorted crackers and baguette slices, I love serving it with sturdy tortilla chips, pretzel crisps, or even some hearty whole-wheat bread. For something a little extra, try adding some colorful fruit like grapes or apple slices on the platter. Some people even like to pair it with a little fig jam or a spicy pepper jelly on the side!
How long does a Classic Cheese Ball last in the refrigerator?
Once it’s made, it should stay good in the fridge for about 3 to 4 days. Just make sure it’s wrapped up really well in plastic wrap or in an airtight container. If you have leftovers (which is rare in my house!), just pop them back in the fridge. It might lose a tiny bit of its coating’s crispness, but it’ll still be delicious!
Nutritional Estimate for Your Classic Cheese Ball
Just a heads-up, this is an estimate, but it gives you a good idea of what you’re working with! This Classic Cheese Ball, when served in about a 2-tablespoon portion, typically comes in around 120 calories. You’ll find about 11g of fat (with 6g being saturated), 4g of protein, and only 2g of carbohydrates. It’s got a little bit of sodium in there too, around 150mg. Pretty manageable for such a delicious appetizer, right?
So, what did you think? Did you make this amazing Classic Cheese Ball? I absolutely LOVE hearing your feedback! Drop a comment below, tell me how it turned out, if you tried any fun variations, or if you just want to share how quickly it disappeared! Don’t forget to give it a star rating if you enjoyed it – it really helps other cooks find this recipe too!
For more delicious appetizer ideas, check out my Pinterest!
Print
Perfect Classic Cheese Ball Delight
- Total Time: 45 minutes
- Yield: 1 cheese ball
- Diet: Vegetarian
Description
A timeless and crowd-pleasing appetizer, this classic cheese ball is rich, creamy, and perfect for any gathering. It’s simple to make and always a hit.
Ingredients
- 8 ounces cream cheese, softened
- 1 cup shredded cheddar cheese
- 1/2 cup finely chopped pecans, divided
- 1/4 cup finely chopped fresh parsley
- 1/4 teaspoon garlic powder
- 1/4 teaspoon onion powder
- Pinch of salt
- Pinch of black pepper
- Assorted crackers and bread for serving
Instructions
- In a medium bowl, combine the softened cream cheese, shredded cheddar cheese, half of the chopped pecans, parsley, garlic powder, onion powder, salt, and pepper.
- Mix until well combined and smooth.
- Shape the cheese mixture into a ball using your hands or two spoons.
- Roll the cheese ball in the remaining chopped pecans to coat evenly.
- Wrap the cheese ball tightly in plastic wrap and refrigerate for at least 30 minutes to allow it to firm up.
- Before serving, place the cheese ball on a serving platter and surround it with crackers and bread.
Notes
- For a smoother texture, you can use a food processor to combine the ingredients.
- Experiment with different nut coatings like walnuts or almonds.
- Add a dash of Worcestershire sauce for an extra layer of flavor.
- You can add a pinch of cayenne pepper for a little heat.
- Prep Time: 15 minutes
- Cook Time: 0 minutes
- Category: Appetizer
- Method: No-bake
- Cuisine: American
Nutrition
- Serving Size: 2 tablespoons
- Calories: 120
- Sugar: 1g
- Sodium: 150mg
- Fat: 11g
- Saturated Fat: 6g
- Unsaturated Fat: 5g
- Trans Fat: 0g
- Carbohydrates: 2g
- Fiber: 0g
- Protein: 4g
- Cholesterol: 30mg


