

There’s just something magical about holiday baking, isn’t there? The smells, the cozy feelings, the sheer joy of creating something delicious for everyone to enjoy. And when it comes to Christmas, my absolute favorite way to get into the spirit is by whipping up a batch of these incredible Christmas Kitchen Sink Cookies. Seriously, these aren’t just cookies; they’re a celebration in every bite! They’re like a party that got accidentally dropped into a cookie dough bowl, and trust me, it’s the best kind of accident. Every year, seeing the smiles they bring makes all the effort totally worth it.
Why You’ll Love These Christmas Kitchen Sink Cookies
Seriously, these cookies are a holiday game-changer! They’re so easy to whip up, which is a lifesaver when you’re busy with all the Christmas chaos. Plus, they taste like a dream and look like a million bucks, making them perfect for pretty much everything holiday-related.
Quick and Easy Holiday Baking
Got a busy schedule but still want to bake something amazing? These cookies are your answer! They come together in a flash, so you can get them in the oven and back to your holiday to-do list in no time.
Packed with Festive Flavors
Imagine the best parts of Christmas snacks all rolled into one chewy, delicious cookie. That’s what you get here – a fantastic mix of sweet chocolate, salty pretzels, and fun candies that just screams holiday cheer.
Perfect for Sharing
Whether it’s for a cookie exchange, a holiday party, or just a sweet surprise for your neighbors, these cookies are always a hit. They look so festive and taste even better, making them the perfect homemade gift from the heart.
Gathering Your Christmas Kitchen Sink Cookies Ingredients
Alright, let’s get down to business and gather everything we need for these amazing Christmas Kitchen Sink Cookies. It’s like a treasure hunt for the best holiday flavors! Don’t worry if you don’t have *exactly* what’s listed; the beauty of these is their flexibility, but here’s what I swear by for the perfect batch.
The Foundation: Butter and Sugars
We start with 1 cup (that’s two sticks, folks!) of unsalted butter that’s been softened. You want it nice and pliable, not melted, so it creams up beautifully. Then comes the sweetness: 1 cup of regular granulated sugar and 1 cup of packed light brown sugar. That brown sugar is key for that chewy texture and lovely caramel undertones that just scream holiday cookie.
Binding and Flavor Agents
To make sure everything holds together and tastes amazing, we’ll add 2 large eggs. Just crack ’em in one at a time, giving them a good mix. And of course, no cookie is complete without a splash of 1 teaspoon of vanilla extract. It just rounds out all those flavors so perfectly.
Dry Ingredients for Structure
For the backbone of these cookies, we’ve got 3 cups of all-purpose flour. No need to sift it unless you’re feeling fancy; just whisking it with 1 teaspoon of baking soda (for that little lift!) and 1/2 teaspoon of salt (to balance the sweetness) is totally fine. This is what gives our cookies their structure without making them tough.
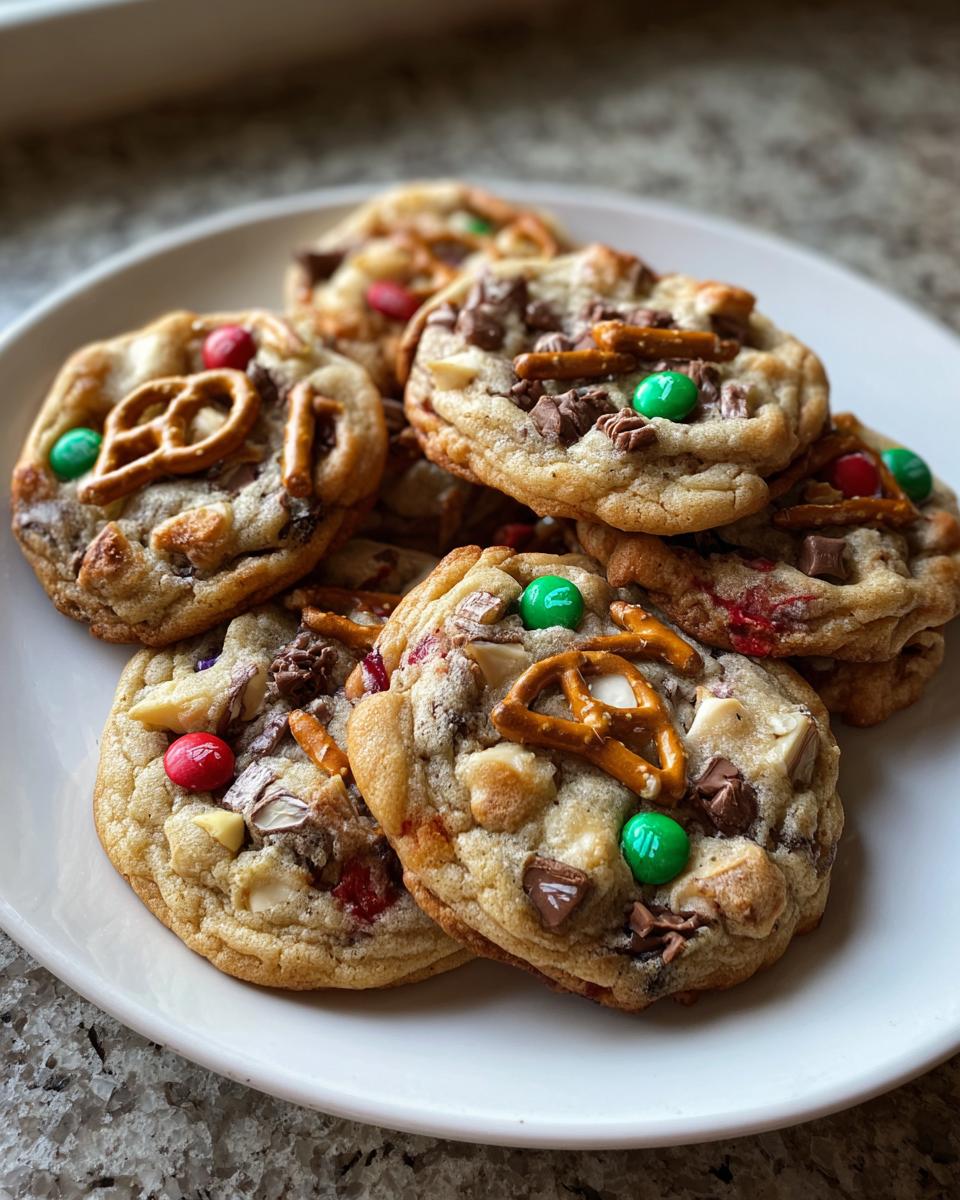
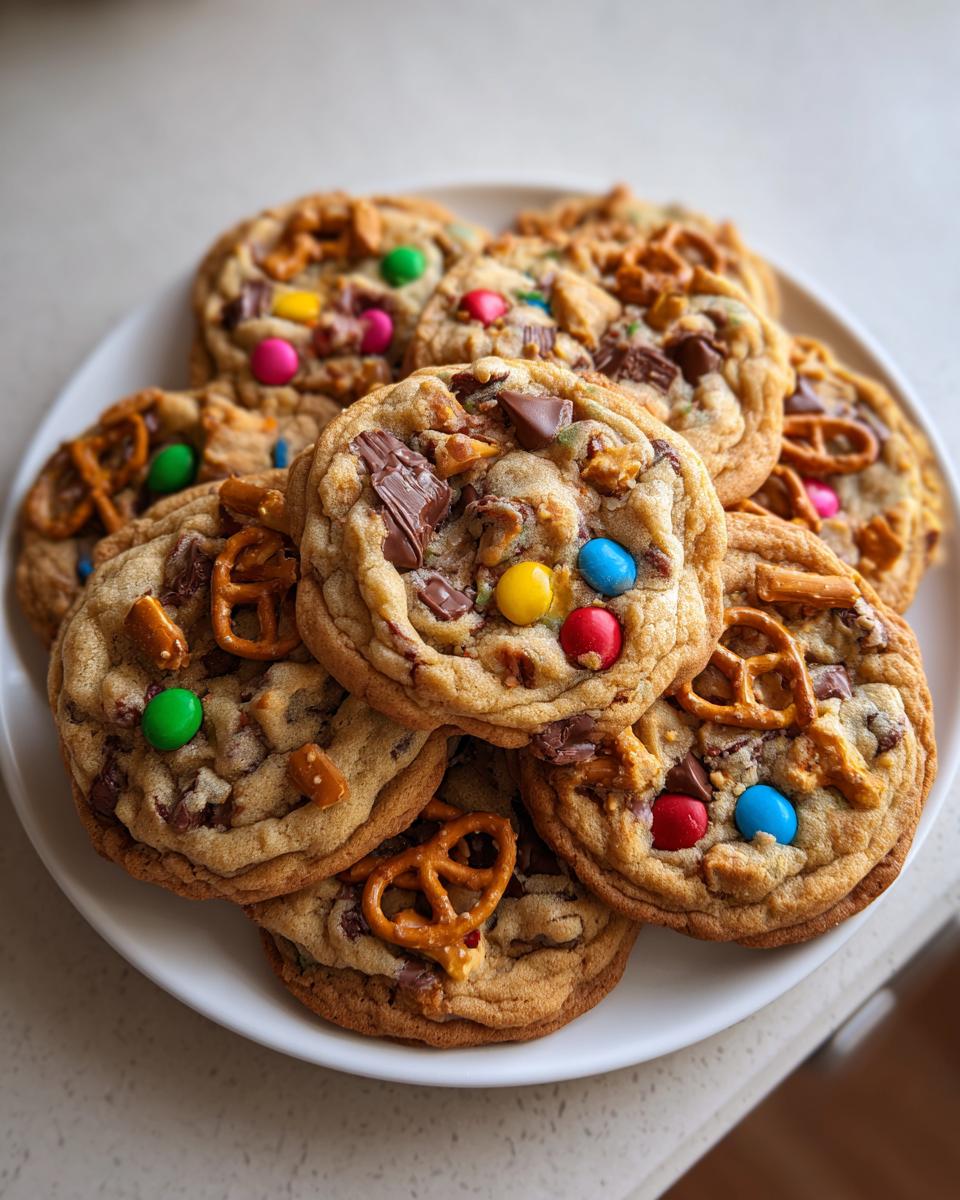
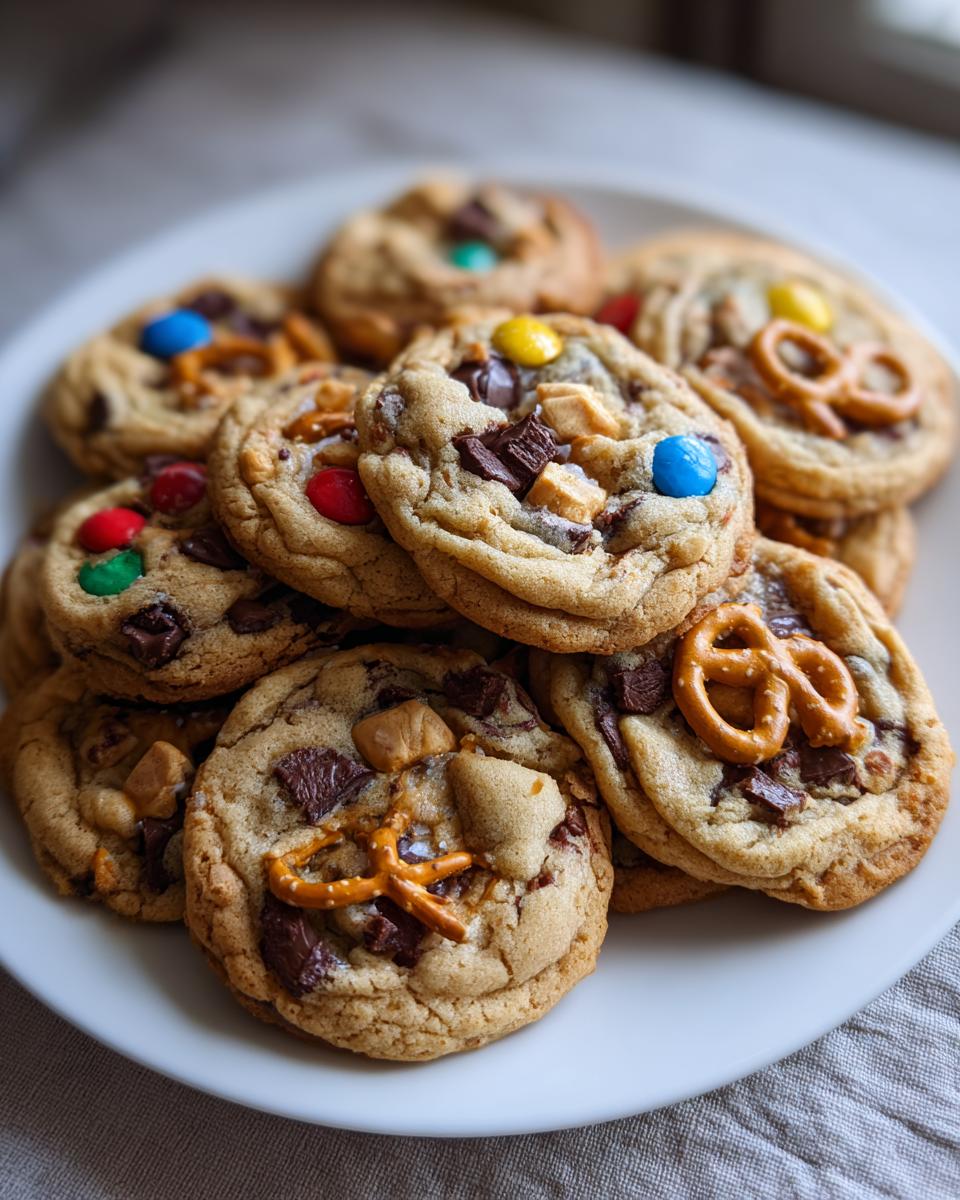
The “Sink” Mix-Ins
Now for the fun part – the “sink”! We’re talking 2 cups of yummy chocolate chips (milk, semi-sweet, whatever makes your heart sing!). Then, for that irresistible salty crunch, we’ve got 1 cup of chopped pretzels. And to really amp up the holiday spirit, toss in 1 cup of chopped festive candies, like red and green M&Ms or crushed peppermint candies. If you love a little extra crunch, feel free to add 1/2 cup of chopped nuts too – walnuts or pecans are fantastic here, but totally optional!
Crafting Your Christmas Sink Cookies: Step-by-Step Instructions
Alright, let’s get these amazing Christmas Sink Cookies into the oven! Making them is really straightforward, and honestly, just as fun as eating them. Follow these steps, and you’ll have a batch of holiday perfection in no time.
Preparing the Dough Base
First things first, let’s get that oven preheated to 350°F (175°C) and line a couple of baking sheets with parchment paper. This makes cleanup a breeze and stops any sticking disasters. Now, grab your largest mixing bowl. We’re going to cream together that softened butter with both the granulated and brown sugars. Beat them with an electric mixer (or a sturdy wooden spoon and some serious elbow grease!) until the mixture is nice and light, almost fluffy. Then, add in your eggs, one at a time, making sure each one is mixed in before adding the next. Finally, stir in that teaspoon of vanilla extract. Easy peasy!
Combining Wet and Dry Ingredients
In a separate bowl, just give your flour, baking soda, and salt a quick whisk together. This just makes sure everything is evenly distributed. Now, here’s the important part: gradually add this dry mixture to your wet ingredients. Mix on a low speed, or stir gently, until *just* combined. Seriously, don’t overmix! Overmixing is the enemy of tender cookies. You want to see just a few streaks of flour left – we’ll get those incorporated with the mix-ins.
Adding the Festive Mix-Ins
This is where the magic happens! Gently fold in your chocolate chips, chopped pretzels, festive candies, and those optional nuts. Use a spatula or your hands to carefully incorporate everything into the dough. You want to distribute all those yummy bits evenly without squishing the dough too much. Make sure you get a little bit of everything in almost every cookie!
Shaping and Baking Your Christmas Kitchen Sink Cookies
Now we shape! Drop rounded tablespoons of dough onto your prepared baking sheets. Give them a good 2 inches of space between each one because they will spread out a bit. Pop them into your preheated oven and bake for about 10 to 12 minutes. You’re looking for the edges to be a lovely light golden brown, but the centers should still look a little soft and not completely set. They’ll continue to cook a bit on the hot baking sheet. Let them hang out on the baking sheet for about 5 minutes to firm up slightly before carefully transferring them to a wire rack to cool completely. Patience here means perfectly chewy cookies!
Tips for Perfect Christmas Kitchen Sink Cookies Every Time
Okay, so you’ve made the dough and they’re baking, but let’s talk about making sure these Christmas Kitchen Sink Cookies are absolute perfection. A few little tricks can make all the difference between a good cookie and a truly unforgettable one. Don’t worry, these are super simple!
Achieving Thicker Christmas Cookies
If you love a really thick, chewy cookie that doesn’t spread out too much, here’s my secret: chill the dough! Before you even scoop them onto the baking sheet, pop that bowl of dough into the fridge for at least 30 minutes, or even an hour. This makes the butter firm up, and the cookies will hold their shape much better while baking, giving you that perfect thick texture we all love.
Ensuring Proper Cooling and Storage
This is SO important for chewy cookies! Let them cool on the baking sheet for a good 5-10 minutes after they come out of the oven. They finish cooking and firm up during this time. Then, transfer them to a wire rack to cool completely. If you try to move them too soon, they can fall apart! Once they’re totally cool, store them in an airtight container. If you’re freezing them for later, make sure they’re completely cooled first, then pop them in a freezer bag or container for up to 3 months. They’re practically freezer Christmas cookies!
Customizing Your Christmas Kitchen Sink Cookies
The best part about these “everything but the kitchen sink” cookies is how you can totally make them your own! Don’t have festive candies? No problem! Use extra chocolate chips, or try some chopped caramels or even some dried cranberries. If you’re not a fan of nuts, just leave them out. You can also play with the chocolate chips – white chocolate, dark chocolate, mini chips – whatever you fancy! It’s all about making these your own special holiday treat.
Frequently Asked Questions about Christmas Kitchen Sink Cookies
Got questions? I’ve got answers! These cookies are pretty forgiving, but a few little tips can make them even better. Let’s dive into some common things people ask about these delightful holiday treats.
Can I make these Christmas Kitchen Sink Cookies ahead of time?
Absolutely! You can totally make the dough a day or two in advance and keep it chilled in the fridge. Or, bake them completely, let them cool, and then freeze them for up to 3 months. They’re fantastic freezer Christmas cookies!
What if I don’t have festive candies?
No worries at all! These are the ultimate “Everything Christmas Cookies,” so get creative! You can just add more chocolate chips, or try some chopped caramels, dried cranberries, or even some chopped peanut butter cups if you like. The possibilities are endless!
How do I store these Christmas Cookies Pretzel for freshness?
Once your cookies are completely cool, store them in an airtight container at room temperature. They’ll stay nice and chewy for a good 4-5 days. Just make sure they’re not still warm when you put the lid on, or you’ll get some unwanted condensation!
Can these be made into Freezer Christmas Cookies?
Yes, yes, and YES! These freeze like a dream. Bake them completely, let them cool *all* the way down, and then pack them into freezer-safe bags or containers. They’ll keep beautifully for up to 3 months. Just thaw them at room temperature when you’re ready to enjoy a little bit of Christmas magic!
Estimated Nutritional Information for Christmas Kitchen Sink Cookies
Just a heads-up, these numbers are estimates, okay? Because we’re all about creativity with our “everything but the kitchen sink” approach, the exact nutritional values for your Christmas Kitchen Sink Cookies might change a bit depending on the brands you use and what mix-ins you toss in. But this gives you a pretty good idea!
Typical Nutritional Values
Per cookie (this is an estimate!):
- Calories: Around 200 kcal
- Fat: About 12g (with 7g saturated)
- Protein: Roughly 2g
- Carbohydrates: Around 25g (with 15g sugar)
- Sodium: Approximately 75mg
Sharing Your Christmas Kitchen Sink Cookies
Alright, you’ve baked up a storm and have these amazing cookies! Now what? I’d absolutely LOVE to hear all about how yours turned out. Did you try any fun new mix-ins? Did the kids help out? Let me know in the comments below!
Leave a Comment and Rate the Recipe
Seriously, tell me everything! Drop a comment below with your thoughts, any tweaks you made, or just to say hello. And if you loved these cookies as much as I do, please give them a star rating – it really helps other bakers find their new favorite recipe!
Spread the Holiday Cheer
Got a friend who needs a little extra Christmas magic in their life? Share this recipe with them! A quick share on social media is a fantastic way to spread the holiday baking joy and maybe even inspire a cookie-baking party.
Print
Amazing Christmas Kitchen Sink Cookies Magic
- Total Time: 32 minutes
- Yield: Approximately 3 dozen cookies
- Diet: Vegetarian
Description
These Christmas Kitchen Sink Cookies are packed with all your favorite holiday treats. They are easy to make and perfect for sharing.
Ingredients
- 1 cup (2 sticks) unsalted butter, softened
- 1 cup granulated sugar
- 1 cup packed light brown sugar
- 2 large eggs
- 1 teaspoon vanilla extract
- 3 cups all-purpose flour
- 1 teaspoon baking soda
- 1/2 teaspoon salt
- 2 cups chocolate chips
- 1 cup chopped pretzels
- 1 cup chopped festive candies (like M&Ms or peppermint pieces)
- 1/2 cup chopped nuts (optional)
Instructions
- Preheat your oven to 350°F (175°C). Line baking sheets with parchment paper.
- In a large bowl, cream together the softened butter, granulated sugar, and brown sugar until light and fluffy.
- Beat in the eggs one at a time, then stir in the vanilla extract.
- In a separate bowl, whisk together the flour, baking soda, and salt.
- Gradually add the dry ingredients to the wet ingredients, mixing until just combined. Do not overmix.
- Stir in the chocolate chips, chopped pretzels, festive candies, and nuts (if using).
- Drop rounded tablespoons of dough onto the prepared baking sheets, spacing them about 2 inches apart.
- Bake for 10-12 minutes, or until the edges are lightly golden brown and the centers are still slightly soft.
- Let the cookies cool on the baking sheets for a few minutes before transferring them to a wire rack to cool completely.
Notes
- For thicker cookies, chill the dough for at least 30 minutes before baking.
- These cookies freeze well. Store cooled cookies in an airtight container in the freezer for up to 3 months.
- Feel free to customize the mix-ins with your favorite holiday flavors.
- Prep Time: 20 minutes
- Cook Time: 12 minutes
- Category: Dessert
- Method: Baking
- Cuisine: American
Nutrition
- Serving Size: 1 cookie
- Calories: Approximately 200 kcal
- Sugar: Approximately 15g
- Sodium: Approximately 75mg
- Fat: Approximately 12g
- Saturated Fat: Approximately 7g
- Unsaturated Fat: Approximately 5g
- Trans Fat: 0g
- Carbohydrates: Approximately 25g
- Fiber: Approximately 1g
- Protein: Approximately 2g
- Cholesterol: Approximately 35mg


