
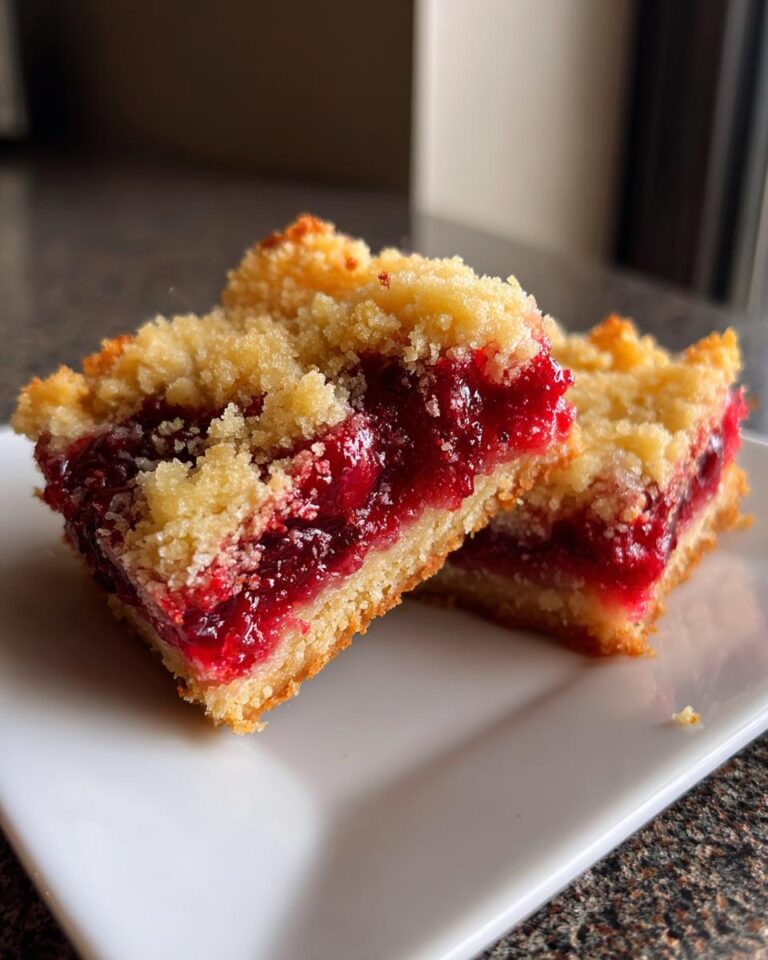
Hey there, fellow dessert lovers! As a lifelong baker, I’ve always been on the hunt for the perfect treat. And let me tell you, after years of experimenting in my kitchen, I’ve finally landed on a recipe that’s an absolute game-changer: the best ever Cherry Pie Bars! These aren’t just any bars; they’re a delightful symphony of buttery, crumbly goodness, paired with a sweet and tart cherry filling that’ll make your taste buds sing. I’ve been baking since I was a kid, watching my grandma whip up magic in the kitchen, and these bars are a direct result of all that love and experience.
I absolutely adore these Cherry Pie Bars because they’re so incredibly easy to make. No complicated steps, no fussy techniques—just pure, unadulterated deliciousness that comes together in a snap. Whether you’re a seasoned baker or just starting out, trust me, you can totally nail this recipe. Get ready to impress everyone with these beauties!
Ingredients for Perfect *Cherry Pie Bars*
Okay, so here’s what you’ll need to make these amazing Cherry Pie Bars. Don’t worry, it’s a pretty straightforward list, and I bet you already have most of this stuff in your pantry! Trust me, the quality of your ingredients makes a huge difference, so let’s get started.
Detailed Ingredient Breakdown
Flour and Sugar
First up, you’ll need 1 1/2 cups of all-purpose flour. Make sure it’s the regular stuff, not self-rising! Also, you’ll need 1/2 cup of granulated sugar for a touch of sweetness. And don’t forget a pinch of salt—about 1/4 teaspoon—to balance everything out. Trust me, it makes a difference!
Butter and Oats
Next comes the good stuff: 3/4 cup (that’s 1 1/2 sticks) of cold, unsalted butter, cut into cubes. Cold butter is key for that perfect crumbly crust! Also, you’ll need 1 cup of rolled oats. These add a fantastic texture, so don’t leave them out! Then, 1/2 cup of packed light brown sugar. And of course, 1/2 teaspoon of baking soda.
Cherry Pie Filling Selection
And finally, the star of the show: 1 (21 ounce) can of cherry pie filling. You can totally use your favorite brand here. I usually go for a classic cherry pie filling, but you can get creative later on!
Step-by-Step Instructions: Making Delicious *Cherry Pie Bars*
Alright, let’s get down to the fun part: actually making those irresistible Cherry Pie Bars! Don’t you worry, it’s way easier than it looks. Just follow these simple steps, and you’ll be enjoying a delicious treat in no time. I’ll walk you through it, so you won’t get lost!
Preparing the Crumb Crust
First things first, preheat your oven to 350°F (175°C). Then, in a big bowl, put in your flour, granulated sugar, and salt. Whisk ’em together to get things started! Next, add in your cold, cubed butter. Use a pastry blender (or your fingers, if you’re feeling old-school like me!) and cut that butter into the flour mixture until it looks all crumbly—like coarse sand. This is the secret to that amazing crust!
Now, toss in those rolled oats. Give it a good stir to make sure the oats are mixed in evenly. Take half of this crumbly mixture and press it firmly into the bottom of a 9×13 inch pan. Don’t be shy; make sure it’s nice and even! For the rest of the mixture, mix in the brown sugar and baking soda. Set it aside for now—we’ll get back to it soon!
Assembling the *Cherry Pie Bars*
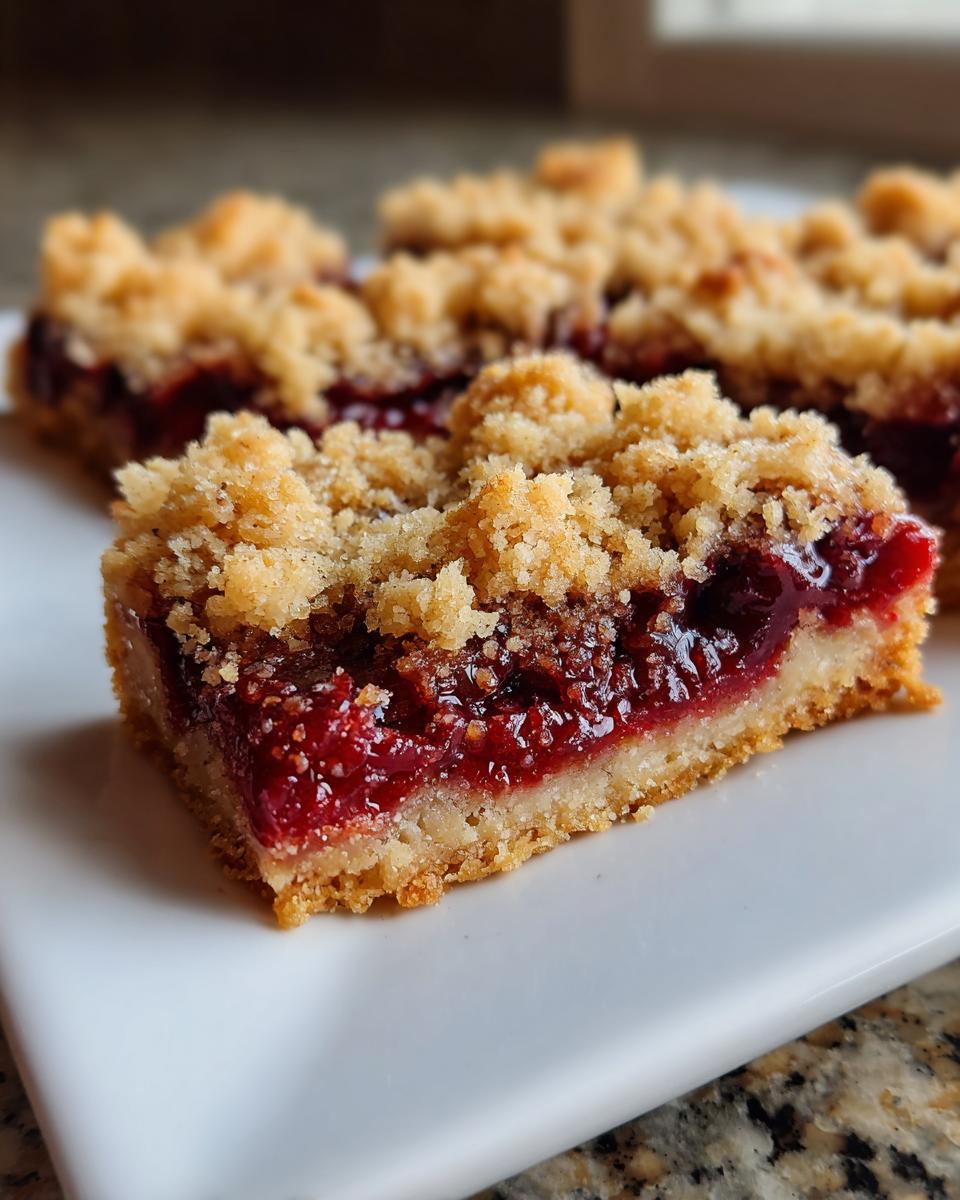
Next up, it’s time for the cherry filling! Spread that gorgeous cherry pie filling evenly over the crumb crust in the pan. Don’t be shy; make sure every inch is covered! I always love this part because it smells so amazing! Then, sprinkle the remaining oat crumb mixture evenly over the cherry filling. Make sure it’s all covered; you want that delicious crumble on top!
Baking and Cooling Instructions
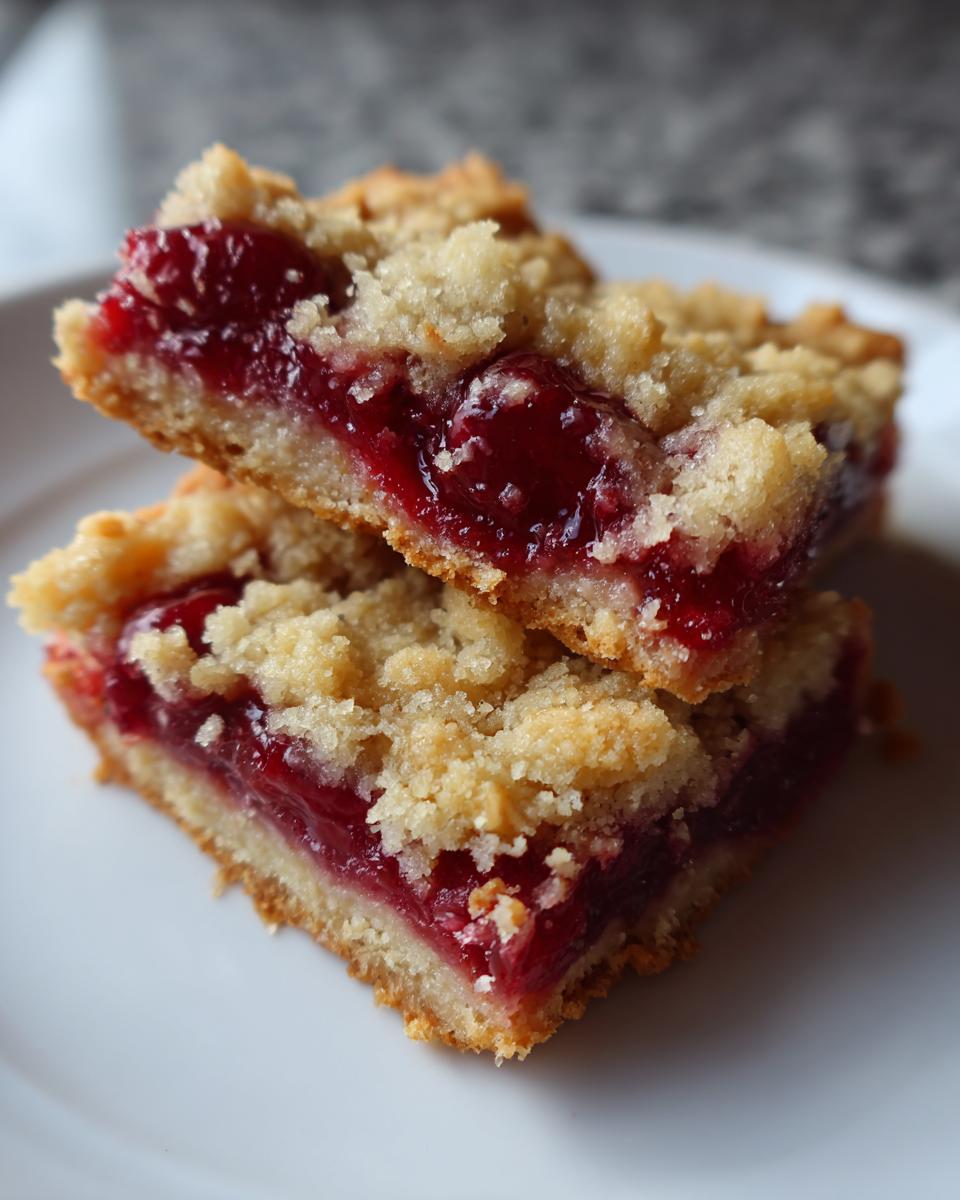
Now, for the magic! Pop your Cherry Pie Bars into the preheated oven and bake for 30-35 minutes. You’ll know they’re ready when the top is golden brown and the filling is bubbly. Careful, it splatters! Once it’s done, take it out and let it cool completely in the pan. This is super important; otherwise, your bars will fall apart! I know, it’s tough to wait, but trust me, it’s worth it. After cooling, cut them into bars, and enjoy! Yum!
Why You’ll Love These *Cherry Pie Bars*
- Easy Peasy: Seriously, these are a breeze to whip up!
- Flavor Explosion: That sweet and tart cherry filling with the buttery crust? Perfection!
- Crowd-Pleaser: Everyone always raves about these.
- Perfect Texture: That crumbly top and the soft filling make every bite amazing.
Tips for *Cherry Pie Bars* Success
Okay, so you’ve got your ingredients, and you’re ready to make some seriously amazing Cherry Pie Bars. Awesome! But before you dive in, let me share a few of my tried-and-true tips to make sure your bars are absolutely perfect every single time. Trust me, I’ve learned these lessons the hard way, so you don’t have to!
Ensuring the Perfect Crumb Texture
The key to that amazing crumbly top and bottom is cold butter! Make sure your butter is really cold, and don’t overwork the mixture. You want it to look like coarse crumbs, not a smooth dough. If your kitchen is warm, pop the bowl in the fridge for a few minutes before pressing the crust into the pan. It helps a ton!
Preventing a Soggy Bottom
Nobody wants a soggy bottom! To avoid this, make sure you press the crust firmly into the pan. This creates a solid base for the filling. Also, don’t skimp on the baking time. Letting the bars cool completely before cutting is super important, but I know it’s hard to wait!
Cooling and Cutting Tips
Letting your Cherry Pie Bars cool completely is the most important step. I usually let them cool in the pan for at least an hour, or even better, in the fridge for a couple of hours. This helps the filling set and makes them much easier to cut. Use a sharp knife and wipe it clean between cuts for the cleanest edges. You’ll be so glad you did!
*Cherry Pie Bar* Variations: Spice Things Up!
Okay, so you’ve made the classic Cherry Pie Bars, and they’re a total hit. Awesome! But what if you’re feeling a little adventurous? The beauty of this recipe is how easy it is to customize. Trust me, there are tons of ways to tweak it and create something totally new and exciting! Let’s get creative!
Different Pie Filling Flavors
First off, don’t feel like you have to stick with cherry pie filling! You can totally swap it out for other flavors. Try blueberry, apple, peach, or even a mix! It’s super fun to experiment with what you and your family like best. Any flavor will taste amazing in these Cherry Pie Bars!
Adding Nuts and Other Toppings
Want a little extra crunch? Add some chopped nuts to the crumb topping! Walnuts, pecans, or almonds would be amazing. You could also sprinkle some chocolate chips on top during the last few minutes of baking for a gooey, chocolatey twist. Or, get crazy and add both!
Vegan *Cherry Pie Bars*
For a vegan version, it’s super simple! Just swap the butter for a vegan butter alternative. Everything else in the recipe is already vegan-friendly. Easy peasy! You can enjoy these amazing Cherry Pie Bars no matter your diet!
Serving Suggestions for *Cherry Pie Bars*
Okay, so you’ve baked up a batch of these incredible Cherry Pie Bars. Now, how do you make them even more amazing? Well, a scoop of vanilla ice cream is always a winner! The cold, creamy ice cream with the warm, fruity bars is the perfect combo. Or, if you’re feeling fancy, a dollop of whipped cream is perfect, too! You can also serve them with a cup of coffee or tea for a cozy treat!
Storage and Reheating Instructions for *Cherry Pie Bars*
So, you’ve got leftovers? Awesome! To keep your Cherry Pie Bars fresh, store them in an airtight container at room temperature for up to 3 days. Or, you can pop them in the fridge for a bit longer! If you want to reheat them, a quick 10-15 seconds in the microwave is usually perfect. You can warm them in the oven, too, at a low temperature, but keep an eye on them! You don’t want them drying out!
Frequently Asked Questions About *Cherry Pie Bars*
Alright, so you’ve got questions? I’ve got answers! Over the years, I’ve had tons of folks ask me about these Cherry Pie Bars, so I figured I’d put together a little FAQ to help you out. Hopefully, this clears up any questions you might have. Let’s get to it!
Can I use homemade cherry pie filling?
Absolutely! If you’re feeling ambitious and want to make your own cherry pie filling, go for it! Just make sure it’s thick enough so it doesn’t make the bars soggy. You might need to adjust the amount of thickener, like cornstarch, to get the right consistency. Homemade Cherry Pie Bars are always a special treat!
How do I prevent the bars from sticking to the pan?
Ugh, nothing’s worse than your delicious Cherry Pie Bars sticking to the pan! To prevent this, I always recommend greasing your pan really well with cooking spray or butter. You can also line the pan with parchment paper, leaving some overhang on the sides so you can easily lift the bars out after they cool. Makes clean-up a breeze!
How long will these *Cherry Pie Bars* last?
If you have any left, that is! But seriously, if stored properly in an airtight container, these Cherry Pie Bars will stay good for about 3 days at room temperature. You can extend their life by popping them in the fridge for up to a week. Just make sure they’re sealed up tight so they don’t dry out. Trust me, they taste even better the next day!
Can I make these *Cherry Pie Bars* ahead of time?
Yes, absolutely! These Cherry Pie Bars are perfect for making ahead. You can bake them a day or two in advance and store them at room temperature. Just let them cool completely before cutting and storing them. They’re also great for taking to potlucks or parties, so you can prep them whenever you have time!
Estimated Nutritional Information for *Cherry Pie Bars*
Alright, so here’s a rough estimate of the nutrition info per bar, but remember, this can vary! Calories, fat, carbs, and all that jazz are included. It’s just a guide!
For more delicious dessert ideas, check out my Pinterest page!
Print
Best Cherry Pie Bars: 1 Simple Recipe for Success!
- Total Time: 55 minutes
- Yield: 24 bars
- Diet: Vegan
Description
Delicious and easy cherry pie bars.
Ingredients
- 1 1/2 cups all-purpose flour
- 1/2 cup granulated sugar
- 1/4 teaspoon salt
- 3/4 cup (1 1/2 sticks) cold unsalted butter, cut into cubes
- 1 cup rolled oats
- 1/2 cup packed light brown sugar
- 1/2 teaspoon baking soda
- 1 (21 ounce) can cherry pie filling
Instructions
- Preheat oven to 350°F (175°C).
- In a bowl, mix flour, granulated sugar, and salt.
- Cut in cold butter until crumbly.
- Stir in oats.
- Press half of mixture into a 9×13 inch pan.
- Mix brown sugar and baking soda into remaining crumb mixture.
- Spread cherry pie filling over crust.
- Sprinkle remaining crumb mixture over filling.
- Bake for 30-35 minutes.
- Let cool completely.
- Cut into bars.
Notes
- You can use different pie fillings.
- For a vegan version, use vegan butter.
- Store in an airtight container.
- Prep Time: 20 minutes
- Cook Time: 35 minutes
- Category: Dessert
- Method: Baking
- Cuisine: American
Nutrition
- Serving Size: 1 bar
- Calories: 250
- Sugar: 20g
- Sodium: 100mg
- Fat: 12g
- Saturated Fat: 7g
- Unsaturated Fat: 4g
- Trans Fat: 0g
- Carbohydrates: 35g
- Fiber: 2g
- Protein: 3g
- Cholesterol: 25mg


